
|
Caught in the Flank Black SS #22 |
||
|---|---|---|
| (Attacker) Germany | vs | United States (Attacker) |
| Formations Involved | ||
|---|---|---|
| Germany |  |
116th Panzer Division |
| Germany |  |
130th "Lehr" Panzer Division |
| Germany |  |
275th Infantry Division |
| Germany |  |
2nd SS "Das Reich" Division |
| United States |  |
134th "First Nebraska" Infantry Regiment |
| United States |  |
737th Tank Battalion |

| Total | |
|---|---|
| Side 1 | 0 |
| Draw | 1 |
| Side 2 | 0 |


| Overall Rating, 1 vote |
|---|
|
5
|
| Scenario Rank: --- of 913 |
| Parent Game | Black SS |
|---|---|
| Historicity | Historical |
| Date | 1944-08-08 |
| Start Time | 17:15 |
| Turn Count | 15 |
| Visibility | Day |
| Counters | 136 |
| Net Morale | 0 |
| Net Initiative | 2 |
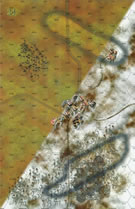
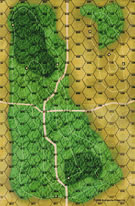
| Maps | 2: 24, 9 |
| Layout Dimensions | 56 x 43 cm 22 x 17 in |
| Play Bounty | 165 |
| AAR Bounty | 171 |
| Total Plays | 1 |
| Total AARs | 1 |
| Battle Types |
|---|
| Inflict Enemy Casualties |
| Urban Assault |
| Conditions |
|---|
| Off-board Artillery |
| Randomly-drawn Aircraft |
| Terrain Mods |
| Scenario Requirements & Playability | |
|---|---|
| Battle of the Bulge | Maps |
| Black SS | Base Game |
| Cassino '44 | Counters |
| Elsenborn Ridge | Maps + Counters |
| Sinister Forces | Counters |
| Introduction |
|---|
|
The 35th Infantry Division had been advancing for two days to reach the Mortain-Barenton road and relieve pressure on the hard-pressed 30th Infantry Division. By midafternoon the 134th Infantry Regiment had advanced east far enough to expose their left flank. The Germans noticed. |
| Conclusion |
|---|
|
Spotter airplanes had been seen the Germans advancing south from Mortain but were unsure of their identity. By the time they were positively identified they were too close to the Americans to engage with artillery. The attackers missed the American spearheads and instead hit the American support units. They quickly destroyed a Sherman tank platoon and regimental cannon company. After rampaging through some jeeps and trucks the German tanks contented themselves with occupying a road along which American supplies had to pass. |
| Additional Notes |
|---|
|
Playable without using the black SS counters. |

|
|
|---|
| AFV Rules Pertaining to this Scenario's Order of Battle |
|---|
|
| Heer |
|---|
|


| Schutzstaffel |
|---|
|


")
")
")


| Army |
|---|
|


| 7 Errata Items | |
|---|---|

|
The reduced direct fire value of the Heer HMG became 5-5 starting with Fall of France. (plloyd1010
on 2015 Jul 31)
|

|
The morale and combat modifiers of German Sergeant #1614 should be "0", not "8". (Shad
on 2010 Dec 15)
|

|
All SPW 251s have an armor value of 0. (Shad
on 2010 Dec 15)
|

|
The movement allowance on the counters in Airborne is misprinted. It should be "3." (rerathbun
on 2012 Jan 30)
|

|
The reduced direct fire value of the SS HMG is 5-5 in Beyond Normandy and Road to Berlin. (plloyd1010
on 2015 Jul 31)
|

|
The Units in Beyond Normandy were misprinted with a movement factor of 5. The movement factor should be 8. (rerathbun
on 2012 Mar 21)
|
|
|
Liberation 1944's counters are mislabeled 'PzIVF2.' The counter's ratings are correct (Armor 5, Move 8, DF 11-6, AT 6-8). (rerathbun
on 2014 Feb 14)
|
| Incredible scenario | ||||||||||||
|---|---|---|---|---|---|---|---|---|---|---|---|---|
No doubt the best of the forty that I have played to date. The set-up is much more subtle than a superficial glance suggests. For example, the US force is on foot, but must enter either through several hexes of fields (terrain mod) or strung along a road (or another trick): they are pressed to enter the large town quickly however. Likewise, the Germans must advance either south along a road or on board edges - wheeled vehicles like armored cars move slowly through wooded hills and they too are pressed to move quickly both to seal off the eastern board edge and get near the town before the US can consolidate as the VC conditions require the Germans both to block the road/board to the east, yet also mount successful assaults against the town hexes (or at least keep control of the road). I will not detail this action because I think this one requires "both" sides to think carefully about how both to hold and to advance and the trade-offs for each (and thus I don't want to spoil the story). I'll simply say that this one was really fun offering any number of possible options (both with the smaller on-board 24 forces and how to organize the larger on-the-move units. My scenario quickly changed from how I supposed it would evolve as vagaries of die rolls have huge positional ramifications. The M10 did sacrifice itself well destroying a step of PzIV-H before succumbing to Panther counter-fire. Pumas (SK234/2)came out on top of the M5 Stewarts in a battle of better armor vs. better gun as the US went for an early dash to the edge, but not unscathed. US got off four countable steps (one of the M5's) before the Germans shut the eastern edge. Germans held the road to the east with no difficulty per se, and led by having fewer step losses for the middle/early late stages, but in moving for a major victory, lost several steps in town assaults. Also, the Germans SPWs were savaged by the US 57mm's and 105mm until the Germans could get close enough to lay on some DF (they only had a single stack of 3x81mm mortars -- one on a half-track) for artillery support. So scenario ended in a minor victory for each side and, thus, a draw. Definitely recommended. |
||||||||||||
| 0 Comments |