
|
Unterscharfurher Ernst Barkmann Black SS #4 |
||
|---|---|---|
| (Defender) Germany | vs | United States (Attacker) |
| Formations Involved | ||
|---|---|---|
| Germany |  |
2nd SS "Das Reich" Division |
| United States |  |
3rd "Spearhead" Armored Division |

| Total | |
|---|---|
| Side 1 | 4 |
| Draw | 1 |
| Side 2 | 1 |


| Overall Rating, 6 votes |
|---|
|
3.83
|
| Scenario Rank: 158 of 913 |
| Parent Game | Black SS |
|---|---|
| Historicity | Historical |
| Date | 1944-07-13 |
| Start Time | 09:30 |
| Turn Count | 16 |
| Visibility | Day |
| Counters | 48 |
| Net Morale | 0 |
| Net Initiative | 1 |
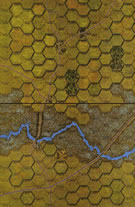
| Maps | 1: 13 |
| Layout Dimensions | 43 x 28 cm 17 x 11 in |
| Play Bounty | 133 |
| AAR Bounty | 159 |
| Total Plays | 6 |
| Total AARs | 3 |
| Battle Types |
|---|
| Exit the Battle Area |
| Inflict Enemy Casualties |
| Urban Assault |
| Scenario Requirements & Playability | |
|---|---|
| Airborne - IE | Maps |
| Black SS | Base Game |
| Elsenborn Ridge | Counters |
| Introduction |
|---|
|
Plagued by constant shortages of manpower and material plaguing, the only advantage the Germans could count on was the hard-won experience of their combat veterans. The previous five years of war had produced quite a few such men, but the vicious Eastern Front fighting had thinned their ranks considerably. Nevertheless, one such man in the right place at the right time could well snatch victory from the jaws of defeat. |
| Conclusion |
|---|
|
Unterscharfuhrer Ernst Barkmann almost single handedly blunted the American advance by destroying three Shermans and scattering their supporting infantry. By the time the fighting in the bocage was done, he would be credited with 25 tanks destroyed. |
| Additional Notes |
|---|
|
Playable without using the black SS counters. |

|
|
|---|
| AFV Rules Pertaining to this Scenario's Order of Battle |
|---|
|
| Heer |
|---|
|


| Schutzstaffel |
|---|
|


")
")
")


| Army |
|---|
|


| 1 Errata Item | |
|---|---|

|
The reduced direct fire value of the SS HMG is 5-5 in Beyond Normandy and Road to Berlin. (plloyd1010
on 2015 Jul 31)
|
| Fancy shootin' | ||||||||||||
|---|---|---|---|---|---|---|---|---|---|---|---|---|
A small battlegroup of SS backed up by a single platoon of Panthers waits a combined arms assault from an American task force. The Ami's have 6 platoons of Shermans, nearly a battalion of infantry, and a fairly sizable amount of artillery. What could go wrong here? Well, for starters, the terrain isn't very user friendly, at least for the Americans. Their attack is funneled right at the town located directly over the only really useful bridge on the map. The Germans sit tight in the town, with their AT support on the south side of the river. The Americans divided their tanks into two groups, looking for the crossfire bonus. Two platoons would be coming around the east hedgerow and four more coming from the west side. The infantry, supported by HMG's and an Engineer platoon would come south, straight at the town. The idea was for the tanks to surround the town and the Panther platoon within. After disposing of the big cats, the remaining Sherms would provide support for the assault on the town itself. The followup was to see the Ami's cross the bridge and exit the map to the south. However, Untersharführer Barkmann had other ideas. More importantly, he had the means at hand to carry them out. His Panthers slipped into the hedgerow north of the town. At the next opportunity, his tanks pulverised the two easternmost Shermans. At the same time, one of the AT guns took out another platoon of M4's from the westernmost group. A covering force of two platoons of Grenadiers from the western bridge moved adjacent to two other M4 platoons, giving them the choice of death by Panther or Close Combat. Faced with that choice the Shermans moved, and the Panthers knocked out another platoon in the process. After that, it was pretty much a done deal. Within an hour, the remaining M4's were shredded and the advancing groundpounders found that the Grenadiers knew very well how to shoot. Moreover, the promised air support failed to achieve even a single hit! When I finally called the game, the Americans had lost a third of their troops balanced against the German loss of half a platoon. Untersharführer Barkmann's fancy shooting had wrecked the American plan before it could be put into action. |
||||||||||||
| 0 Comments |
| Dead panther | ||||||||||||||
|---|---|---|---|---|---|---|---|---|---|---|---|---|---|---|
It didn't feel so easy : my GIs had to cross the minor river surrounded by swamps of the Airborne map with only one bridge + embankment. On the other side : some SS platoons, 2x 75mm gun platoons, some mortars, one 20mm and....Barkmann's panther platoon. Since the beast was located at the exit of the bridge, it was a total no go for all these shermans.... So US artillery, mortars and HMG begin to try to soften the target. Luckily one of the 75mm AT was quickly atomized along with the best SS leader :decapitation and catastrophic loss. The rest was a question of patience. Some GIs were sent across the bridge and on the embankment next to the dreaded panther : casualties were rising and when a bazooka team finally got the chance to fire some rockets at the monster, they missed the target. More patience and more artillery until, on turn 9, another inf platoon assaulted the panther hex and rolled 12 on the bazooka kill table. More artillery demoralized the second 75mm and... The other player,too. Nice scenario even if the sherman attack is not necessarily easy. |
||||||||||||||
| 0 Comments |
| Barkman Wins Again | ||||||||||||
|---|---|---|---|---|---|---|---|---|---|---|---|---|
This situation was one of my all-time favorite ASL scenarios. The different scale of PG gives a much different feel, but the results are just about the same that I got before. I placed Barkman's Panthers in the nothernmost town hex with an infantry platoon and LT to keep US infantry from trying to walk in and take the town, the next town down the road got a 75mm AT gun, it's tow, and an infantry platoon with a CPT, the next town south of the river got the other 75mm AT, another infantry and the Col. The rest of the SS were placed similarly in the rest of the town hexes except for the mortars, 20mm AA gun, the halftrack tow vehicle and another infantry, which was placed to give some covering fire for the southern towns from 0506 and 0406. The US tanks started getting their backsides bitten as soon as they entered the board centered along the trail while the US infantry used the hedgerows to cover their approch. The US lost 4 steps of tanks on that very firs turn for 8 points, going from a slight initiative advantage to a lower initiative. The surviving Shermans worked to regroup and attack but ended up losing every last tank in the 2 companies. A lucky OBA shot demoralized the LT and eliminated both steps of infantry in the tow but left Barkman intact and on the prowell. The US major lead his troops along the elevated tracks and then through the swamp but more OBA and DF directed from the town lead by the SS Colonel demoralized the infantry that spent the next few turns avancing to the rear while the rest of the US infantry tried to advance to engage and try to take that town hex. At the halfway point of the scenario, with the points at 20-2 favoring the Germans, and with even taking a town and exiting a few units off the south of the board not really giving enough positive victory points to draw, I ended the bloodshed. Good game, and my first in a month. Interesting that the new cat was nearly as dangerous to the game as Barkman was. |
||||||||||||
| 0 Comments |