
|
The Odon Bridges Beyond Normandy #4 |
||
|---|---|---|
| (Defender) Germany | vs | Britain (Attacker) |
| Formations Involved | ||
|---|---|---|
| Britain |  |
23rd Hussars |
| Britain |  |
29th Armoured Brigade |
| Britain |  |
2nd Northamptonshire Yeomanry |
| Britain |  |
8th Rifle Brigade |
| Britain |  |
Fife and Forfarshire Yeomanry Armour |
| Germany |  |
101st SS Heavy Panzer Battalion |
| Germany |  |
12th SS Artillery Regiment |
| Germany |  |
12th SS Flak Battalion |
| Germany |  |
12th SS Panzer Regiment |
| Germany |  |
12th SS Pioneer Battalion |
| Germany |  |
25th SS Panzergrenadier Regiment |
| Germany |  |
26th SS Panzergrenadier Regiment |

| Total | |
|---|---|
| Side 1 | 6 |
| Draw | 1 |
| Side 2 | 2 |


| Overall Rating, 10 votes |
|---|
|
3.7
|
| Scenario Rank: 260 of 913 |
| Parent Game | Beyond Normandy |
|---|---|
| Historicity | Historical |
| Date | 1944-06-26 |
| Start Time | 13:30 |
| Turn Count | 21 |
| Visibility | Day |
| Counters | 163 |
| Net Morale | 1 |
| Net Initiative | 2 |
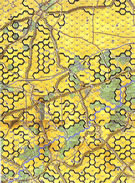
| Maps | 1: BN1 |
| Layout Dimensions | 88 x 58 cm 35 x 23 in |
| Play Bounty | 142 |
| AAR Bounty | 153 |
| Total Plays | 9 |
| Total AARs | 4 |
| Battle Types |
|---|
| Bridge Control |
| Inflict Enemy Casualties |
| Urban Assault |
| Conditions |
|---|
| Off-board Artillery |
| Randomly-drawn Aircraft |
| Reinforcements |
| Severe Weather |
| Smoke |
| Scenario Requirements & Playability | |
|---|---|
| Beyond Normandy | Base Game |
| Introduction |
|---|
|
Although all objectives had not been captured by the 15th Scottish Division's morning attacks, what was taken was judged sufficient to continue with the operation. Just before 1300 the order to "seize the crossings of the Odon at Tourmauville and Gavrus" arrived at the 11th Armoured Division HQ. General "Pip" Roberts, commanding, had been waiting all morning for the order and quickly unleashed two tank regiments, a recon regiment equipped with tanks and a motorized battalion. |
| Conclusion |
|---|
|
The two British armored columns managed, with difficulty, to get through the streets of Cheux. Led by the Cromwells of the Northampshire Yeomanry, they headed south for the Odon bridges at Gavrus and Tourmauville. As the first of the Cromwells crested the ridge south of Cheux heavy anti-tank fire destroyed two and forced the withdrawal of the remainder. The two armored regiments fared not better. Lack of sufficient infantry to deal with German anti-tank guns and guard the open terrain between the roads meant the British tanks often fought alone, something not calculated to ensure their survival. The 15th Scottish Division's reserve brigade, the 227th was committed along with the 9th RTR to an evening attack. |

|
|
|---|
| AFV Rules Pertaining to this Scenario's Order of Battle |
|---|
|
| Army |
|---|
|


| Heer |
|---|
|

| Schutzstaffel |
|---|
|


")
")


| 9 Errata Items | |
|---|---|
| Scen 4 |
Special Rule #6: Die Roll Result of 4 should read 2 x 13, not 2 x 1 (GeneSteeler
on 2010 Jul 05)
|

|
The "Optional Values" for the Achilles---and by extension the Archer---given in an Avalanche Press Daily Content piece on the 17-Pdr Anti-Tank gun (and printed on a replacement counter sheet Download) are now the Official Ratings, published in games like Cassino '44, Grossdeutschland 1946, and Indian Unity. These are: 8-5 / 8-8 Full Strength and 4-5 / 8-8 Reduced Strength. (caryn
on 2012 May 03)
|

|
All Bren carriers should have a movement value of 7. (Shad
on 2010 Dec 15)
|

|
The "Optional Values" for the Firefly given in an Avalanche Press Daily Content piece on the 17-Pdr Anti-Tank gun (and printed on a replacement counter sheet Download) are now the Official Ratings, published in games like Cassino '44, Grossdeutschland 1946, and Indian Unity. These are: 5-5 / 8-8 Full Strength and 3-5 / 8-8 Reduced Strength. (caryn
on 2012 May 03)
|

|
All SPW 251s have an armor value of 0. (Shad
on 2010 Dec 15)
|

|
All SS 105mm guns should have white, indirect fire values. (Shad
on 2010 Dec 15)
|

|
The reduced direct fire value of the SS HMG is 5-5 in Beyond Normandy and Road to Berlin. (plloyd1010
on 2015 Jul 31)
|

|
The Units in Beyond Normandy were misprinted with a movement factor of 5. The movement factor should be 8. (rerathbun
on 2012 Mar 21)
|
|
|
Liberation 1944's counters are mislabeled 'PzIVF2.' The counter's ratings are correct (Armor 5, Move 8, DF 11-6, AT 6-8). (rerathbun
on 2014 Feb 14)
|
| Nothing ever goes as planned, until it does... |
|---|
|
Seriously. I have played board games for quite a while now, and whether it's a well-designed defense or cannot lose offensive tsunami, things always start to head south after the first roll of the dice. Until now. After setting up the Nazis in a manner allowing me to adjust to a more in-depth zone defense within the first couple of turns, with 5 zones and a rapid response team in the center, more or less. The Brits chose a three-pronged assault. Fast forward to the final turn. Much of the British armor is destroyed, strewn across the board. The King's troops hold one of the bridges, but the two German Tigers are two hexes away! On the initiative roll, the SS get a 1, Tommy rolls a 6. There is nothing the heavy tanks can do. Oh, and the weather sucked most of the game!. |
| 0 Comments |
| Beyond Normandy, Scenario #4, The Odon Bridge | ||||||||||||
|---|---|---|---|---|---|---|---|---|---|---|---|---|
To make a long story short, it was a Major German Victory. I was able to control only the town hex #0921 but that was it. British Infantry are worth more then armor in this scenario and they are in far short supply. The British Armor are in one of the biggest numbers I have ever played with, not counting Desert scenarios but they start to wear down if you are not careful, against all the German AT guns and the few armor units. Artillery is crazy but not reliable from turn to turn. Weather and movement really hammer the British but lack of enough Infantry is the most difficult thing. On a side note, within the Battle it’s self, I had another battle going on between a couple platoons of Tigers and a boat load of British armor. I rolled well as the British Player and believe it or not took out all four steps of Tiger I tanks at the cost of (6-steps of Firefly’s, 2-steps of Cromwell’s, 2-steps of Achilles & 3-steps of Sherman’s). This really did drain the last chance I had at any kind of victory however. Fun game to play and a break from The Eastern Front! One more Observation, the German Morale of 9/8 is a real killer in this scenario as well. |
||||||||||||
| 0 Comments |
| Down to the final minutes, and the winner is… | ||||||||||||
|---|---|---|---|---|---|---|---|---|---|---|---|---|
THE BATTLEThe morning rain has become heavier in the afternoon with visibility decreased from the morning (visibility = 2d6 hexes). The rain also has sodden the ground bogging the vehicles slowing them down considerably. The British believe the PzIVH in the northwest will be a big problem and decide to move against them in force. 1330 British begin to advance southward. The Northwest Shermans advance and a platoon is lost to the PzIVH. British move their Cromwells westward to set up flanking fire. 1 Cromwell platoon is also lost. 1345 Seeing the danger, half the Panzer fall back while the others try to hold back the British Armour, eliminating some Achilles and reducing two platoons of Cromwells. 1400 Panzers hold their ground and decimate the British armour! 4 Cromwells, Stuart and Achilles are hit. But British keep on the offensive and with flanking fire eliminate two of the Panzer platoons! The British gambit pays off!!! Marder III and 75mm reduce a Cromwell that advanced too far south. 1415 Heavy rain begins to ease up into light rain. The 3rd Company, 101st SS Heavy Panzer Battalion, Panzer VIe (Tigers), are deployed and begin to move. British win the initiative and the Fireflies and Shermans attach the PzIVH reducing them both. The Panzers try to flee south through the hedgerows. Cromwells sent in pursuit. In the east, the Shermans advance under the fire of the 105mm near Colleville. 1430 Northampshire Yeomanry trying to push south down the centre. Hussars advance down the east. Achilles eliminated by 105mm. Cromwell eliminates the German Marder III. 1445 Wespe platoons open fire against the 23rd Hussars (eastern armour column). Sherman platoon is eliminated. 1500 Wespes are hit by the Hussars. In the north, the British Infantry tries to advance. M3 is eliminated by 20mm AA Guns. Remaining infantry dismounts to advance on foot. 1515 Western column (Fife and Forfar Yeomanry) advances and eliminates one of the reduced PzIVH. They are spotted by the 88s which reduces a Firefly platoon. Assaults begin all along the German line. Grenadiers assault some Shermans with Panzerfausts and 3 Sherman platoons are eliminated! Wowzers! Tigers enter a town in the southeast ready to fire upon the advancing 23rd Hussars. 1530 Can the Tigers stop the Shermans in the east? The British armour advances and the Tigers open fire. The Fireflies are decimated losing two and a half platoons! In the west, the Yeomanry slowly advances. They have been quite delayed. But delayed enough? 1545 Tigers move to stop the Fireflies and Stuarts. Halftime Comment: Even if the British get to the bridge, can they hold off the PzVIe platoons? This has become a very interesting battle. There is an urgency for the British to advance, they can’t afford to stay and fight. 1600 British win initiative and a reduced Firefly and Stuart move to elude the Tigers. The Stuart is eliminated by opportunity fire. In the west, German Grenadiers initiate assaults versus the British armour. In the south, the Grenadiers begin to fall back toward the bridges. 1615 The Battle of the Line continues as the Tigers and Grenadiers withdraw towards the south bridges. More British armour manages to sneak past the 88s on the west. 1630 One Tiger platoon advances on the Cromwells in the center while the Second platoon heads to the southeast bridge. German front line is collapsing under the heavy British attack. But they have done their job in delaying the Allies. Success will depend on the troops and armour to the south now. Who will win? It appears the British may win as the Tigers may prove too slow to retreat to the bridges 1645 Tiger eliminates the Shermans in the center. The German AT Guns are too restricted in their field of fire to be very effective. The 88 has had terrible luck and misses the majority of its attacks 1700 The race to the south continues with more British armour moving south. The British control two bridges. The Tiger has control of the southeast Bridge and begins to move west. Five turns (75 minutes) to go! 1715 The British move to block the southeast bridges. 1730 The Tiger moves westward through the light woods, but 3 more Shermans are coming down the eastern road! They are attacked by the Central Tiger reducing one platoon. This Tiger *has** to stop the Shermans, otherwise they will regain control of the southeast bridge. German Grenadiers are hit hard (lose 2 steps) by the Fireflies at the southwest bridge. 1745 Shermans in the east are hit hard by the Central Tiger and stopped dead in their tracks. But more Shermans arrive from the north! Tiger in the south decimates the Friefly at the south central bridge. The Battle continues to rage in the north, but this is now inconsequential. 30 Minutes to go! 1800 The central Tiger wins initiative and eliminates the two undisrupted Shermans! The disrupted Shermans fail to recover and can’t make it to the Southeast bridge in time. Focus goes back the Southwest bridge. In the South, the Tiger clears out the British Armour north of the bridge as the Grenadiers advance. 1815 The Centeral Tiger finishes off the disrupted Shermans in the east. In the South, Grenadiers recapture the South Central bridge, but run out of time to initiate an assault against the last half platoon of Fireflies holding the Southwest Bridge. The battle is over! The British hold on to a single bridge with half a platoon and win by the skin of their teeth! BRITISH MAJOR VICTORY!!! AftermathWow! One more turn and the Grenadiers would have initiated an assault and taken away control resulting in a German Major Victory! This battle really was down to the wire. I believe both sides made some major mistakes. The Germans particularly had the wrong Battle Plan. Instead of trying to hold they line, they should have executed a fighting withdraw and particularly blocked the Bridges. They also should have abandoned the central hill a few turns earlier and beaten the British to the bridges. The British should have advanced down the east and west on foot, with the M3s trying to keep up. With the sodden ground, foot would have been faster, even if it would have made them vulnerable to mortar and artillery fire. In the halftracks, they were so susceptible to anti-tank fire, that they spent the first two hours mostly paralysed. I almost felt overwhelmed in this scenario. Neither side had an “obvious” strategy and both required manoeuvre. This would be an interesting scenario to play face to face. The Tigers did well covering the road and proved why they were feared. Casualties were enormous with about 75% of the British armour eliminated. Scenario Rating: 4/5 – Very difficult scenario both tactically and with the Special Rules. Played (mostly) in a single evening, I at times felt overwhelmed at the complexity. The Tension in the final 8 turns kept me wondering who would win and pushed me to play until midnight. |
||||||||||||
| 0 Comments |
| Muck your way to the bridges! | ||||||||||||||
|---|---|---|---|---|---|---|---|---|---|---|---|---|---|---|
This scenario was played as a team event by my gaming group. I act as moderator and facilitator for each game, and I do not participate directly as a player. My listing of “winning” is based on the PG HQ site cannot support a neutral role in AARs. The town of Cheux effectively ceased to exist. The heavy bombardment and fighting in the morning destroyed anything that was standing, and the heavy rain turned what was left into a quagmire. The streets were nearly impassable due to mud and debris. Scouting reports showed the British need not worry about German resistance while moving through the wreckage, but fighting the conditions would slow the advance. Of course, the entire advance would be slowed due to the rain. The countryside was also a slippery muddy mess. The British forces would struggle just to move forward across the terrain. The Hitler Youth took the rain in stride, bailing out their positions and grumbling much less than their adult British counterparts. Thirteen thirty hours, time to launch the attack. The sounds of an entire army of British tanks coming to life rumbled across the lines. One thing for sure, the British had tanks. Lots of tanks. Many more tanks than the small amount of infantry could support. And the Germans had guns. Lots of guns… The tanks on the British right immediately rode into the sights of the German defenders, and several burst into flames within minutes. The devastation of Cheux and poor visibility saved the center and left from similar fates, but eight tanks on the right were burning hulks. Two more would burn in the next 15 minutes, and five more in the next 15 minutes. The Germans would pay with two tanks of their own. Forty five minutes into the battle the rain began to slacken. Visibility improved, and artillery batteries opened up on both sides. The Germans lost two batteries of 105mm from British counterbattery fire, and the German right began to buckle. British tanks began to emerge from Cheux, and the forward right/center German position, held by the 1/26 SS PG Battalion, came under pressure. The British launched a full offensive across the front, and the next 30 minutes became a nightmare on both sides of the battle. Within 15 minutes half of the tanks of the 12 SS Panzer Regiment were destroyed, several ATG batteries wrecked, and German infantry suffered many casualties. During that time the British paid with several more tanks, and units on the extreme right assaulting German defenders were paying a heavy price (Eight steps of Brits, 12 steps of Germans, tanks counting double). Bu the following 15 minutes deflowered the attacking British. The loss of a Marder unit was paid back with massive British tank, APC, gun, mortar, and infantry casualties (19 Brit steps, tanks counting double). The British right was a wreck. The left had suffered some casualties, but was pushing forward around the 1/26 to press against the weakened 12 SS Arty Regiment. The British center and part of the left, however, were completely held up by the tenacious defense of the 1/26. Despite significant casualties these Hitler Youth were holding their ground against everything the Brits could throw at them. The British poured massive amounts of firepower against the 1/26 positions, but the line held. The defiance against that much firepower created an aura of invincibility of the 1/26. The Brits appeared to fear assaulting them. The fanatical defense of two officers at the very front, surrounded by the bodies of their men, firing their pistols and the dropped rifles of their men, caused entire armoured columns to steer around the position. The British center never managed to move forward, and the remaining tanks of the 12 SS Panzer Regiment, supported by German infantry, moved into Cheux behind the British tanks and began pummeling parts of the 8th Battalion of the Rifle Brigade. And the hearty defense of the 1/26 slowed the British advance long enough for the Tigers of the 3rd Company, 101 SS Heavy Panzer Battalion, to shift in support of the 12 SS Arty Regiment. While the British managed to continue inflicting casualties on German defenders, the Germans were hitting back at double the rate. The advance of the British right was poised to overrun the 12 SS Arty Regiment, but the arrival of the Tigers placed that attack at high risk. The British center could not advance past the 1/26, and the 12 SS Pioneers and 15th Company of the 25th PG regiment were holding the central road and pushing between the British right and center. The British right, for the plastering it took, was actually starting to drive around the German flank and preparing for a rush to the bridges. But to do so the small number of tanks would first have to get past the well positioned 88mm guns of the 12 SS Flak battalion. No easy task with no infantry support. The British commander could not stomach the losses already suffered, and had no heart to drive his men further into the maw of the German defense. The offensive teetered on the edge, and could fail as easy as succeed. Success or failure, the losses to the British would have wrecked the British units and taken them out of the order of battle for most of the war. The British withdrew, leaving the tank and corpse littered field to the Germans. The Germans achieved a major victory. Total tally Germans lost 26 steps, British 58 steps. I rated this scenario a 4, and a strong 4 at that. The action was awesome. The map was a pleasure to play on. The lack of British infantry meant a reliance on armor against an entrenched force strong with ATG capability. This battle could have gone either way. The main detractor is the victory conditions. I really don’t see this going as a minor victory level for either side. This was obvious before the game even started. One side or the other would win by the major victory conditions. Really you could simplify the victory conditions by making the capture of one of the bridge hexes (or failure to do so) as the only victory condition. Good scenario placing disparate force structures against each other. A lot of fun. |
||||||||||||||
| 0 Comments |