
|
St. Mauvieu Beyond Normandy #2 |
||
|---|---|---|
| (Defender) Germany | vs | Britain (Attacker) |
| Formations Involved | ||
|---|---|---|
| Britain |  |
1st Middlesex (machine-gun) |
| Britain |  |
6th King's Own Scottish Borderers |
| Britain |  |
6th Royal Scots Fusiliers |
| Britain |  |
79th Armoured Division |
| Britain |  |
8th Royal Scots |
| Britain |  |
9th Royal Tank Regiment |
| Germany |  |
12th SS Panzer Regiment |
| Germany |  |
26th SS Panzergrenadier Regiment |
| Germany |  |
4th Flak Battalion |

| Total | |
|---|---|
| Side 1 | 3 |
| Draw | 2 |
| Side 2 | 6 |


| Overall Rating, 11 votes |
|---|
|
3.36
|
| Scenario Rank: 509 of 913 |
| Parent Game | Beyond Normandy |
|---|---|
| Historicity | Historical |
| Date | 1944-06-26 |
| Start Time | 07:45 |
| Turn Count | 26 |
| Visibility | Day |
| Counters | 146 |
| Net Morale | 1 |
| Net Initiative | 1 |
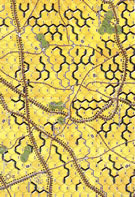
| Maps | 1: BN3 |
| Layout Dimensions | 88 x 58 cm 35 x 23 in |
| Play Bounty | 138 |
| AAR Bounty | 153 |
| Total Plays | 11 |
| Total AARs | 4 |
| Battle Types |
|---|
| Urban Assault |
| Scenario Requirements & Playability | |
|---|---|
| Beyond Normandy | Base Game |
| Introduction |
|---|
|
In the early morning hours of 26 June the soldiers of the 44th Infantry Brigade of the 15th (Scottish) Division, accompanied by tanks of 9th Royal Tank Regiment, advanced across the Mue River valley on the twin villages of la Gaule and St. Mauvieu. The other half of the opening attack of Operation Epsom, the advance followed a heavy barrage. Immediately after capturing the two settlements, the 11th Armoured Division was to be unleashed in a sweep around Caen and into the rear of the German line. |
| Conclusion |
|---|
|
British rifle battalions suffered heavy casualties in this action as well, facing fanatical resistance and sodden ground. Despite these problems, the Scots pressed forward and took most of their objectives. As 11th Armoured Division moved forward through 15th Scottish to resume the advance, British commanders note the enemy panzer formations had been tied down in front of them and prevented from launching their own offensive. |

|
|
|---|
| AFV Rules Pertaining to this Scenario's Order of Battle |
|---|
|
| Army |
|---|
|


| Heer |
|---|
|


| Luftwaffe |
|---|
|

| Schutzstaffel |
|---|
|


")
")
")
")
")


| 8 Errata Items | |
|---|---|

|
The "Optional Values" for the 17-Pdr given in an Avalanche Press Daily Content piece on the 17-Pdr Anti-Tank gun (and printed on a replacement counter sheet Download) are now the Official Ratings, published in games like Cassino '44, Grossdeutschland 1946, and Indian Unity, as shown in one of the two counter images. These are: 5-5 / 8-8 MA 0 (Towed). (caryn
on 2012 May 03)
|

|
The "Optional Values" for the Achilles---and by extension the Archer---given in an Avalanche Press Daily Content piece on the 17-Pdr Anti-Tank gun (and printed on a replacement counter sheet Download) are now the Official Ratings, published in games like Cassino '44, Grossdeutschland 1946, and Indian Unity. These are: 8-5 / 8-8 Full Strength and 4-5 / 8-8 Reduced Strength. (caryn
on 2012 May 03)
|

|
All Bren carriers should have a movement value of 7. (Shad
on 2010 Dec 15)
|

|
Ignore the direct fire values. (Shad
on 2010 Dec 15)
|

|
All SPW 251s have an armor value of 0. (Shad
on 2010 Dec 15)
|

|
The reduced direct fire value of the SS HMG is 5-5 in Beyond Normandy and Road to Berlin. (plloyd1010
on 2015 Jul 31)
|

|
The Units in Beyond Normandy were misprinted with a movement factor of 5. The movement factor should be 8. (rerathbun
on 2012 Mar 21)
|
|
|
Liberation 1944's counters are mislabeled 'PzIVF2.' The counter's ratings are correct (Armor 5, Move 8, DF 11-6, AT 6-8). (rerathbun
on 2014 Feb 14)
|
| Big Toys, Lots of Men, and a Small Battlefield equals a Grand Title Bout! | ||||||||||||
|---|---|---|---|---|---|---|---|---|---|---|---|---|
Note: Score will be denoted by (x-y), where x=German casualties, y=British casualties. Solitaire Note: Pre-plotted artillery. To make this somewhat “random” I chose 6 hexes (St Mauvieu town hexes) and then randomly rolled which would get hit each turn. If a hex with no units was chosen, then the British could activate a different unit for their impulse. THE BATTLE0745 - 0800 As St. Mauvieu comes under heavy bombardment the Royal Scots advance under fire. The 8th Royal Scots on the west with the 6th Royal Scots Fusiliers to their east. They are supported by elements of the 9th Royal Tank Regiment. A Churchill VII is eliminated by some 88’s of the German 4th Flak Battalion. 0815 German 88’s continue to fire and reduce some more Churchill VII platoons! But, now spotted, one is eliminated by artillery and the second is demoralised by Scottish mortars. The Royal Scots continue to take heavy casualties. (22-2) Strategy Note: This was a big blunder of the British set-up. I should have led with the armour and kept the infantry safe. But too much Eastern Front led me to believe that the Scottish Wave could just overrun the German line. But these Germans have a morale of 9/8 and are not easily routed. Direct Fire was very ineffective against them while they inflicted major damage amongst the Scots. I was hesitant to charge the Churchills, but with the sodden ground, in hindsight, it was the right choice. (Actually, it was my girlfriend’s choice to charge the tanks!) They were, in some ways, targets needed in order to spot the concealed (limiting terrain) 88’s which could then be taken out. Then the Crocodiles (Flamethrower Tanks) and AVREs (armed with 290 mm Spigot mortar) should have led the charge. Well, they didn’t and the Scots paid dearly for my mistake. 0830 Under fire, the second German 88 battery crews rout. In the west, the German HMG nest is hit by AVRE and reduced when assaulted by the Crocodiles. The Scots continue to be hit hard. The 8th has already taken 15 casualties and the 6th, 10 casualties!!! With the 88’s gone, a British Marauder strikes inflicting the 5th German step loss. 0845 - 0900 The Scots continue to be hit by direct fire. Their direct fire is ineffectual against the high morale dug-in Germans. Only the British artillery and armour is strong enough to cause further casualties to the Grenadiers. 0915 – 0930 German SPW251 is hit by British armour. British command sincerely wonders if this battle is already lost. With the 8th and 6th Royal Scots have a combined total of 30 step losses already, they wonder if the reinforcements due to arrive will be enough. Playnote: I seriously thought it was over for the British. At this time, I thought to myself, I’d like to give this scenario another go. But I continued on. 0945 - 1015 In an act of depression, the British Lt. Col fails to recover from his demoralisation and deserts! This Lt. Col. felt how I felt. I think he figured the battle was lost too! But, the Churchills, with the aid of the AVRE and Crocodiles break through the German centre line!!! The British armour is going to be a serious problem for the Germans, perhaps there is a bit of hope? With their line breached and the towns relatively undefended, the German forces begin to fall back from their dug-in line to defend St. Mauvieu. German AT Guns can’t penetrate the heavy armour of the AVREs. British armour widens the whole in the German line which subsequently falls back en masse. The rural assault is over. It is now time for the urban assault. With a further glint of hope, the first infantry platoons of the 6th Kings Own Scottish Borderers arrive! 1030 More platoons of reserves arrive for the British, but the German defence is buffeted by their own reinforcements, the PzIVHs of the 9th Panzer Company, 12th SS Panzer Regiment. German 120mm is hit in transport, trying to fall back to la Gaule. 1045 The Armoured Vehicle Royal Engineers eliminates the 75mm AT Gun with its’ spigot mortar. 1100 - 1115 British win initiative and the Crocodile assaults the HMG nest in the west. A whole German platoon is eliminated, but the Crocodile is out of fuel. PzIVH reserves cut down the British Infantry. British anti-tank guns advance. German AA gun in the east is eliminated by mortar fire. PzIVHs and Churchills exchange ineffectual fire. In St. Mauvieu a GREN is eliminated by the AVRE. Germans are running low on men! 10 GREN steps, 2 AA Guns, 2 SPW 251, 2 Mortars, few engineers and 3 X PzIVH remain 1130 More British reinforcements arrive in the north. A reduced Churchill is eliminated by PzIVH. An Achilles moves into range. British enter la Gaule as the 6th Kings Own Scottish Borderers circle around the south. AVRE strikes again clearing a sector of St. Mauvieu. 1145 British win the initiative and the Achilles fires, but misses! Retaliatory shells from the panzers eliminate both Achilles platoons. Some British Anti-Tank Guns set up in their place in the light woods. Grenadiers are routed from North St. Mauvieu. 1200 More reinforcements arrive. Germans have the upper initiative and eliminate 2x Bren Carriers and a reduced Churchill platoon. British Churchills intercept 2x SPW251 before they can relieve la Gaule. British forces control some of la Gaule and north St. Mauvieu. They have 3 of the 8 objectives under control. A stroke of luck when an anti-tank gun reduces a PzIVH platoon! 1215 Armour battle continues as South St. Mauvieu is in trouble. A fourth town hex is under British control. 1230 Churchills hit PzIVH as the panzers take out a Crocodile platoon. The AVRE clears the GREN from South St. Mauvieu. German forces remaining: 4 PzIVH steps, 3 GREN platoons, 2 AA Batteries and 1 mortar. 90 minutes to go! (6 turns) 1245 PzIVH eliminate the advancing Achilles. One PzIVH platoon enters West St. Mauvieu. Both reduced PzIVH are eliminated by shells from the Churchills to the east. AA is cleared out of South St. Mauvieu by the AVRE. 3 GREN and PzIVH in West St. Mauvieu. 1 Mortar remains in la Gaule 1300 Grenadiers are reduced by the AVRE. British armour advances on West St. Mauvieu. 1315 Churchills fire first and the PzIVH is reduced! Return fire reduces a Churchill platoon. 1330 British armour manoeuvres to flank the Panzers while the AVRE helps to eliminate the mortar crews and liberate la Gaule. 1345 The last of the British reinforcements arrive. Flanking fire eliminates the last of the Panzers, but the Grenadiers continue to hold out! 1400 The reduced Grenadiers are eliminated but two Grenadier platoons remain in Western St. Mauvieu. The second AVRE arrives. The Battle is over. BRITISH MINOR VICTORY!!! AftermathI believe in another turn or two it would have been a British Major Victory as the last two Grenadier platoons would have fallen to the British Armour. As commented above, I think the British could have advanced more smartly. As it was, almost the whole 8th Royal Scots and 6th Royal Scots Fusiliers were eliminated. Casualties were extreme. This battle was one of my favourite PG battles to date. The variety of forces for both sides made for an extremely tense battle. I was convinced that the British would lose, but all of a sudden they had a breakthrough in the German line and all those dug-in German Grenadiers meant nothing! They had to protect the towns! I believe the victory conditions are fairly balanced. If the British didn’t capture their towns it would have been a German Major Victory. (There isn’t much difference between German Major and German Minor Victory). This made for a great see-saw of a battle. The Reinforcements tipped the scales with both sides getting what they needed. The Germans received some well needed armour and the British got some more men (as I foolishly sent many a Scot to the grave). Scenario Rating: 5/5 – AVRE, Crocodiles, Mines, 88s, Airstrike, Big Artillery, Armour Battles, Lots of units on a small map, Reinforcements. This scenario has it all! |
||||||||||||
| 0 Comments |
| St Mauvieu | ||||||||||||||
|---|---|---|---|---|---|---|---|---|---|---|---|---|---|---|
First round of Beyond Normandy, the action was in northern France as the Brits attempt to push into Caen. In this case, on 26 Jun '44, the Brits have launched another offensive to drive to the city. Initial results are good, but not complete. In one localized area the 6th Royal Scot Fusiliers and the 6th Kings Own Scottish Borderers, with some armor support from the 19th, managed to take St Mauvieu. The Germans attempted a counterattack in the early afternoon, but were pounded by British artillery. Waiting until they could scrape together some more force, they tried again just before evening. In reality, the arty kept them from retaking the town, but they managed to establish positions just outside of it. Our game required the Germans to have control of 3 of 5 (60%) hexes of the town. The Brits had to stop them and inflict losses. As a note, we played the terrain as we interpreted from the rules. There are some substantial differences between the BN specific terrain in the rules and the final “official” interpretations. This cost the Brits 2 Bren units and 2 ATGs, yet saved some Brit units in a town from a significant unleashing of firepower. In all reality, the change in results would have probably been slightly more German bloodshed to achieve the same overall (but perhaps less specific) result. A drive by the 6th Kings Own Scottish Borders and 6th Royal Scot Fusiliers, with armor from the 19th, had taken St Mauvieu in the morning. The 6RSF occupied the southern end of the town, and extended a defensive position further south. The 6KOSB did the same on the north end of the town. After successfully repulsing a German attack early in the afternoon, the British had worked to further consolidate their gains, digging positions in and around the town. By morning only a massive effort would drive them out. The rain had picked up and was making work more difficult. At least the rain should slow any further attempt by the Germans to move again on St Mauvieu. The German tanks rolled eastward through the downpour. Vision was less than optimal, a big help in letting the Germans move towards the town unseen. SS-Standartenführer (Colonel equivalent) Kunze split to the north with half the force, sending the other half south. Of the southern group, part would engage the British while the rest would move around the flank. His northern force would drive against the British right. The town was now in view, just barely. Even more importantly was what else Kunze spotted. The British were still in some disarray from his previous assault, apparently not expecting another drive so soon. Six Achilles tank destroyers were sitting in the open north of the town. He looked to his PzIVs, who had obviously also sighted them and were maneuvering to engage. Their muzzles flashed, and six Achilles burst into flames. He heard the report of more PzIV cannons to the south, and heard report of Shermans and Brens burning to the south. Things appeared to be going well! Lt Col Brown heard the shots and saw his armor erupt in flames. The rain was too heavy to see what was shooting, but the Panzers he repulsed earlier had obviously come back. The radio crackled, and he heard one of his forward officers requesting artillery. Explosions ripped the hillside just far enough out of view to see the target. But the radio reports were ecstatic. His Lieutenant reported five out of eight Panzers on fire. [Oops, misread #X result for arty against armor! Shoulda been check at M. This makes up for the two Bren and ATGs mentioned above.] SS-Standartenführer Kunze was furious. Losing an entire platoon of tanks to artillery just as the attack stepped off! The southern force was no longer strong enough to engage to the front while circling to the flank. This also meant less stress on the British left, so the right would stay stronger. As the axiom of no plan survives contact with the enemy became horribly true, he decided to change the entire strategy. Now he would engage at range, then rush the town. German armor continued to beat apart British tanks and APCs, while infantry and artillery tried to soften up British soft targets. Responding British artillery kept the Germans from making a concerted advance. The rain began to let up, allowing both sides a more open field of fire. Finally, two platoons of PzIVs on the north began a drive towards the town. German grenadiers started to move to the British right flank. And the last of the 22 British tanks exploded into flames. The remaining three PzIVs on the German right also succumbed to British artillery. [And again misreading X on arty vs armor.] At this point, Maj Howard, leading the 6KOSB, ordered a counterattack. The PzIVs on the German left were caught unsupported by charging British infantry, and the few remaining Brens tried to flank the German positions. However, what looked to be a master stroke against the advancing German troops turned into disaster. German assault guns caught the Brens, and the charging British infantry was gunned down by desperate German tank gunners. To add insult to injury, German infantry joined the fray against the falling British infantrymen and chewed them to pieces. Yet still, the clock was ticking, and the Germans had to take the town before nightfall. The 6KOSB counterattack, combined with the movement of 6RSF troops to forward positions, threatened the German timetable. While Kunze felt he needed another 15 to 30 minutes to continue softening the Brits, he knew time was not on his side. He ordered his forces forward out of defensible positions. He, along with SS-Obersturmführer (Lt equivalent) Freidmann, personally led two platoons of Hitler Youth grenadiers around to the British right. British artillery rained down on the advancing Germans. One massive barrage even caught SS-Standartenführer Kunze and company. Freidmann and half the soldiers broke and dove for cover. British infantry of the 6RSF led assaults against combined German tank and infantry forces. British soldiers in the town repositioned themselves to absorb what had to be an upcoming assault. But still the Germans moved on. Suddenly, realizing time was of the essence, SS-Standartenführer Kunze ordered his infantry to charge the town. Having circumvented the British flank, Kunze noticed the rear areas of the town were devoid of defenders. Braving British fire, Kunze and his platoon broke into the British rear and occupied the northeast edge of the town. Seeing their success, the remainder of the northern group charged the British line defending the town. German troops moved into St Mauvieu, and ferocious close range combat saw a total collapse of the 6KOSB. With the entire north end of the town under German control, the German southern group drove into the British line. The 6RSF, however, was still a force to be reckoned with. Assaulting infantry slowed the Germans, and the three platoons holding the southwest end of the town pulverized German armor and infantry trying to enter the town. Unfortunately, the southeastern part of the town was open, and one force of German armor and infantry slipped through the defenses unengaged and made it into the town, effectively surrounding the defending British. Lt Col Brown, just outside the German snare, managed to pull together about 75 men of the 6RSF and retreated back to the German lines. With half the 6RSF as casualties, and all remaining positions completely surrounded, the rest of the 6RSF surrendered. The 6KOSB was even worse off. Having suffered 85% casualties, there was effectively no 6KOSB left to surrender. The unit was annihilated. The Germans had control of the town in exchange for eight tanks and some grenadiers. However, there was one sour note to SS-Standartenführer Kunze's victory. SS-Obersturmführer Freidmann had fled the battle the moment Kunze had charged out of their position. Had he known Feidmann's fear at the time, or if he should ever find him again, he would personally execute the coward. Observations – Nice little scenario forcing the German to attack against a timetable. British side could have set up better, leaving their armor in view for a horrendous hail of AT fire leading to a bloody end. Those tanks would have been very helpful when German infantry started to move up. Without them, little chance the Brits could survive against an aggressive German. German player would have preferred more time to soften, but the scenario doesn’t allow all that much. Misreading X results on the arty table as destroying armor certainly hurt. BTW, the Brit arty is significant. Really forces the German to choose between a slow covered crawl or a quick and dangerous dash. As the game progressed, fear of friendly fire limited the effectiveness of the Brit arty, and most of it was wasted against near meaningless targets. All that arty takes guts once the forces are in close contact, and the Brit commander just didn’t have that level of intestinal fortitude. British players also tended to get a bit aggressive. The counterattacks against German tanks certainly slowed the German advance, but bad die rolls combined with follow-up German infantry meant the Brits had little to defend the town with. Of the five town hexes, only one survived on the Brit side. It had three platoons and shrugged off anything the Germans threw at it. Morale in BN is fascinating. The German morale makes risky moves possible as they can shrug off a lot of morale checks. Of course, rolling two consecutive boxcars for the SS-Obersturmführer and an SS infantry platoon was harsh. Luckily for the German player the preceding roll of 11 for the SS-Standartenführer was against an 11 morale. Meanwhile, the continuously decreasing morale for the Brits means every step/leader loss is a huge gain for the Germans. Eventually British formations collapse, and mere morale checks become deadly. |
||||||||||||||
| 0 Comments |
| Normandie |
|---|
|
Second scénario de Beyond Normandy, sur la plus petite des trois cartes. Les Anglais, deux régiments complets et pas mal de chars, attaquent une ligne au nord de St-Mauvieu, tenue par des SS fanatisés ; moral 9/8. Kalman m'a préparé le barrage d'artillerie. Très mauvais début pour les écossais ! Le tir de barrage est au nord de la ligne de défense allemande, et en plus, leur placement initial ne les mettait pas à l'abri des Allemands ! Grosse gaffe de ma part... Les 88 allument les Achilles, et un peloton saute. (Blindage de 1 contre tir AT de 8, c'est vite vu, même à 9 hexs de distance.) Pour la suite, les avions essaient d'avoir les 88mm, mais ceux-ci sont robustes. J'ai joué le deuxième tour, rien de plus pour les écossais. J'ai fait les quatre premiers tours. Bombardements sans effets pour l'instant, et les avions qui se concentrent à chaque fois sur les 88 n'ont pas plus de succès. Les écossais vont devoir bientôt avancer sans avoir rien entamé. C'est mal emmanché. Les écossais vont commencer à avancer et sortir du couvert, sinon leurs renforts n'auront pas la place d'entrer. Mais les cornemuses sonnent faux, je n'ai pas assez affaibli la ligne adverse, il va falloir essayer de les submerger... Les écossais en Normandie : la suite ne s'arrange pas ! Après un bombardement infructueux, les deux régiments avancent sur deux axes de pénétration distincts. A l'ouest, le long des colonnes 12xx-13xx, avec des chars car il n'y a pas de canon de 88 pour les allumer dans ce secteur ; au centre, le long des colonnes 17xx-18xx, mais que de l'infanterie, les 88mm sont en 2210 et 2310 et couvrent cet axe. Le tir allemand est dévastateur, et quand les écossais arrivent au contact, ils découvrent les champs de mines. Je n'avais encore jamais vu les mines, mais j'ai tiré des champs de 2 et 3, et par la suite quelques 6. Un peloton de Churchill qui saute... J'arrive quand même à passer à l'assaut colonne 13xx, et en deux-trois tours, je dégage un passage. A l'est, ça se passe beaucoup plus mal ; les allemands couvrent beaucoup plus, ont leurs meilleurs officiers dans le secteur qui arrivent à monter des groupes de tir de 22. J'ai réussi à monter un assaut pourles alliés, mais avec un seul peloton d'infanterie et derrière tout le monde s'est barré, démoralisé !!! Et les renforts qui devaient arriver depuis une heure ne sont toujours pas là. Les chars écossais vont pénétrer à l'Ouest, ils ont franchi la ligne, mais les allemands ont déplacé un de leurs deux 88 mm. Il va falloir que l'infanterie se rue pour le faire taire, mais sous le feu d'autres équipes. Il est 10 heures 15 et ça sent le roussi pour les alliés... Les parties de la fin de la guerre sont vraiment beaucoup plus mortelles que celles d'Eastern Front, je ne me rends pas compte si c'est historiquement justifié. J'aime bien dans Beyond Normandy et Battle of the Bulge ce côté heavy metal, même si j'ai un peu de mal avec la densité des pions. J'apprécie quand il y a quelques Fog of War ; je vais regarder encore les règles de blitz de kalman. Le côté un peu contourné du paysage dans Beyond Normandy est sympa, mais c'est dur de décider les lignes de vue. Les écossais n'arrivent décidément pas à passer au centre, je vais peut-être essayer de tout envoyer par l'ouest (l'ouest est en haut de la photo). Pour l'instant, le 88 a loupé les Churchills, mais l'infanterie qui se rue pour les éliminer a été disruptée par un tir d'opportunité d'une HMG dans les bois. Je me demande comment ça va tourner au prochain tour. Quelques tours de plus : les Ecossais ont changé de plan. On va essayer de passer toutes les forces par la brêche ouverte à l'Ouest. Les chars se ruent sur le 88, l'infanterie a été mitraillée et bloquée. Des tirs à bout portant font sauter le 88 qui a lamentablement raté tous ses tirs, même avec le bonus de +1 pour tir adjacent (sans compter le +2 de différentiel avec le blindage des Churchill). Les allemands recréent un front dans le bois, et tirent dès le premier tour leurs renforts de chars alors que les renforts alliés poireautent depuis plus d'une heure. Les Pz IV se répartissent autour des Churchills ; le tour d'après, toute une série de tirs de chars à bout portant, avec des bonus de Xfire à +2, mais rien, aucun jet de dés sur une bonne dizaine (avec l'efficacité des chars) ne dépasse les 6 ! Le tour d'après, les allemands ont de nouveau l'initiative et cette fois suppriment les Churchills et démoralisent l'Avre. Ils ont perdu un pas et les chars qui étaient en réserve à l'est arrivent au Nord, après avoir renoncé à leur pénétration initiale. La bataille de chars ne fait que commencer. J'ai fini le scénar avant de partir en vacances : les écossais ont percé une brèche à l'ouest de la ligne allemande, mais ceux-ci arrosent depuis les bois situés à l'est. Ils ramènent aussi des forces de l'est de la ligne pour couvrir Saint-Mauvieu. Les Ecossais montent à l'assaut dans les bois, Churchill contre PzIV, grosses pertes de part et d'autre mais quatre tours avant la fin, les bois sont toujours disputés. Victoire majeure allemande, les Alliés n'ont oobtenu aucun de leurs objectifs et ont perdu une vingtaine de pas ! |
| 0 Comments |
| A Serious Stonking |
|---|
|
So this was a massive, crushing British victory. Basically a brigade of British infantry and tanks, with ample artillery and air support, pounded a battalion of SS to pulp. The SS were dug in along a thin line across the relatively narrow battlefield, supported by some 88s, a 75 atg, and some 20mm AA. The British tank support, composed of two companies of Churchills plus multiple platoons of AVREs, Crocodiles and Achilles, moved out ahead of the infantry and engaged the dug in SS. A few tanks were lost to 88 fire, but these were soon silenced by repeated air attacks. The tanks got to point blank range with the SS and began to stomp them in their foxholes. After about an hour and a half of steady attacks the SS were in tatters, so the British infantry moved out. By the time they had closed with the German stragglers it was clear the situation for the nazis was hopeless, so I called the game. |
| 0 Comments |