
|
The Ridge Battle of the Bulge #34 |
||
|---|---|---|
| (Attacker) Germany | vs | United States (Defender) |
| Formations Involved | ||
|---|---|---|
| Germany |  |
276th Volksgrenadier Division |
| Germany |  |
896th Grenadier Regiment |
| Germany |  |
988th Grenadier Regiment |
| United States |  |
60th Armored Infantry Battalion |
| United States |  |
9th "Phantom" Armored Division |

| Total | |
|---|---|
| Side 1 | 2 |
| Draw | 0 |
| Side 2 | 3 |


| Overall Rating, 5 votes |
|---|
|
2.8
|
| Scenario Rank: 817 of 913 |
| Parent Game | Battle of the Bulge |
|---|---|
| Historicity | Historical |
| Date | 1944-12-16 |
| Start Time | 07:45 |
| Turn Count | 32 |
| Visibility | Day |
| Counters | 104 |
| Net Morale | 0 |
| Net Initiative | 0 |
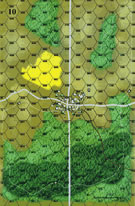
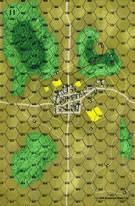
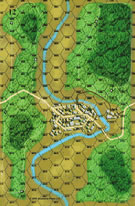
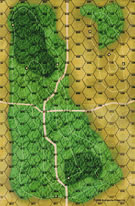
| Maps | 4: 10, 11, 12, 9 |
| Layout Dimensions | 86 x 84 cm 34 x 33 in |
| Play Bounty | 129 |
| AAR Bounty | 165 |
| Total Plays | 5 |
| Total AARs | 2 |
| Battle Types |
|---|
| Inflict Enemy Casualties |
| Rural Assault |
| Urban Assault |
| Conditions |
|---|
| Off-board Artillery |
| Terrain Mods |
| Scenario Requirements & Playability | |
|---|---|
| Battle of the Bulge | Base Game |
| Introduction |
|---|
|
On the far left flank of the German offensive, the LXXXrd Corps three divisions were to cross the Our and Sauer Rivers and drive back the Americans, principally those elements of the 9th Armored Division that held the line between the 4th and 28th Infantry Divisions. Two regiments of the 276th Volkgrenadier Division crossed on either side of the 60th Armored Infantry Battalion's positions at 0630. |
| Conclusion |
|---|
|
The 986th Regiment's advance was slow. Crossing the river was difficult and the predawn artillery bombardment did not touch the dug-in American armored infantry. As the lead grenadiers closed on the American positions they were pinned by heavy fire for the remainder of the the day. Better progress was achieved on the left by the 988th Regiment which managed to work around the right flank of the American position. Once the scope of the German attack was understood the 60th Battalion's reserve company was sent forward. By the end of the day the 60th Armored Infantry Battalion was close to being surrounded. |

|
|
|---|
| AFV Rules Pertaining to this Scenario's Order of Battle |
|---|
|
| Heer |
|---|
|


| Army |
|---|
|


| 3 Errata Items | |
|---|---|

|
The reduced direct fire value of the Heer HMG became 5-5 starting with Fall of France. (plloyd1010
on 2015 Jul 31)
|

|
The morale and combat modifiers of German Sergeant #1614 should be "0", not "8". (Shad
on 2010 Dec 15)
|

|
The M18 has a special rule in Battle of the Bulge but it applies globally: "A two-step M18 unit can fire one anti-tank shot and move half its movement allowance (retain fractions) in a single impulse. The order in which it does these two actions is the player's choice." (Shad
on 2010 Dec 15)
|
| The Ridge |
|---|
|
The Germans were to either clear all US units off Board 9, or take the town to the south. Assembling in the north, the German 986th and 988th would use the cover of hills as they coordinated their attack. At this point, my goal was to push the US off Board 9. The US were sparsely dug in on the ridge on Board 9, while other units were holding the southern town. US A and C companies were planning on holding their ground, directing artillery at the advancing Germans, and holding their fire until the Germans closed the distance. Their goal was to eliminate nine German steps and avoid the German victory conditions. By 0945, all German units had arrived. The 986th positioning to attack the US left flank, while the 988th would focus on the right flank. Within an hour, artillery attacks were being traded. The US forces were taking a beating on the ridge. The Germans quickly cleared the eastern portion of the ridge and were making good progress in the west. At 1100, the Germans had only lost two steps. By 1130, the German 988th has swept through the US right flank, and a few of their units have moved west to help the 986th mop up the US forces dug in on the west end of the ridge. A US captain in town is also leading four platoons of M3 halftracks to the battle in an attempt to slow the German advance. Again, the German is trying to push all US units off the ridge, and ultimately, off Board 9. The US is trying to eliminate nine German steps. The situation at 1300 found the German 988th and 986th had joined up on the ridge and were continuing to assault US units desperately trying to delay the Germans. The Germans had some concerns about those halftracks, and started moving units in that direction to assault them. If the halftracks could be pushed back, the Germans may then be able to form a defensive line to repel any US units from Board 9. Within a couple of hours, US forces in the town did attempt a counter-attack, but they suffered significant casualties and many retreated. The counter-attack did result in several disrupted German units scattered along the south side of the ridge, but they were quickly replaced by good order platoons. At the end of the eighth hour, at 1545, the Germans had cleared Board 9. With a two-to-one superiority in manpower, they were able to insert fresh troops into their assaults. The strong German line would keep the US from attempting another counter-attack; however, the surviving US forces were largely disrupted/demoralized and would not be able to mount an attack anyway. The Germans ended up approaching to within two hexes of the town. They had fulfilled their goal and lost only seven steps in the process, earning the 786th and 788th regiments a victory. |
| 0 Comments |
| Catch me if you can | ||||||||||||
|---|---|---|---|---|---|---|---|---|---|---|---|---|
The Germans have to clear board 9 or clear a town on board 10 and the Americans only had to eliminate nine German steps. Since the Germans did not have a singe AT weapon (other than in assault), the US dug-in his HMGs, APCs and a bunch of leaders with combat factors in a line in front of the town. Due to the 5 hex HMG/APC range any German approaching would have to take two turns of heavy fire before they even begin to assault. On board 9, the US deployed a group of dug-in units farthest away from the German entry hexes. This would force the Germans to march 16 hexes through an OBA barrage before getting into assault range. This is where the victory conditions are so important to creating a good game and this is why I rated the scenario a 2. The German has to either assault a dug-in cluster of units or enter an urban assault without losing nine steps. Knowing that is near impossible the German player chose to clear board 9 with the understanding that he will lose more than nine steps but will be able to force a tie. The German units enter sporadically so they paused out of sight to group the units prior to the long march. Better to overwhelm the OBA with targets. The US sent out FOs but it was only a few turns until they were overrun by the advancing Germans. The Germans crossed the board to swarm the dug-in troops and lost six steps from OBA. US only needs three more. Eventually board 9 is cleared! A tie is assured! But wait... Once again the victory conditions let us down. To ruin the German victory condition the american just has to get one unit on the board 9 by the end of the scenario. Waiting until near the end of the scenario the Americans sprint their four APCs toward board 9. They all reached board 9 but two were snagged in an assault so they don't control the hex. The other two just dashed away from any approaching German. So in the end only the US had earned a victory condition (eliminating 9+ German steps) and therefore win the scenario. I don't like victory conditions that create such "gaminess". |
||||||||||||
| 0 Comments |