
|
Team Desobry III Battle of the Bulge #27 |
||
|---|---|---|
| (Attacker) Germany | vs | United States (Defender) |
| Formations Involved | ||
|---|---|---|
| Germany |  |
2nd "Vienna" Panzer Division |
| Germany |  |
304th Panzergrenadier Regiment |
| Germany |  |
3rd Panzer Regiment |
| United States |  |
10th "Tiger" Armored Division |
| United States |  |
502nd Parachute Infantry Regiment |
| United States |  |
506th Parachute Infantry Regiment |
| United States |  |
705th Tank Destroyer Battalion |
| United States |  |
Army |

| Total | |
|---|---|
| Side 1 | 3 |
| Draw | 0 |
| Side 2 | 1 |


| Overall Rating, 4 votes |
|---|
|
3
|
| Scenario Rank: --- of 913 |
| Parent Game | Battle of the Bulge |
|---|---|
| Historicity | Historical |
| Date | 1944-12-20 |
| Start Time | 05:30 |
| Turn Count | 40 |
| Visibility | Day |
| Counters | 151 |
| Net Morale | 0 |
| Net Initiative | 1 |
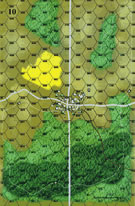
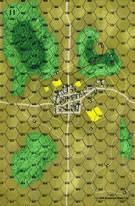
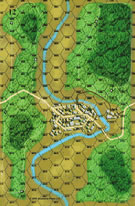
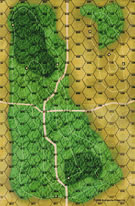
| Maps | 4: 10, 11, 12, 9 |
| Layout Dimensions | 86 x 56 cm 34 x 22 in |
| Play Bounty | 134 |
| AAR Bounty | 171 |
| Total Plays | 4 |
| Total AARs | 1 |
| Battle Types |
|---|
| Urban Assault |
| Conditions |
|---|
| Off-board Artillery |
| Terrain Mods |
| Scenario Requirements & Playability | |
|---|---|
| Battle of the Bulge | Base Game |
| Introduction |
|---|
|
Despite a successful defense of Noville on the 19th, German pressure was building. The paratroopers and Team Desobry survivors prepared to defend the town. Behind them other units of the 101st were filling in the perimeter as the defense of Bastogne solidified. |
| Conclusion |
|---|
|
The German attack was better coordinated than that of the previous day and the German tank-infantry teams advanced in strength on Noville. Fog and smoke from burning vehicles lent a strange halo to everything and prevented long-range fire of any type. The remaining Shermans of Team Desorby ran out of armor-piercing ammunition and the Americans withdrew to the Bastogne perimeter. |

|
|
|---|
| AFV Rules Pertaining to this Scenario's Order of Battle |
|---|
|
| Heer |
|---|
|


| Airborne |
|---|
|


| Army |
|---|
|


| 6 Errata Items | |
|---|---|
| Scen 27 |
Confusing set up directions for Germans: "...within 3 hexes of the east edge and withing 3 hexes of the north edge." Could mean within 3 hexes of the entire north edge and within 3 hexes of the entire east edge. Or it could mean a 3 hex by 3 hex zone in the very northeast corner. Since even triple stacking all the German units wouldn't fit in the little northeast zone, I interpret the instruction to mean all across the north and east edges. (arixius
on 2014 Sep 03)
|

|
The reduced direct fire value of the Heer HMG became 5-5 starting with Fall of France. (plloyd1010
on 2015 Jul 31)
|

|
All SS PzIVH tanks should have a movement of 8. (Shad
on 2010 Dec 15)
|

|
The morale and combat modifiers of German Sergeant #1614 should be "0", not "8". (Shad
on 2010 Dec 15)
|

|
All SPW 251s have an armor value of 0. (Shad
on 2010 Dec 15)
|

|
The M18 has a special rule in Battle of the Bulge but it applies globally: "A two-step M18 unit can fire one anti-tank shot and move half its movement allowance (retain fractions) in a single impulse. The order in which it does these two actions is the player's choice." (Shad
on 2010 Dec 15)
|
| Battle of the Bulge #27 | ||||||||||||
|---|---|---|---|---|---|---|---|---|---|---|---|---|
I always try to at least give an idea of why a scenario receives a rating of "1". This one unfortunately is a complete mess. To start with, the scenario instructions are unclear at best, unusable at worst. As others have noted, the setup area for the Germans as written cannot house all of their units, even when triple stacked. This leaves the players to try to discern intent if "and" should be"or" or if the area should be an enter the board from these hexes instruction (which is common in this module), or something else entirely. It doesnt end there. This scenario does not tell us to ignore the town on board 11 (we have been in the other two Desobry scenarios, and I believe this is intended to be the same ground. The other two Desobry scenarios are also inconsistent as to which woods/hills are in play, and if the ignored towns count as roads. This one is no exception. The puzzling thing even moreso is that it adds board 12 and it's town into play, unoccupied (with no road in the place of the river which is ignored mind you). End result? No matter how you interpret setup, the Germans (historical attackers) will occupy the now present towns on boards 11 and 12 and wait for the already weakened Desobry force and reinforcing paratrooper infantry force to attack them. VC's from sitting in these towns is enough for the Germans to win, and any attack from the weaker Americans (and associated step losses) is icing on the cake. So really, the setup instructions are a complete mess, it produces a completely ahistorical action, and it is completely imbalanced in favor of the Germans. These are not uncommon of course (BotB was the low point in PZG scenario design IMO), but altogether in one go is a rough experience. I am curious at the high ratings this scenario has. I am using the first printing book, maybe the scenario received updates in the second printing? Unfortunately there are no other AARs with which to compare. As one last aside, if you ignore all the problems and play this one historically anyway, the Germans will still overrun the Americans without much difficulty anyways. |
||||||||||||
| 0 Comments |