
|
Barely Holding On Battle of the Bulge #15 |
||
|---|---|---|
| (Attacker) Germany | vs | United States (Defender) |
| Formations Involved | ||
|---|---|---|
| Germany |  |
28th Engineer Battalion |
| Germany |  |
304th Panzergrenadier Regiment |
| Germany |  |
Heer |
| United States |  |
110th Infantry Regiment |
| United States |  |
630th Tank Destroyer Battalion |
| United States |  |
707th Tank Battalion |
| United States |  |
Army |

| Total | |
|---|---|
| Side 1 | 8 |
| Draw | 0 |
| Side 2 | 2 |


| Overall Rating, 10 votes |
|---|
|
3.3
|
| Scenario Rank: 548 of 913 |
| Parent Game | Battle of the Bulge |
|---|---|
| Historicity | Historical |
| Date | 1944-12-16 |
| Start Time | 08:00 |
| Turn Count | 50 |
| Visibility | Day & Night |
| Counters | 104 |
| Net Morale | 0 |
| Net Initiative | 1 |
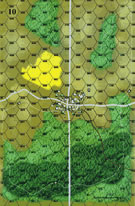
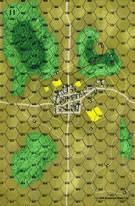
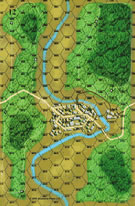
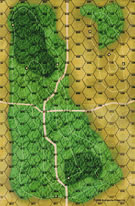
| Maps | 4: 10, 11, 12, 9 |
| Layout Dimensions | 86 x 84 cm 34 x 33 in |
| Play Bounty | 130 |
| AAR Bounty | 165 |
| Total Plays | 10 |
| Total AARs | 2 |
| Battle Types |
|---|
| River Crossing |
| Urban Assault |
| Conditions |
|---|
| Off-board Artillery |
| Reinforcements |
| Terrain Mods |
| Scenario Requirements & Playability | |
|---|---|
| Battle of the Bulge | Base Game |
| Introduction |
|---|
|
The defense of the Clerf-Reuler-Marnach area was the responsibility of the 110th Infantry Regiment. Initially thought to be only a local attack, the German offensive was resisted by Lt. Col. Donald Paul's 1st Battalion. Paul soon found he had a lot more to handle than he had believed possible. |
| Conclusion |
|---|
|
The Germans were only able to push lightly-armed infantry across the Our River initially, and these were repulsed as they neared Marnach. The Americans managed to retain control of Marnach (the town on Board 11) and seriously disrupted the XLVII Panzer Corps' timetable. Second Panzer Division's lead elements had been disorganized and it took all night to get the attacking elements reorganized and reinforced. |

|
|
|---|
| AFV Rules Pertaining to this Scenario's Order of Battle |
|---|
|
| Heer |
|---|
|


| Army |
|---|
|


| 2 Errata Items | |
|---|---|

|
The reduced direct fire value of the Heer HMG became 5-5 starting with Fall of France. (plloyd1010
on 2015 Jul 31)
|

|
All SPW 251s have an armor value of 0. (Shad
on 2010 Dec 15)
|
| Lackluster ending. | ||||||||||||
|---|---|---|---|---|---|---|---|---|---|---|---|---|
The beginning of this scenario had a great deal of interest in it. Particularly the Northern town, easily taken over by the M8 unit and required either retaking, which would split the German forces, or to leave it alone and bet on taking of the most western town.... more than enough to make a win. You could not do both. (Well, maybe.) As it was, taking the western town turned into a slugfest. ..... making the end of the game boring. |
||||||||||||
| 0 Comments |
| Battle of the Bulge Scenario 15 | ||||||||||||
|---|---|---|---|---|---|---|---|---|---|---|---|---|
The Americans set up based on limiting set up instructions and cannot move until the Germans let them through a few criteria. The Town on board 11 is the first target, so the Germans enter the board and sit and wait on the Southern Hill until reinforcements arrive. Once roughly half of them are on board, they overwhelm the town taking 4 GREN step losses but wiping out all the defenders.They then move towards 12, moving one platoon of GRENS north to 10 to secure the hexes, and let the rest of the initial reinforcements hold off the American counterattack from their reinforcements. The main force sits and OBAs the town on 12 until the last reinforcements arrive and wipe them all out. Fairly straightforward. German win. Not a whole lot to add. It seems to balance out these scenarios time should be significantly reduced so the Germans cant attack as one overwhelming force... |
||||||||||||
| 0 Comments |