
|
Squeezing Jarmin Alaska's War #8 |
||
|---|---|---|
| (Attacker) United States | vs | Japan (Defender) |
| Formations Involved | ||
|---|---|---|
| Japan |  |
303rd Independent Infantry Battalion |
| United States |  |
7th Infantry Division |

| Total | |
|---|---|
| Side 1 | 1 |
| Draw | 3 |
| Side 2 | 3 |


| Overall Rating, 7 votes |
|---|
|
3
|
| Scenario Rank: 726 of 913 |
| Parent Game | Alaska's War |
|---|---|
| Historicity | Historical |
| Date | 1943-05-17 |
| Start Time | 05:15 |
| Turn Count | 22 |
| Visibility | Day |
| Counters | 38 |
| Net Morale | 0 |
| Net Initiative | 0 |
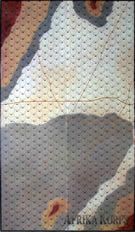
| Maps | 1: AK3 |
| Layout Dimensions | 88 x 58 cm 35 x 23 in |
| Play Bounty | 154 |
| AAR Bounty | 159 |
| Total Plays | 7 |
| Total AARs | 3 |
| Battle Types |
|---|
| Road Control |
| Conditions |
|---|
| Hidden Units |
| Severe Weather |
| Terrain Mods |
| Scenario Requirements & Playability | |
|---|---|
| Afrika Korps | Maps |
| Alaska's War | Base Game |
| Battle of the Bulge | Counters |
| Guadalcanal | Counters |
| Introduction |
|---|
|
The American assault on Jarmin Pass continued for several days with little progress. The Japanese slipped from position to position, and even with the landing of more of the 7th Division's artillery the advance could not be resumed. But the American success at Moore Ridge freed up troops from Northern Force, which attacked from the opposite side of the pass. |
| Conclusion |
|---|
|
The Japanese could not hold against an attack from two directions, and with the Northern Force's advance the pass no longer held much strategic value. The Japanese began to slip away unseen, and withdrew back toward Chichagof Harbor undetected by the Americans. |

|
|
|---|
| Imperial Japanese Army |
|---|
|


| Army |
|---|
|


| Marine Corps |
|---|
|

| Alaska’s War, scenario #8: Squeezing Jarmin | ||||||||||||
|---|---|---|---|---|---|---|---|---|---|---|---|---|
*These Alaska’s War scenarios are fast playing because there is a lot of movement and a low unit count, so I enjoy playing them for a change as they give you a total different feel then the usual PG scenarios. *In this one, the Americans have two forces, one that enters from the south and one from the north and they must keep the trail clear of undemoralized Japanese that are in range of direct fire of that trail. The Scout unit quickly headed down the trail to flush out hidden Japanese units and served this purpose well but took a step loss in the process. The North Battle Group of Americans cleared their section of enemy units and had to join up with the South Battle Group of Americans to help them out, as more Japanese units were concentrated there. This provide to be very time consuming and in the end one disrupted Japanese Infantry unit was still in Direct-Fire range of the Trail cancelling the American victory, by maybe one turn, so it became a very close Draw, even though the Japanese lost 9 steps to the Americans 4 steps. Visibility, cold weather and terrain slows thing way down. |
||||||||||||
| 0 Comments |
| Alaska's War #8 Squeezing Jarmin |
|---|
|
The Axis set up dug in at center board where the road comes closest to the trail. As the Allies approached the Axis occupied the trail and dug in right under the guns of the Axis foxhole line in the nearby arctic hill hexes. When the Allies approached the Axis could not fire at all of the units that were coming foward. Because of this the Allies were able to get next to the Axis positons in good strength. The Allies then were able to wear down the Axis positions with close in direct fire causing step losses, disruptions and demorializations. During this exchange of fire the Allies got the best of it. They then began to assault the now weakened Axis positions. It was a slow process but by the end of the game only three Axis steps still were on the board and all were pushed beyond direct fire range from the trail. The Axis lost 12 steps and the Allies four. No Axis units were on the track. Allied major victory. The Allies were finally able to bring their full firepower to bear on Axis positions because of the attack from two directions which was made possible by the trail. When that happens the Axis have little chance except to try to make it expensive for the Allies. |
| 0 Comments |
| Clearing Jarmin Pass | ||||||||||||
|---|---|---|---|---|---|---|---|---|---|---|---|---|
Jarmin Pass proved to be a difficult objective for the Americans, but once Moore Ridge had been taken, US troops were able to attack the Japanese holding the Pass from both north and south. Although the US troops of the 7th Infantry Division were up before the sun on May 17, 1943, they did not take fire from the Japanese 303rd Independent Infantry Battalion until 0530 hours when units on the south track saw mortar fire from the southwest hill. At 0600, units on the central track were fired on by a machine gun nest on the east ridge. Both the Japanese infantry on the southwest hill and the HMG nest near the central track were neutralized by 0800, and the Japanese Captain in charge of the battle lost his life when the mortar installation on the southwest hill was destroyed at 0845. However, during that time, hidden Japanese units had been moving toward the north end of the track from both east and west under the cover of heavy fog. Despite being under assault, an HMG platoon in the west and 2 infantry platoons in the east were able to keep the track within their firing range impeding American troop movement through the pass. The primary objective of this scenario is to have a clear track that is free of Japanese units and out of their direct fire range. Step losses play a role in secondary victory determination. This is another scenario where the Japanese player can hold back a few hidden units and make a run for the track later in the scenario in the hope of preventing US control. Japanese units were placed on both western hills and the east ridge with that intention. The Americans expanded their perimeter aligned on both sides of the track in an effort to identify those units before they could compromise the secure perimeter. In the end, although the three Japanese units noted above were under assault, they had the track within their direct firing range and were undemoralized, so they fulfilled one of the primary criteria. However, because the American only lost four steps to the Japanese total of seven steps loss, the scenario ended in a draw. |
||||||||||||
| 0 Comments |