
|
Second Try Airborne #14 |
||
|---|---|---|
| (Defender) Germany | vs | United States (Attacker) |
| Formations Involved | ||
|---|---|---|
| Germany |  |
352nd Infantry Division |
| Germany |  |
709th Static Infantry Division |
| United States |  |
501st Parachute Infantry Regiment |
| United States |  |
506th Parachute Infantry Regiment |
| United States |  |
746th Tank Battalion |

| Total | |
|---|---|
| Side 1 | 0 |
| Draw | 0 |
| Side 2 | 5 |


| Overall Rating, 5 votes |
|---|
|
3.4
|
| Scenario Rank: 461 of 913 |
| Parent Game | Airborne |
|---|---|
| Historicity | Historical |
| Date | 1944-06-07 |
| Start Time | 08:30 |
| Turn Count | 52 |
| Visibility | Day |
| Counters | 82 |
| Net Morale | 0 |
| Net Initiative | 1 |
| Maps | 1: 13 |
| Layout Dimensions | 43 x 28 cm 17 x 11 in |
| Play Bounty | 152 |
| AAR Bounty | 159 |
| Total Plays | 5 |
| Total AARs | 3 |
| Battle Types |
|---|
| Bridge Control |
| Urban Assault |
| Conditions |
|---|
| Off-board Artillery |
| Reinforcements |
| Terrain Mods |
| Scenario Requirements & Playability | |
|---|---|
| Airborne | Base Game |
| Eastern Front | Counters |
| Introduction |
|---|
|
Though his division fought very well on D-Day despite its scattered landings, Gen. Taylor remained concerned that his troops failed to blow or even attack the road and railroad bridges across the Douve River north of Carentan. Although the lock at La Bourquette and the two wooden bridges to the east were in American hands, the German-held highway bridge was an open door to UTAH Beach's southern flank. Taylor ordered the 506th Parachute Infantry Regiment to attack. |
| Conclusion |
|---|
|
German resistance halted the advance before the paratroopers even reached St. Come-du-Mont. The fighting raged all morning around the hamlet of Les Droueriers and ended with the withdrawal of the American force. |
| Additional Notes |
|---|
|
This scenario requires an SPW 251 counter from Eastern Front or other game and four Para counters from Battle of the Bulge or Elsenborn Ridge. |

|
|
|---|
| AFV Rules Pertaining to this Scenario's Order of Battle |
|---|
|
| Heer |
|---|
|


| Airborne |
|---|
|


| Army |
|---|
|


| 3 Errata Items | |
|---|---|
| Scen 14 |
In the German OOB, Sdkfz 251 should read SPW 251. (rerathbun
on 2012 Feb 12)
|

|
The reduced direct fire value of the Heer HMG became 5-5 starting with Fall of France. (plloyd1010
on 2015 Jul 31)
|

|
All SPW 251s have an armor value of 0. (Shad
on 2010 Dec 15)
|
| It only seemed like a lot of turns | ||||||||||||
|---|---|---|---|---|---|---|---|---|---|---|---|---|
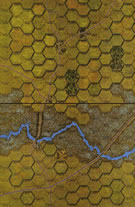
In this lengthy scenario, the Americans must capture or destroy the bridge in 0412, while the Germans must keep it intact and control. The counter density is high, and the Americans and Germans both start strung out across the length of the board. The Germans set up a heavy defense around the bridge, concentrating on guarding the approaches south of the river as the Americans start with a bridge on the east edge protected by a small force. The Germans set up in both northern towns in an attempt to slow the overwhelming American forces starting on the northern edge. They also push out to the east of the central town since the Americans are also present on the east edge. The Americans consider multiple strategies. The northern and central towns are not important, but bypassing them can leave Germans in the rear and allow a stronger German force once reinforcements arrive. They could also try to move to the center location and thrust into the German center, but without control of the roads that will be a long process and allow the Germans to pull back their northern forces into the defense line. Finally, they can move south and cross the river, threatening the Germans from the rear, while trying to pin the northern elements to prevent them from reinforcing the objective. This would be very slow, and allow German reinforcements to come in before any real damage is done to the defenders. The decision is to attack heavy from the north, probe in the center, and hold the eastern bridge in the south for later exploitation. The Americans come in fast and furious in the north. The first town is immediately in trouble, especially with the worst of German leadership supporting the line. It falls quickly, but not before some defenders can fall back. The second town quickly becomes a battleground, and the Germans are ejected in short order. Some fall back to the German center, while the rest are destroyed. In ten turns the Americans have taken both northern towns with small losses. In the meantime, both sides probe in the center, and when the Germans believe they have a great assault opportunity, they take it. It goes badly. The Americans direct some reinforcements, and the starting German troops in the center collapse quickly. But the Americans take some losses, and are badly shaken. In the south, a German attempt to probe towards the American bridge also goes badly, but withdrawals with minor losses. Over the next ten turns the Americans launch a bi-directional attack on the German center. German reinforcements come on the board and make it a bloody mess for both sides. Some reinforcements split off to help the German south, but most charge north including all armored units. Eventually over ten turns the Americans take the town, but at significant damage to both sides. The Germans lose their transports, but retain their tanks. The Americans lose half their tanks and one ATG. German center forces are mostly wiped out. While American losses are much lower, most of the American force is disrupted or demoralized. Twenty turns in and the German losses are significant enough that this begins to look like an easy win. The Americans take ten turns to recover and position their forces for the attack on the bridge. Reinforcements have moved east and south to assist a larger force to come across the river and attack from the east. The Germans are fully recovered, dug in where possible, and waiting for the inevitable onslaught. The town hex containing the bridge is well defended, tanks, ATGs, and machine guns, with flanking forces covering adjacent hexes. The attack comes. The narrow front causeway and swamp approaches prove difficult to move enough force into assault position. The Germans are chewing up Americans on the approach. When the Americans think they’ve got the upper hand, they bring in the tanks. And then lose the initiative roll the next turn. And the American tanks are burning hulks. Attacks from the south of the river move in well, pushing aside resistance until reaching the town at 0613. At that point the southern advance turns to a crawl. The Americans finally get into position for the assault. Supporting forces are largely disrupted or demoralized, and fleeing the scene, but the Americans get a force into the town. The Germans have a quick upper hand, and pound the assaulting Americans. But gradually the Germans suffer a couple steps, and the degradation of German defenders causes that slight shift in advantage. The Americans are now approaching from the north and south, several German units not in the town are tied down in assaults, and the Americans can move the engineers into the town to try and blow the bridge. The Germans have resisted well enough that the clock shows blowing to be a better strategy than capture. The Germans launch a desperate counterassault and mange to demoralize the engineers, but at the cost of another German step. The Americans spend time recovering and moving stronger troops in to support the engineers. Another desperate German counterassault fails, and on turn 49 the Americans succeed in blowing the bridge and gaining victory. The body count is bloody. The Germans only have 2.5 Grens, 0.5 HMG, and one step of tanks left on the board. The Americans lose 22 steps, to include all their tanks. A hard fought battle. And what seemed like an infinity of available turns (52) turns out to be a close call. Loved this scenario. So many options, so much action, so much tension. As I said, what I thought was a long time turned out to be a stressor for the Americans at the end. The Americans were never really concerned over time, but the idea of capture disappeared as the clock hit turn 46. Lucky rolls on either side were cancelled out by similar rolls from the other. Mistakes on both sides also cancelled. There was enough time and activity to equalize good/bad luck. I think the Americans had a slight advantage, but the task is still daunting. Highly recommended. PS: Went back and modified this play to rate it a 5. Without question, my favorite in the box, earning it my very limited distribution of 5. |
||||||||||||
| 0 Comments |
| Digging trenches in basements; driving Jeeps through hedges | ||||||||||||
|---|---|---|---|---|---|---|---|---|---|---|---|---|
Well, the Germans were miraculously able to dig in while in a town, and the war gods didn’t notice…the Americans had dug in near one bridge while keeping a sharp eye out for any German troop movement. Meanwhile, near the objective, the Germans had dug in so far that they couldn’t see the tree roots before them. American paratroopers plopped out of the sky and formed up, moving en masse toward the first of 2 towns ahead, knowing the Germans had taken the second town. Using the first town and the miles of hedgerows as cover, they advanced until they had literally wrapped themselves around the German army, not firing one shot to reveal themselves. The Germans, knowing they were coming, moved some troops towards the town from behind to assist. At this point, the world caught fire as advances, and then assaults began on this poor little town. American and German blood looks remarkably similar, and even though rules had been disrupted (the Germans, of course cannot dig into a town), the Americans were handed lawn mowers and ordered to push. They took some serious damage, but soon the Stars and Stripes were in every window. There was not much left of the German army to retreat, but retreat they did; all the way back to the bridge, what they had not realized is that the American army, defying all laws of physics and hedgerows, had towed a really big gun toward the bridge, its Jeep laden with a Lt. Colonel and, yes, the engineer. When they got close enough to pound the bridge they held until the rest of both armies (the other bridge being abandoned for better use) to have a nice little party in which the Germans again could not roll their way out of a dice tower. The engineer did not get to blow the bridge up before the credits rolled, but they were American credits nonetheless… This was a fun, second real scenario for me. I obviously missed a few big rules, and I have the Jeep of the gods. I need to replay this soon, when I have the rules down better. Playing solo mostly, it can be game hours before I realized that Jeeps cannot go through a hedge… |
||||||||||||
| 0 Comments |
| Time for a Second (and Third, and Fourth) Try | ||||||||||||
|---|---|---|---|---|---|---|---|---|---|---|---|---|
The Americans start out with a big advantage in manpower and tank support, but have to bypass or eliminate some opposition to reach their objective. The German reinforcements including a tank squadron arrived fairly early, and the German tank was able to take out two steps of American tanks while they were involved in assaults. The American paratroopers then tied up the German tank unit in an assault while the American tanks took shots at it until they eliminated it. After that it was just a matter of time before the Americans surrounded, ground down and eliminated the Germans for a win. The scenario would rate more highly if it were more balanced. The Americans had plenty of time and manpower to eliminate the Germans and take their objective, despite what seemed to me a lot of bad American die rolls (Lots and lots of "1's" when assaulting and 6-8's when shooting). I'd suggest playing this one solo, but limiting it to 40 turns to give the Germans a better chance of holding out. |
||||||||||||
| 0 Comments |