
|
Second Best Airborne #8 |
||
|---|---|---|
| (Defender) Germany | vs | United States (Attacker) |
| Formations Involved | ||
|---|---|---|
| Germany |  |
59th Infantry Division |
| United States |  |
502nd Parachute Infantry Regiment |

| Total | |
|---|---|
| Side 1 | 0 |
| Draw | 2 |
| Side 2 | 2 |


| Overall Rating, 4 votes |
|---|
|
2.75
|
| Scenario Rank: --- of 913 |
| Parent Game | Airborne |
|---|---|
| Historicity | Historical |
| Date | 1944-09-18 |
| Start Time | 10:00 |
| Turn Count | 27 |
| Visibility | Day |
| Counters | 61 |
| Net Morale | 0 |
| Net Initiative | 1 |
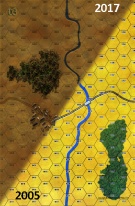
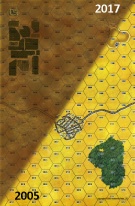
| Maps | 2: 3, 4 |
| Layout Dimensions | 56 x 43 cm 22 x 17 in |
| Play Bounty | 146 |
| AAR Bounty | 165 |
| Total Plays | 4 |
| Total AARs | 2 |
| Battle Types |
|---|
| Bridge Control |
| Inflict Enemy Casualties |
| Conditions |
|---|
| Off-board Artillery |
| Reinforcements |
| Scenario Requirements & Playability | |
|---|---|
| Airborne | Base Game |
| Eastern Front | Maps |
| Introduction |
|---|
|
After the failed attempt to take the town of Best and its nearby bridge, the entire 3rd Battalion of the 502nd Parachute Regiment made ready to drive the Germans out. At Zon, 7,000 yards to the east, the 2nd Battalion was ordered to circle north and attack in conjunction with the 3rd. |
| Conclusion |
|---|
|
The Germans blew up the bridge in late afternoon and withdrew after two British armored cars appeared south of the canal. The Americans didn't capture the town of Best until the Germans left, but never even seriously attempted it. Only the bridge truly mattered as a military objective. |
| Additional Notes |
|---|
|
This scenario requires boards from Eastern Front. |

|
|
|---|
| AFV Rules Pertaining to this Scenario's Order of Battle |
|---|
|
| Heer |
|---|
|


| Airborne |
|---|
|


| 2 Errata Items | |
|---|---|

|
The reduced direct fire value of the Heer HMG became 5-5 starting with Fall of France. (plloyd1010
on 2015 Jul 31)
|

|
The morale and combat modifiers of German Sergeant #1614 should be "0", not "8". (Shad
on 2010 Dec 15)
|
| Germans Come Out Second Best | ||||||||||||
|---|---|---|---|---|---|---|---|---|---|---|---|---|
Had a small space and a few evenings free, so tried this scenario, one of three in Airborne set during Operation Market-Garden. The Americans start with a large advantage in units (15 Para vs 8 Gren), although the Germans do get some reinforcements. The Americans set up in the woods south of the bridge and next to the town in the north. The Germans set up in the southern town (Best). The paratroopers win the initiative and make it to the bridge first. They begin digging in, while the Germans fire at them from medium range. They are hoping for an early arrival of their reinforcements so they can take the bridge before the Americans make it down from the north. The northern group of Paratroopers moves around the woods east of town and the two American forces combine. When the Geman armored car platoon arrives, the Americans have a choice: Remain dug-in around the bridge and allow the Germans to weaken them with direct and artillery fire, or assault and try to take out the armored car and Grenadiers in Best. The Americans opt for the aggressive approach, and manage to take out the armored car platoon in an assault. They move up into the town and begin to clear out the Germans. The German reinforcements continue to trickle in, but too slowly to allow them to hold the Americans. The scenario ends with the Americans dug-in around the bridge and holding all but one contested town hex. The Germans only inflicted five step losses on the Paratroopers. American victory. This is an interesting scenario, but it seems from my playing to favor the Americans. It could be improved with a different setup, requiring the Americans to set up in the woods north of the river. This would give the Germans a better chance to reach the bridge first, and make the Americans work to take it before the German reinforcements arrive. |
||||||||||||
| 0 Comments |
| Liked it, wanted to love it, but... |
|---|
|
The Americans decide to become very aggressive from the outset. They seize the bridge, and try to reek havoc on the Germans defending Best by going in on the assault. Before German reinforcements arrive, they invest the town and tie down most of the Germans. They inflict two step losses on the Germans, suffer one in return, and dig in around the bridge. At this point the Germans begin to realize they do not have sufficient force to take the bridge since so many troops are locked into combat in town. Attempts to send reinforcements to the bridge are met with significant artillery and direct fire from American forces, and they begin to die off or suffer morale hits. American aggression has placed them at three step losses after seven turns, and the Germans have suffered many more. The Germans begin to play for the draw. With the armored cars and the full strength HMG finally making it into town, the Germans begin the assault process. While the Americans are dealing out heavy losses, the steps of American casualties are adding up. On turn 15, the Germans need only one more step loss to make the nine needed for victory. The bridge is and always will be American. The Germans make one last gasp, sending in the ACs, HMG, and Gren against a heavily defended American position. The Americans inflict two step losses on the attackers, but the Germans pick up step loss nine and manage the draw. Their backs are broken, half the armored cars are burning, and they have no hope of executing another successful attack, but it was enough. The Americans, in their anger, take the next twelve turns to kill everything shy of the 20mm and one Gren platoon. That includes every German leader gone. The Americans take no more losses, all leaders are fine, but fail to win due to that last step loss. I liked the scenario from the point of view that the Americans had sufficient force to make a major attack against a decently strong German force. The Germans had enough strenght to deal out damage as well. The ACs, full strength HMG, and ENG units are their key players, and must be protected with cannon fodder troops up to the end. But the one shortcoming is the Germans are unlikely to survive and pull the draw if they engage for the bridge. It is tough for them to inflict the necessary losses AND take the bridge given the preponderance of American forces at the outset. The Americans can easily grab the bridge if they get the first initiative roll, then pile on any Germans attempting to seize it. Then it's hold on and inflict steps on the Germans simply to weaken them before the Germans can inflict nine. Playing for the draw was really fun, but it never seemed likely the Americans would actually lose. Wanted to give this a four, but the unlikelihood of the Germans ever achieving victory kept it at a grudging 3. |
| 0 Comments |