
|
To the Switch Line Afrika Korps #7 |
||
|---|---|---|
| (Defender) Italy | vs |
Australia
(Attacker)
Britain (Attacker) |
| Formations Involved | ||
|---|---|---|
| Australia |  |
16th Infantry Brigade |
| Australia |  |
2/5th Infantry Battalion |
| Australia |  |
2/7th Infantry Battalion |
| Britain |  |
7th Royal Tank Regiment |
| Italy |  |
157º Reggimento Fanteria "Liguria" |
| Italy |  |
63ª Divisone Fanteria "Cirene" |

| Total | |
|---|---|
| Side 1 | 12 |
| Draw | 2 |
| Side 2 | 3 |


| Overall Rating, 19 votes |
|---|
|
2.84
|
| Scenario Rank: 795 of 913 |
| Parent Game | Afrika Korps |
|---|---|
| Historicity | Historical |
| Date | 1941-01-03 |
| Start Time | 12:30 |
| Turn Count | 26 |
| Visibility | Day |
| Counters | 110 |
| Net Morale | 0 |
| Net Initiative | 0 |
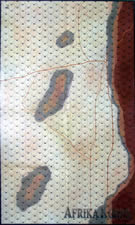
| Maps | 1: AK2 |
| Layout Dimensions | 88 x 58 cm 35 x 23 in |
| Play Bounty | 109 |
| AAR Bounty | 141 |
| Total Plays | 17 |
| Total AARs | 6 |
| Battle Types |
|---|
| Inflict Enemy Casualties |
| Rural Assault |
| Conditions |
|---|
| Anti-tank Ditches |
| Entrenchments |
| Off-board Artillery |
| Reinforcements |
| Terrain Mods |
| Scenario Requirements & Playability | |
|---|---|
| Afrika Korps | Base Game |
| Introduction |
|---|
|
Following the breakthrough of the Bardia fortress perimeter, companies of 2/5th and 2/7th Battalions began to roll up Italian positions on the southern flank of the penetration. Despite its overall setbacks, individual units of the Cirene Division sometimes fought back desperately. Others collapsed quickly. |
| Conclusion |
|---|
|
The Cirene Division repulsed the first attack, inflicting heavy casualties on one of the two lead companies. The Australians brought up reinforcements in the middle of the afternoon, including some of the unstoppable Matilda heavy tanks. The advance continued, even as night fell, but the Italians just barely managed to hold the Aussies back from most of their attack objectives. |
| Additional Notes |
|---|
|
The book calls for British Brens to be substituted for Australian Brens in the scenario OOB. Australian Brens are available in Waltzing Matilda. |

|
|
|---|
| AFV Rules Pertaining to this Scenario's Order of Battle |
|---|
|
| Army |
|---|
|


| Army |
|---|
|

| Regio Esercito |
|---|
|


| 1 Errata Item | |
|---|---|
| Scen 7 |
Setup calls for 5 Italian Capitani; there are only 4 in the counter set. Suggest adding a Maggiore to replace the missing Capitano - too bad he stands a good chance of this being a tombstone promotion...... (wleonard1
on 2013 Jun 20)
|
| Heroísmo italiano en Bardia. Los "Matilda" no pasan. |
|---|
|
En este escenario, efectivos italianos del tamaño aproximadamente de un regimiento esperan atrincherados el ataque de un batallón y medio de australianos, reforzados con dos secciones de tanques pesados británicos "Matilda". Los italianos disponen, además de la infantería y ametralladoras, de seis secciones AT de cañones de 47mm, tres secciones de morteros de 81mm, dos secciones de cañones AA de 20mm, un grupo de artillería de 65mm, una batería de artillería de 105mm, otra de 77mm y una batería fuera del mapa (1 x 13). Los australianos disponen sólo de dos secciones de morteros de 3 libras y de dos baterías de artillería fuera del mapa (2 x13). Los australianos tienen una moral elevada (8/8) y se benefician de la regla especial "Rendición". Los italianos tienen una moral más modesta (7/5). Los latinos gozan de la protección de 21 campos atrincherados, teóricamente dispuestos tras una fosa antitanque, que apenas es útil ya que el escenario comienza cuando los australianos han roto el perímetro defensivo italiano de Bardia y atacan desde el interior de éste. La fosa AT, por tanto, no supone una ventaja defensiva. Los "aussies" empiezan su ataque desde el ángulo noroeste del campo de batalla. Los italianos han repartido sus fuerzas más o menos equilibradamente sobre el terreno, en torno a las posiciones atrincheradas. Han desplegado inteligentemente sus piezas AT de 47mm, conscientes de que sin el beneficio de la regla "fuego cruzado" son incapaces de perforar los robustos blindajes de los "Matilda". El progreso australiano es lento, ya que los italianos se defienden bien. La artillería y morteros italianos son una verdadero tormento para la infantería enemiga, que enlentece su avance al tener que reorganizarse continuamente. Los "aussies" emplean como punta de lanza a sus dos secciones de "Matilda", buscando la rendición de las posiciones enemigas, pero los italianos resisten bien. No obstante, con el tiempo la presión australiana aumenta y comienzan a caer las primeras trincheras latinas, aunque lentamente. Los australianos son conscientes de su lento progreso y deciden dividir a sus tanques (hasta ahora habían avanzado y combatido juntos) para poder llegar a más posiciones enemigas. Esta medida da resultado y el avance de los "aussies" progresa notablemente, produciendo la rendición de varias posiciones italianas. No obstante, la infantería australiana sufre un duro castigo y no puede seguir a los tanques, por lo que algunas valerosas unidades italianas contraatacan y reconquistan posiciones perdidas. En algunos casos se produce una resistencia heroica: en el hex atrincherado 0912 y hexes contiguos los italianos, dirigidos por un coronel (10-1-1), protagonizan una defensa a ultranza desde los primeros turnos hasta el penúltimo, en que son desbordados y aniquilados; pero hacen pagar cara la derrota, destruyendo ¡nada menos que cinco secciones de vehículos "Bren" enemigos! En el hex atrincherado 0717 tres secciones de morteros italianos, a las órdenes de un teniente coronel, resisten hasta el último hombre hasta casi al final de la batalla tras haber sido la pesadilla de la infantería "aussie". El final del combate es reñidísimo. La batalla se decide en el último turno y en la última tirada de dados. Los italianos consiguen conservar 10 posiciones atrincheradas y causar 18 "steps" de bajas al enemigo, con lo que consiguen la victoria. Se trata de uno de los mejores y más emocionantes escenarios que he jugado este año. (He aplicado la regla especial "Rendición" que viene en el libro de escenarios, que me parece mejor que la que se aconseja en esta web). |
| 0 Comments |
| Waltzing Matildas | ||||||||||||
|---|---|---|---|---|---|---|---|---|---|---|---|---|
With all those entrenchments, it seemed daunting at first, but the Australian strategy was to move south and to the east of the anti-tank ditches and strike early. Using the Matildas to force Italian surrenders would be critical to achieve victory. The Italian strategy is to stay put, try to wear down the Australians, and hold on to 10 entrenchments by sunset. At 1645, the Australians hade made good progress, but still had 5 entrenchments to clear in only 2.5 hours to achieve victory. They decided to concentrate their efforts in the easternmost line of entrenchments to stay out of range of the Italian artillery positioned on the south hill. Again, success would hinge on how fast the Matildas could force surrenders along the line. At 1800, the Australians had cleared all but 7 entrenchments, and had Matildas adjacent to two of those. With sunset soon approaching, the victorious Australians pulled back slightly to avoid further losses. They had lost two officers, two platoons of Bren carriers, and one step of infantry. The primary reason for the Australian victory was the Matildas. When they approached the entrenchments, the Italians typically surrendered and the infantry avoided assaults that can be costly in terms of casualties. |
||||||||||||
| 0 Comments |
| An Unbalanced Battle, that the Commonwealth Force Probably Cannot Win | ||||||||||||||
|---|---|---|---|---|---|---|---|---|---|---|---|---|---|---|
This was an enjoyable 6-session play-through with the wily Treadasaurus as the leader of the defending Italians hiding behind a lot of spread out entrenchments. I tried my luck as the Australian/British leader of a combined arms force. We lost count of the number of Fog of War-shortened turns in this battle, but this rule certainly helped the defenders more than the attacking side. This scenario was a real slog to finish and it is VERY unbalanced in favor of the Italians. I recommend it for solo play only, unless you play it with the house rules that others have described in their AARs, especially as regards the confusing surrender rule. |
||||||||||||||
| 1 Comment |
| Australians with only a couple Brens try to take on a whole Italian Regiment (30 Infantry platoons!) | ||||||||||||
|---|---|---|---|---|---|---|---|---|---|---|---|---|
Italian Strategy: Concentrate set-up in the centre with AT-Guns and Artillery/Mortars. Try to funnel Australians into a “death zone”. The First Hour Australians begin to advance. Soon the Australians come under heavy fire and have their front men demoralized. Australian reinforcements arrive. Playnote: I only noticed afterwards that the reinforcements should have included two Matilda platoons. This would have made a huge difference. So, lets see what would have happened to the Australians without the 7th Royal Tank Support! The eastern Italian entrenchment surrenders as the Australian Captain is killed in action. The Second Hour Australians begin to get hit hard by Italian artillery and mortars. An Australian lieutenant is killed and their 81mm mortars eliminated. The next two Italian entrenchments surrender. The Third Hour Italian AA Guns and Infantry assault the Bren demoralizing them. The Italians surrender but the Bren is destroyed by an Italian AT Gun! The Australians head for the Italian artillery batteries in the southeast. Australians lose more men assaulting the Italians and Italian mortars claim more lives. Australian OBA (Off-Board Artillery) is too weak, and the Italians have too much artillery support! The Italian batteries in the southeast are overrun and the Australian company heads due west for the Italian rear. The Fourth Hour Australians push very hard to the Italian entrenchments. The Bren is keeping its distance from the Italian AT Guns. Boy, would a Matilda have come in hand about now Dug-in Italian infantry is eliminated leaving the Australians in the open who are hit very hard by the Italian line! The Fifth Hour The Australians can’t penetrate the concentrated Italians and the Bren is destroyed by long-range fire. On the south wing, the Australian company and the Bren capture an entrenchment. Australians suffer casualties in the centre and on the “wing”, losing two half platoons and another Lieutenant. Italian Colonel and Infantry surrender on the wing as the Australian casualties continue to mount in the centre, including another lieutenant. The Sixth Hour Australian OBA finally hits the mortar crews hard eliminated both of them as the Italian tenente deserts. The Australians continue to push the assaults but continue to suffer. On the wing, the distant entrenchment finally surrenders to the Bren. The Final Half Hour The next entrenchment in the south surrenders to the Bren which is in turn hit and destroyed by long range Anti-Tank fire. In the centre the Australians push the assault and the Italian HMG is reduced but not taken. Unsuccessful, the Australians withdraw. ITALIAN VICTORY!!! AftermathAustralian casualties were 10 steps and the Italians held on to 11 entrenchments. This is a narrow victory for the Italians. I think with the presence of the AT-resistant Matildas, this would likely have been an easy Australian Victory as they only required 3 more entrenchments. They would have also denied the Italians the steps they required, as they wouldn’t have had to put the Brens within AT Gun firing range. Still, an interesting battle but I didn't enjoy it as much as the previous ones. I believe this is the last of the 3rd January Bardia battles. |
||||||||||||
| 0 Comments |
| Badly Designed & Play-Tested Scenario | ||||||||||||||
|---|---|---|---|---|---|---|---|---|---|---|---|---|---|---|
This looked like it might be a decent scenario to try at only 26 game turns and with what looked like a somewhat balanced setup with the combined Australians/British side on offense, and the Italians defending a sector of the Bardia fortress perimeter. We played it out over 4 online sessions without the defense-favoring, fog of war rule, but with the smoke and consolidation rules in effect. I played the Australian/British side. It was a bloody thing with more than 40 Italian steps eliminated, as well as 8 leaders; as against 19 steps lost and 4 leaders eliminated on the Allied side. A hard-won Italian victory was the result as I conceded at the start of the 25th game turn when it became apparent that there was no way for the Allied side to prevail. As published, this one is lucky to get a 2 rating from me, as it was deeply flawed and deserves a 1. However, it was fun to play with the steadfast, Mr. Baumber, so this play-through got a slight better grade and a set of rule suggestions for others to try in future game play. Our play through was a " close run" thing that might have gone my way with a few more turns and better luck. Other reviewers have suggested that Afrika Korps scenario #7 victory conditions are seriously flawed in their AARs. As published, the Australians have to capture and hold at least 13 entrenchments that are held by a regiment-sized Italian force behind a stout line of AT ditches. My distinguished opponent and I have jointly compiled a suggested set of rule and victory condition revisions for this scenario in hopes of making it more fun and less frustrating for future players. Here are the suggested revisions that we came up with: Setup Changes - Italian Force - Delete 1, 47mm AT gun platoon - Add 1, HMG platoon Australian/British Force - Add 1 additional 3-inch Mortar platoon Scenario Special Rules The Australian/British side may use the smoke rule with 3 turns of smoke per individual mortar unit. The 4th Edition Panzer Grenadier Surrender Rules are in effect, but with two additions: 1) Surrender requests may only be made against INDIVIDUAL, DEMORALIZED Italian units in any terrain, by adjacent, undemoralized units with direct fire values that activate to request the surrender. The targeted Italian units may be supported by friendly leaders present in the same hex. Only the targeted unit is affected. 2) Undemoralized and undisrupted Matilda II tank units may request surrenders from INDIVIDUAL Italian units in any terrain, however, they must start adjacent to the Italian force. Only the individual targeted unit is affected. If the surrender request is either refused, or accepted, the Matilda II platoon may then activate to fire or assault.Replacement Victory Condition language The Australian/British player wins a victory by: eliminating 30 or more Italian steps, exiting 12 undemoralized steps of combat units across the south map edge, and occupying at least 6 entrenchments by the end of the scenario’s 26th turn. The Italian side wins if the Australian/British side does not. |
||||||||||||||
| 2 Comments |
Not that AK is known for balance... or even proofreading... but if you change up the Surrender rule like you are you are fundamentally playing a different scenario than is in the book. The Surrender mechanism paired with the Matildas is how the Allies (already facing an uphill battle) have any semblance of chance. They need to be triggering full Italian stack surrenders to clear the entrenchments basically just by showing up. That holds true for many scenarios in the module.
If the suggested scenario rules make for a more enjoyable play-thorough for others in shared play, then I think it is well worth including them in one's AARs. This is a game after all, not an olympic sport with rules written in stone. Since we each own a copy of this game, if the players wish to alter the rules to allow for more fun, or better play balance, that is their prerogative. Alternately, if they prefer to stick strictly to the rules and scenarios instructions that come with the game, it is once again, a matter of individual choice.
While I am relatively new to online PG play, I have noted: 1) the variation in the way that the game is played by the several individuals that I have had the opportunity to play with, as well as 2) the alternate rule sets that exist in the PG-HQ space.
| "Plucky" Italians hold off rampaging Maltida's just | ||||||||||||||
|---|---|---|---|---|---|---|---|---|---|---|---|---|---|---|
Played over 4 session on VASSAL, this scenario has a small but extremely well motivated Australian infantry supported by Brit Maltida tanks attacking Italian fortified lines. The Italians have to start spread out as they have to man every entrenchment but can soon consolidate around a main line especially if your opponent does not like the FOW rule. The initial Australian attack is repulsed with some losses for both sides, the few Aussie Bren gun carriers make some feint attacks but are dispatched by accurate long range shooting form the Italian anti tank guns. With the arrival of the Maltida's things slowly start to change and a strong Commonwealth thrust on the Italian flank using the line of A/T ditches as cover begins to change the momentum of the battle, however the Maltida's begin to forge ahead (typical British cavalry mentality) away from the INF, the tanks head for a gap in the anti tank ditch and begin to demand Italian surrenders while this is successful initially one brave Italian company led by the intrepid Lt de Christo charge one tank platoon and completely destroy it (a very lucky double 1) they then promptly surrender to the adjacent tank. Although Italian losses were now mounting up and entrenchments were slowly falling time and light was running out for the Commonwealth forces. As duck approached the Australian commander called of the attack. As the VC's stand this is a tough old ask for the Australian forces however not impossible and I think a well executed combined arms thrust might well succeed, the Maltida's asking for surrender and then Aussie infantry exploiting the gaps made by any surrenders. The VC's are not well written and my opponent has put forward new VC's with some small tweaks to the surrender rule and initial forces. I do not like the surrender rules overly much and am not sure they are realistic. I accept that there were times when large bodies of Italian and other troops did surrender but that was normally when the battle was almost over and they were looking at defeat anyway. The scenario itself as it stands is not overly exciting but is reasonably playable I hope that Felipe's amended rules make it a better game.emphasized text* * |
||||||||||||||
| 2 Comments |