
|
War on the Equator Africa Orientale Italiana #12 |
||
|---|---|---|
| (Defender) Italy | vs |
Britain
(Attacker)
South Africa (Attacker) |
| Formations Involved |
|---|

| Total | |
|---|---|
| Side 1 | 0 |
| Draw | 0 |
| Side 2 | 2 |


| Overall Rating, 2 votes |
|---|
|
3.5
|
| Scenario Rank: --- of 913 |
| Parent Game | Africa Orientale Italiana |
|---|---|
| Historicity | Historical |
| Date | 1941-02-21 |
| Start Time | 06:30 |
| Turn Count | 24 |
| Visibility | Day |
| Counters | 71 |
| Net Morale | 2 |
| Net Initiative | 1 |
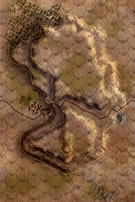
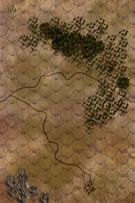
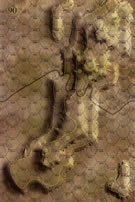
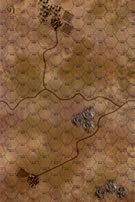
| Maps | 2: 84, 89, 90, 91 |
| Layout Dimensions | 86 x 56 cm 34 x 22 in |
| Play Bounty | 184 |
| AAR Bounty | 171 |
| Total Plays | 2 |
| Total AARs | 1 |
| Battle Types |
|---|
| Inflict Enemy Casualties |
| Rural Assault |
| Urban Assault |
| Conditions |
|---|
| Off-board Artillery |
| Smoke |
| Terrain Mods |
| Scenario Requirements & Playability | |
|---|---|
| Africa Orientale Italiana | Base Game |
| Introduction |
|---|
|
With the Juba River line broken, the South Africans along with two African divisions began to roll up the Italian positions and advance toward Mogadishu. The Italian colonial troops still had a good deal of fight left in them, and two battalions of them dug in at the village of Margherita, around a Fascist monument marking the Equator. It was an imposing marble construction, though not as imposing as the South Africans would later claim, and the Italian officers did not want to yield it up without a struggle. |
| Conclusion |
|---|
|
The 196th Colonial Battalion did not put up much of a fight, but the 49th more than made up for it and both sides inflicted serious casualties with their artillery fire. But the South African guns were bigger and more numerous, and by mid-afternoon South African officers were posing for photographs with Mussolini’s monument. |

|
|
|---|
| AFV Rules Pertaining to this Scenario's Order of Battle |
|---|
|
| Army |
|---|
|
| Regio Corpo di Truppe Coloniali |
|---|
|


| Regio Esercito |
|---|
|


| Army |
|---|
|


| 2 Errata Items | |
|---|---|
| Scen 12 |
Setup calls for an IT 77mm; not included in AII counter mix (TFGA73
on 2019 Sep 05)
|

|
Ignore the direct fire values. (Shad
on 2010 Dec 15)
|
| A win, but no prize | ||||||||||||
|---|---|---|---|---|---|---|---|---|---|---|---|---|
The Situation: The South Africans, all riding trucks with a company of armored cars in support, are gunning for a series of villages and the Italian Equatorial monument (the rules say use an airfield marker to represent the obelisk, but I broke out a small souvenir Washington Monument instead). Setup: The Italians have a rather strict setup, with about half required to start on one board with some villages and the other half on the board with the monument. Oddly, the two groups also have different morale levels, which became a pain near the end when they began mixing together. For the first group I set them up around the southernmost village I could and tried to use the thorn forest for a little cover. For the others, I dug in most around the monument with a small reserve force in the village just to the north. Summary: The South Africans enter from the southwest and and split up, with the bulk of the HMGs hitting the group guarding the villages and the armored cars leading the force going after the monument. At first it looked like a rollover, with the Springboks rolling quickly up to the Italian positions and laying down effective fire. But around turn 10 things bogged down, with the eastern force unable to break through to the monument over the course of about eight turns. They simply couldn’t pry the Italians out of their foxholes, and then the three FANs held in reserve were able to work their way in for an assault on the armored cars. They didn’t destroy any, but they kept them busy and allowed the other IT units to work over the SA infantry. The SA force to the west wrapped up their attack around turn 18 and hurriedly tried to pivot east and help take the monument. But their attack went in piecemeal and the SA force ran out of time. There are four victory conditions for the South Africans in this one; they got two, earning a minor victory, but they didn’t get the big win and, more importantly, they didn’t get the monument. Final losses were 11 steps for Italy and 5 for South Africa. Final Analysis: This is a game with a low number of units on four boards, but the action compressed pretty quickly. It’s tough for me to see a way for the South Africans to score a complete victory; they lack the firepower to quickly push the Italians out of the way and take all of the objectives. More of a solitaire game as the Italians pretty much stand in place until the end. |
||||||||||||
| 1 Comment |
Welcome to PG-HQ, Tommy. Great AAR! Keep them coming!