
|
Return Engagement Africa Orientale Italiana #2 |
||
|---|---|---|
| (Attacker) Italy | vs | Britain (Defender) |
| Formations Involved |
|---|

| Total | |
|---|---|
| Side 1 | 4 |
| Draw | 0 |
| Side 2 | 2 |


| Overall Rating, 6 votes |
|---|
|
3.33
|
| Scenario Rank: 540 of 913 |
| Parent Game | Africa Orientale Italiana |
|---|---|
| Historicity | Historical |
| Date | 1940-07-10 |
| Start Time | 07:00 |
| Turn Count | 24 |
| Visibility | Day |
| Counters | 46 |
| Net Morale | 0 |
| Net Initiative | 1 |
| Maps | 1: 91 |
| Layout Dimensions | 43 x 28 cm 17 x 11 in |
| Play Bounty | 158 |
| AAR Bounty | 159 |
| Total Plays | 6 |
| Total AARs | 3 |
| Battle Types |
|---|
| Urban Assault |
| Conditions |
|---|
| Smoke |
| Scenario Requirements & Playability | |
|---|---|
| Africa Orientale Italiana | Base Game |
| Introduction |
|---|
|
Rebuffed in their first attack on Kenyan Moyale, the Italians gathered more force for a second, better-supported attempt. Meanwhile the British had run in reinforcements of their own; though Moyale represented a meaningless dot on the map, East African Command did not wish to explain how the Italians had come to conquer British territory. |
| Conclusion |
|---|
|
With greater numbers, and some rather dubious artillery support, the Italians overran the British positions around Moyale and drove the KAR out of the town. Italian propaganda made much of the victory, but Moyale had little strategic value to either side beyond its status as a water source in a very dry region. |

|
|
|---|
| Army |
|---|
|


| Regio Corpo di Truppe Coloniali |
|---|
|


| Regio Esercito |
|---|
|


| 1 Errata Item | |
|---|---|

|
Two British infantry have their full strengths printed on the back. They should both be "2-3" when reduced. (Shad
on 2010 Dec 15)
|
| Meat Grinder. The Italians ran out of time and luck. |
|---|
|
This scenario is a challenge is for the Italians; the are tackling an attack against a built-up area, across open ground, with only a 2 to 1 superiority in troops, and only seven hours to take the town. The Italians, came close but failed this time. Leadership and luck seemed to be the determining factor between success and failure. The British drew some good leaders, this time. One had a morale modifier, and two had tactical modifiers which allowed the massing of fires. This time it was Italians who had overall poor leadership - only one leader had a modifier, and it was a morale modifier. In effect the Italians were unable to mass fires, meaning that they needed to close with the town hexes, assault them, and hope for the best. To do this, the Italians would task organize BAN platoons as part of their assaulting force to take advantage of the +1 assault modifier in combat. As with he previous scenario, the instructions were to hold the town. The Instructions are not clear, but I think it is the Farm/Orchard Space (0415) and a Field (0315) are supposed to be used as the town (it is the one thing that makes sense). The Italian Colonials need to set up anywhere in the top 30% of the Map. With more combat power, the Brits decided to task organize into three companies. One, without HMG support, was positioned in the rocky terrain forward and to the right of the British main battle position. The positioning of this company would prevent the Italians from easily maneuvering on the flank, and would help canalize Italian forces into the prepared engagement area north of the town. This British company had to be dealt with or contained by a fixing force before the Italians could close on the main British battle positions. The two remaining companies were arrayed south and southwest of the company in the rocks. Both had HMGs attached to them. One reinforced company held the town. The other reinforced company held dug-in positions, south of the road, parallel to the rocky ground to the north. To the south of this company I held a Mortar PLT, with an INF PLT and a leader dug-in.The Italians task organized into 2 x three company battalions with Bande split to support each battalion in its southern attack. The preponderance of the MIT were in the west. The Italians attacked with the regiment in line, battalions in line, and companies in line across a broad front. Initially the Italians were lucky. With very little attrition, they overran the KAR company in the rocks, and displaced the British with heavy casualties. The eastern battalion, now a little behind the western battalion continued south to carry the attack against the dug in company due south of the rocks, and the remnants of the British company from the Rocky terrain further north. The Italian western Battalion struck the British in the town after some serious demoralization due to opportunity fire as the Italian Battalion closed with the town. After moving adjacent, taking some hard lumps, the Italians set conditions by firing, point blank from one hex, and assaulting from another hex. The Italians, by dint of leadership, had to enter the town to assault in order to prevent being chewed up by point blank fire by the Brits. The Italians could only mass enough fire power in one hex to fire on the 16 column max (and only if adjacent to the town). The Brits ability to combine the fire from multiple hexes could fire at a 30 or more dependent on how the they were task organized. In the assault, the Italians had a chance. The Bande with their +1 column modifier, and the undemoralized leader modifier usually allowed the Italians an opportunity to assault with even odds or up to a one column advantage. The fight devolved into a slug fest. Over the course of the next almost six hours there were a series of back to back assaults, morale failures, recoveries, and lulls as reinforcements were rotated through the town in the west. In the east the Brits were pushed out of their foxholes about 400 meters to the south, right on top of their mortar position. The Italians could rarely massed more than 13 points into their assault. Brits rarely attacked in the assault, but opted instead to focus on regaining morale. The fighting in the town drew forces from the East. By the games end, the Brits lost 10 steps (40% of their force)- the Italians 9 (slightly more than 20%). Both sides had a significant amount of their forces demoralized by the end of the scenario. But it didn't really matter. The Brits held with a demoralized IN Platoon and leader in one hex, and two disrupted units in the other hex. The Italians ran out of time - with another turn or two it could have been a draw. With another hour, they could have been victorious. The Italians came close. I am convinced that with even slightly better leadership, the outcome would have been far different.Lessons learned Italians- 1) Effective use of time - The Italians made great use of time and closed on the town rapidly. Luck wasn't with them. 2) Task Organization is Critical - The Italians effectively task organized, and placed the one leader with a morale modifier where it would do the most good, in the town. The issue is that the Italians just couldn't help the average five platoons that were disorganized and had fled away from to the town to the Rocky terrain. 3) Keep focused on the objective. Italian planning was pretty good. Their maneuver was fairly effective in the beginning of the game. Their luck was even better for the first five hours of the fight. The eastern battalion was pushing the Brits back, and it was intoxicating. The eastern battalion almost drove the British right flank off of the map. Two single step INF platoons and a Mortar Platoon were within two hexes of the southern edge. Instinctively a commander wants to reinforce success, but victory hinged on actions occurring in the west - in the town. The town was invested and contested, but needed help to complete the victory. In the east, once the Company in rocky terrain had been dispersed, it would have been better to keep a small fixing force to the north of the British company dug in south of the road and maneuver the remainder of the Battalion around that British Companies west flank, penetrating the British lines at the center and isolating the town. Isolating the town early on, and prevented reinforcements from entering and bolstering the defense, may have ensured victory for the Italians. 4) Leadership is Critical - Even one leader with a tactical modifier of 1 would be helpful for the Italians. It would have allowed a change in Italian tactics, possibly allowing them to mass fires into the town, and perhaps degrade defending forces prior to assaulting; thus improving the odds of success for the assaulting force and easing the path to victory. Unfortunately for the Italians, this was not an option in this game. This one change would have altered the tactics pursued by Axis forces, and perhaps led to a successful assault. British - 1) Flexibility. When the Brits were overrun in the rocky ground to the north, the remainder of their forces coalesced on the defense to the south. The Brits should have added them to the reserve but didn't. While it helped slow down and even attrit the Italians, it meant that the Italians retained the initiative. If the Commander has a larger more robust reserve force, it could have allowed the Brits to contest the initiative on at lest part of the battlefield and force the Italians to adjust. 2) The Reserve - The one platoon reserve proved helpful when the mortars were being overrun. A larger reserve could have provided more options to the commander, and more combat power when needed. Overall, a fun game with lots of lessons learned. Italians came close to a draw and may have eeked out a victory, but fortune (Italians only won three initiative rolls our of 16) and time favored the KAR. |
| 0 Comments |
| Battle of the Rocks |
|---|
|
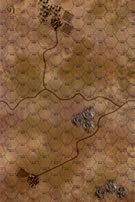
The rocks I refer to are at hexes 0911, 0910,0911 and 0810 on board 91.The British set up on the rocks, one of only a few geographical features on this board. The Italian nplayer had a simple objective: push the enemy off the rocks, and secure an avenue. of approach to the town. This was accomplished by turn 8. Italian casualties were high. British low. But the Italians had a much larger force than the British and could absorb the losses. Thus the Kings African Rifles, 1st Brigade, were pushed off the rocks and back towards Moyale. The game was halted in the 10th t urn, the British leaving the town to the Italians. |
| 0 Comments |
| Round two. | ||||||||||||
|---|---|---|---|---|---|---|---|---|---|---|---|---|
The Italians, reinforced, struggled to take that Southern most town. The British put up a temporary defensive line which was expected to hold for most of the game. However, the Italians sprung a surprise and broke through early and almost took the town, being held only by the Mortar Plt for a harrowing two move ordeal, while the rest of the British scrambled like eggs to get down to the town for a quick defense. Fortunately, the British Army, showing some of that stiff upper lip got back and held the town. (Lets hear it for the sons of Wellington!) |
||||||||||||
| 0 Comments |