
|
Panzer Lion III: A Promising Start Army Group South Ukraine #10 |
||
|---|---|---|
| (Attacker) Germany | vs | Soviet Union (Defender) |
| Formations Involved | ||
|---|---|---|
| Germany |  |
3rd SS "Death's Head" Division |
| Germany |  |
Grossdeutschland 1st Grenadier Regiment |
| Germany |  |
Grossdeutschland Division |
| Germany |  |
Grossdeutschland Fusilier Regiment |
| Soviet Union |  |
14th Guards Heavy Tank Regiment |
| Soviet Union |  |
27th Guards Tank Brigade |
| Soviet Union |  |
29th Tank Corps |
| Soviet Union |  |
81st Guards Rifle Division |

| Total | |
|---|---|
| Side 1 | 2 |
| Draw | 1 |
| Side 2 | 0 |


| Overall Rating, 3 votes |
|---|
|
4.67
|
| Scenario Rank: --- of 913 |
| Parent Game | Army Group South Ukraine |
|---|---|
| Historicity | Historical |
| Date | 1944-05-02 |
| Start Time | 12:00 |
| Turn Count | 24 |
| Visibility | Day |
| Counters | 252 |
| Net Morale | 0 |
| Net Initiative | 2 |
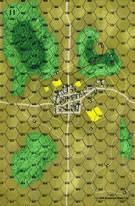
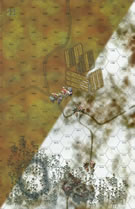
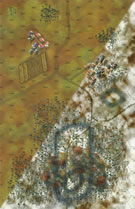
| Maps | 3: 11, 22, 23 |
| Layout Dimensions | 84 x 43 cm 33 x 17 in |
| Play Bounty | 213 |
| AAR Bounty | 165 |
| Total Plays | 3 |
| Total AARs | 2 |
| Battle Types |
|---|
| Rural Assault |
| Urban Assault |
| Conditions |
|---|
| Off-board Artillery |
| Randomly-drawn Aircraft |
| Reinforcements |
| Scenario Requirements & Playability | |
|---|---|
| Army Group South Ukraine | Base Game |
| Battle of the Bulge | Maps |
| Eastern Front | Counters |
| Elsenborn Ridge | Maps |
| Red Warriors | Counters |
| Road to Berlin | Counters |
| Introduction |
|---|
|
Just because Gen. von Manteuffel had sent his heavy panzers to handle another crisis did not mean he planned to take the defensive at Targu Frumos. SS Death's Head Division was ordered to advance from Helestieni and assist the grenadiers retreating from the fighting around Dumbravita in establishing new positions at Radui. Grossdeutschland's Panzer IVs were to provide assistance. The participants interpreted their orders creatively. |
| Conclusion |
|---|
|
SS Death's Head Division advanced steadily toward Rudinoassa while the Panzer IVs of Grossdeutschland cleared Radui on their way there. By sundown a promising start had turned into a catastrophe for the Soviets. |
| Additional Notes |
|---|
|
Scenario requires RKKA BM-13 pieces from Red Warriors - Guards BM-13 pieces from Road to Berlin may be substituted |

|
|
|---|
| AFV Rules Pertaining to this Scenario's Order of Battle |
|---|
|
| Heer |
|---|
|


| Schutzstaffel |
|---|
|


")
")
")
")


| Army (RKKA) |
|---|
|


| Guards |
|---|
|


| 10 Errata Items | |
|---|---|

|
The reduced direct fire value of the Heer HMG became 5-5 starting with Fall of France. (plloyd1010
on 2015 Jul 31)
|

|
The Pz IVe appearing in the original Panzer Grenadier game had an Anti tank value of 4-7. As of Afrika Korps (2002), continuing onward through the 3rd and 4th edition games, the anti tank value has been 4-4. (plloyd1010
on 2016 Jul 25)
|

|
All SS PzIVH tanks should have a movement of 8. (Shad
on 2010 Dec 15)
|

|
The morale and combat modifiers of German Sergeant #1614 should be "0", not "8". (Shad
on 2010 Dec 15)
|

|
All SPW 251s have an armor value of 0. (Shad
on 2010 Dec 15)
|

|
The reduced direct fire value of the SS HMG is 5-5 in Beyond Normandy and Road to Berlin. (plloyd1010
on 2015 Jul 31)
|

|
The reduced direct fire value in Kursk: Burning Tigers is 4-4. (plloyd1010
on 2015 Jul 31)
|

|
Kommissars never get morale or combat modifiers. Ignore misprints. (Shad
on 2010 Dec 15)
|

|
All Guards JS-IIs should have AT fire values of 8-8. (Shad
on 2010 Dec 15)
|

|
All Guards T-34/85 tanks should have AT fire values of 7-7. (Shad
on 2010 Dec 15)
|
| The Lion Ate the Bear | ||||||||||||
|---|---|---|---|---|---|---|---|---|---|---|---|---|
The Soviets had set up to cover the probable avenues of approach with AT crossfire and mutually supporting positions across maps 22/23. At the last minute the Germans decided to attack the northeast end of the Soviet line. The GD performed very well, chewing up the Soviet Guards on the hill and in the town. When the Germans entered on the south edge, the Soviets in the had to withdraw to the west. The Soviets were caught in a fire sac and decimated. Even with reinforcements later, they were unable to put a real hurt on the Germans. The German SS reinforcements cemented a lopsided german victory. Great scenario. |
||||||||||||
| 0 Comments |
| Panzer Lion III: They thinks its all over it is now! | ||||||||||||
|---|---|---|---|---|---|---|---|---|---|---|---|---|
What a wild scenario this is. Soviet forces deploy over three maps, with towns on all three to defend. The Soviet commander decided to leave the large town to the west (Board 11) largely undefended and have a SMG company mounted on trucks as a reserve. The initial German units come on from the north and attempted to take the first town on the "bounce", this attack was repulsed with heavy losses but has sucked in the Soviet reserves. The next wave of German reinforcements come from the south and caused the Soviet defenders in the east to retreat from their town without a fight. This was an error as German artillery hit them hard causing units to get disrupted and left as easy meat for the advancing panzers. The German commander also sent a battle group to disrupt the on board Russian morters,this worked well enough and the morters left to seek sanctury in the western town. By now the Soviet forces had been sucked into a large battle around the middle town, this battle they were winning but the Soviet's were hoping that the rumours of a SS division to the south were untrue. Alas these hopes were dashed and the Nazi horde swept up the road brushing aside the few units who had dug in before the town. This was a turning point on the western side, although Soviet troops hung on to the outskirts of the town more than 80% of the town would end in German hands. A tank battle had erupted on the eastern flank, this resulted in 10 PzIVH's destroyed but at the cost of 8 JSII's the elite of the Red Army's armour was now nothing but a twisted smoking wreck. The battle now settled down into one of attrition. The turns were flying by (4 quick turns due to FOW), this in fact helped the German as the late Soviet reinforcements did very little except dig in around the last town in Russian hands. as the game ended the German's were slowly chewing up the Soviet defenders and gaining VPs every turn. This exciting scenario ended in a major German victory but it really could have gone both ways. This was a solo game but I can see this being an even better FtF game. Play this one if you can |
||||||||||||
| 0 Comments |