
|
Kasserine Pass: Like a Stone Wall An Army at Dawn #31 |
||
|---|---|---|
| (Attacker) Germany | vs | United States (Defender) |
| Formations Involved | ||
|---|---|---|
| Germany |  |
10th Panzer Division |
| United States |  |
26th Infantry Regiment |

| Total | |
|---|---|
| Side 1 | 1 |
| Draw | 1 |
| Side 2 | 2 |


| Overall Rating, 4 votes |
|---|
|
4
|
| Scenario Rank: --- of 913 |
| Parent Game | An Army at Dawn |
|---|---|
| Historicity | Historical |
| Date | 1943-02-19 |
| Start Time | 15:30 |
| Turn Count | 18 |
| Visibility | Day & Night |
| Counters | 154 |
| Net Morale | 1 |
| Net Initiative | 2 |
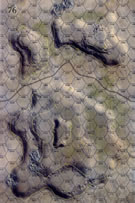
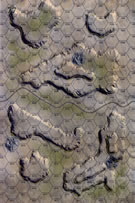
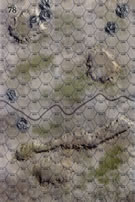
| Maps | 3: 76, 77, 78 |
| Layout Dimensions | 84 x 43 cm 33 x 17 in |
| Play Bounty | 172 |
| AAR Bounty | 171 |
| Total Plays | 4 |
| Total AARs | 1 |
| Battle Types |
|---|
| Exit the Battle Area |
| Hill Control |
| Inflict Enemy Casualties |
| Conditions |
|---|
| Minefields |
| Off-board Artillery |
| Reinforcements |
| Smoke |
| Terrain Mods |
| Illumination |
| Scenario Requirements & Playability | |
|---|---|
| An Army at Dawn | Base Game |
| Introduction |
|---|
|
Seeing the Allied position in disarray, the Axis command decided to take advantage with a counter-offensive to drive their enemies back into Algeria. Unfortunately for the Axis cause, at least four different commands had their own concept for the attack and issued orders accordingly. On the Allied side, II Corps commander Lloyd Fredendall seemed determined to match their confusion single-handedly. He phoned Col. Alexander Stark and told him to drive immediately to Kasserine Pass and take command of the assorted troops there. “I want you to go to Kasserine right away,” Fredendall told the astonished colonel, “and pull a Stonewall Jackson.” |
| Conclusion |
|---|
|
The Americans held the pass despite their poor organization and cohesion. After nightfall the commander of the British 26th Armored Brigade, Brigadier General Charles Dunphie visited the pass to see how to best employ his unit if needed. Colonel Stark assured him that everything “was well in hand.” Unfortunately, the colonel only had a vague idea where his units were deployed, and the brigadier encountered a fair number of German troops less than 400 yards from the command post. Fredendall refused Dunphie’s request to move his brigade forward and clear up the situation, despite Stark’s strong support for the British general’s idea. |
| Additional Notes |
|---|
|
Special rules for American poor burying of mines. |

|
|
|---|
| AFV Rules Pertaining to this Scenario's Order of Battle |
|---|
|
| Heer |
|---|
|


| Army |
|---|
|


")
| 4 Errata Items | |
|---|---|

|
The reduced direct fire value of the Heer HMG became 5-5 starting with Fall of France. (plloyd1010
on 2015 Jul 31)
|

|
All SS PzIVH tanks should have a movement of 8. (Shad
on 2010 Dec 15)
|

|
The morale and combat modifiers of German Sergeant #1614 should be "0", not "8". (Shad
on 2010 Dec 15)
|

|
All SPW 251s have an armor value of 0. (Shad
on 2010 Dec 15)
|
| Block those Panzers, Colonel! | ||||||||||||||
|---|---|---|---|---|---|---|---|---|---|---|---|---|---|---|
This was a 8-session play-through with the ever-dynamic and aggressive, goosebrown, as the attacking German Commander. I played the US Commander of an ill-quipped & over-extended, scratch force with inferior morale. We did not use the FOW rule, but did use the smoke, consolidation, extended assault, strategic movement and excess initiative optional rules. The 1st session (game turn 1) consisted of the, now-standard, boldy-aggressive, right flank (northern) mass attack mounted by the German infantry and the attached reconnaissance battalion. Three steps of American speed bumps in the form of dug-in AT gun platoons and infantry were eliminated almost immediately, as were a pair of German AT guns on the long, east-west ridge north of the road on Map 78. The second session (game turn 3) consisted of the continuing saga of the right flank-only mass attack of German infantry, predictably supported by armored cars. The battle field looked like Xerxes’ Persian columns versus the relatively few Greeks at Thermopylae as the Germans rapidly closed to decisive engagement range and discovered that the minefield on the north edge of the battle map was only a decoy. A final burst of smoke rounds from the supporting German mortars helped close that range and the first close assault began. A platoon of Pz-II light tanks in the former-decoy minefield hex was eliminated by long-range American AT fire, however all supporting Allied artillery was ineffective this turn. The spearhead of the German armor entered the battle field at the end of this turn, portending a left-flank, supporting thrust aimed at the US positions on 60-meter high, Djebel Chambi. The 3rd longish (no FOW) session (game turn 4 & the beginning of 5) started out with a bang when all 3 German armored car platoons - helplessly pinned in an assault hex - were reduced to scrap metal by American AT fire. The balance of the turn included a series of close infantry assaults by the Germans on the dug-in American positions on the northernmost hill of Map 76. A number of Battle Group Menton’s troops were now past the Thermopylae-like chokepoint in the north and were deploying to the adjacent plain. A movement-to-contact in the south of an amorphous mass formation of German armor, was met by ineffective long range AT fire from the top of Djebel Chambi. The final step loss count was: 4 for the US, and 12 for the rapidly advancing Germans. The fourth session (game turns 5 & the beginning of turn 6) saw the Germans, infantry-heavy right flank claw decisively engaging all but a single US stack on the north hilltop on Map 76. The last of the Axis AT guns were eliminated by heavy US artillery fire, while the onrushing horde of German armor on the left flank rapidly closed on the American defensive positions atop Djebel Chambi. The German Commander wisely kept a substantial reserve made up of a battalion of mechanized infantry in the off-board holding box, in order to back up his left flank armored spearhead. By the end of the session, step losses were up to 21 for the German side and 5 for the defending Americans. The 5th session (game turns 6-7) was characterized by furious close assault fighting as the German right flank column decisively engaged all remaining US infantry positions atop the northernmost hill on Map 76. A fast-moving American armored probe just south of that position managed to pin the remaining German Mortar platoons in a sweeping advance on the northern portion of Map 78. In the meantime, the left flank panzer attack continued and began seizing ground on the lower margins of Djebal Chambi, while also eliminating several AT SPAT guns. An ineffective US infantry counter attack at least managed to slow the onrushing tanks and forced them to redeploy in response. At session end, step losses were up to 25 for the German side and 9 for the defending Americans. The sixth session (game turn 8) featured a continuing set of hotly-contested infantry assaults in the north, and the movement of additional German armor into decisive engagement in the south on the margins of Djebel Chambi. Highlights of the fighting included: some surprisingly accurate American AT fire in the dusk-reduced remaining daylight; a decapitation of the top Axis leadership when the courageous Lt. Colonel was caught by an OBA concentration while leading his troops from the front; as well as the final demise of the German mortar company in an American armored assault. At session end, step losses were up to 33 for the German side and 14 for the defending Americans. The victory points total was now: 48 for the US side and 14 for the Germans. The 7th session (game turn 9) included fiercely-contested, attritional, infantry-heavy, close assaults in the north, as well as new tank-heavy German assaults on the margins of Djebel Chambi in the south. In the south, an American captain was killed while fleeing, and in the north a German Captain was captured as he fled. The luck of a pair of German SPW halftracks continued to hold, as they now became decisively engaged in the north. Another 3 steps of German armor was lost - remarkably - this included a step loss inflicted by a single, dug-in US infantry platoon in the south. The newly-deployed, APC-mounted Axis mobile reserve moved close enough to begin receiving incoming bombardment and long-range AT fire as nightfall further reduced battlefield visibility. The first Allied illumination mission resulted in the disruption of a entire German armored company by a surprisingly accurate onboard artillery concentration. The step loss totals were up to 38 for the German side and 19 for the defending Americans at the end of turn 9. The updated victory point total was now: 52 for the US side, and 19 for the Germans. The eighth session (game turn 10) was a grim one for the German side and the same batch of hotly-contested assaults in the north continued; heavy fire bombardment and direct fire was aimed at the mechanized strike force moving-to-contact in the center; and a cleverly managed, side-stepping movement began by the Boche armor on the south edge of Djebel Chambi. Highlights of this session included: multiple losses of German SPW units in the north and center to accurate American AT fire under illumination, and US counter attacks in the north that resulted in the capture of 3 German leaders, thereby bringing the total leader loss on the Axis side to 7. Oddly, only a single combat 7-die roll was thrown by the American Commander. Step losses this session increased for both sides, and the totals ended up at 45 lost for the Germans, and 21 lost for the defending US side. The updated victory point total was: 58 for the US, and 21 for the Germans. The very short ninth session (game turn 11) featured an honorable concession by the attacking German Commander when we jointly that further play would result in an inevitable US victory. |
||||||||||||||
| 0 Comments |