
|
Djebel Ksiara An Army at Dawn #26 |
||
|---|---|---|
| (Attacker) Germany | vs | United States (Defender) |
| Formations Involved | ||
|---|---|---|
| Germany |  |
5th Light Panzer Division |
| United States |  |
1st "Old Ironsides" Armored Division |

| Total | |
|---|---|
| Side 1 | 4 |
| Draw | 1 |
| Side 2 | 1 |


| Overall Rating, 8 votes |
|---|
|
3.5
|
| Scenario Rank: 417 of 913 |
| Parent Game | An Army at Dawn |
|---|---|
| Historicity | Historical |
| Date | 1943-02-15 |
| Start Time | 16:30 |
| Turn Count | 14 |
| Visibility | Day & Night |
| Counters | 56 |
| Net Morale | 1 |
| Net Initiative | 1 |
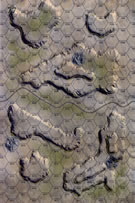
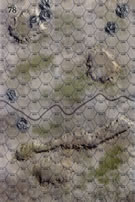
| Maps | 2: 77, 78 |
| Layout Dimensions | 56 x 43 cm 22 x 17 in |
| Play Bounty | 136 |
| AAR Bounty | 159 |
| Total Plays | 6 |
| Total AARs | 3 |
| Battle Types |
|---|
| Hill Control |
| Inflict Enemy Casualties |
| Conditions |
|---|
| Off-board Artillery |
| Smoke |
| Terrain Mods |
| Illumination |
| Scenario Requirements & Playability | |
|---|---|
| An Army at Dawn | Base Game |
| Introduction |
|---|
|
In their haste to take Sidi Bou Zid, the Germans chose to screen rather than eliminate the opposition on Djebel Ksiara on the 14th. With their primary task accomplished, they turned their attention to repelling the expected counterattack. Next, having decisively defeated the counterattack, they returned to the American holdouts on Djebel Ksiara. |
| Conclusion |
|---|
|
This time the Germans underestimated their opponents. Instead of the company they expected to displace from the hilltop, almost a full battalion awaited them on Djebel Ksiara. The Germans spent little time pressing the attack once they realized their mistake, but the Americans remained isolated. The following night the 1,900 men of the 168th Infantry Regiment defending Djebel Ksiara and Garet Hadid attempted to break out and reach friendly lines. Only one officer and a few men managed to make good their escape. |

|
|
|---|
| AFV Rules Pertaining to this Scenario's Order of Battle |
|---|
|
| Heer |
|---|
|


| Army |
|---|
|


| 3 Errata Items | |
|---|---|

|
The reduced direct fire value of the Heer HMG became 5-5 starting with Fall of France. (plloyd1010
on 2015 Jul 31)
|

|
The morale and combat modifiers of German Sergeant #1614 should be "0", not "8". (Shad
on 2010 Dec 15)
|

|
All SPW 251s have an armor value of 0. (Shad
on 2010 Dec 15)
|
| Hill Fight After Dark | ||||||||||||
|---|---|---|---|---|---|---|---|---|---|---|---|---|
This 14-turn scenario has a fairly low counter density making it ideal for my quiet day gaming at work, but adds fading daylight to force everyone to fire up as much ranged weapons as possible as early as possible so that they have done some damage before closing for assaults. The OBA is about equal in the 30 column for both sides, and both have 8 infantry and 2 HMGs, both have a good selection of leaders, enough anyway to do the job for both sides. US troops are holding the large 2-level hill on the west side of board 77, Germans get to set up on the south 7 hexes of board 78, and both sides can begin dug in. The Germans get the support of an 88, which I placed at the 7th row north of the edge, on the ridge where it could fire away at any worthy targets, and dug in the German mortars to the southwest corner on the hill there so that they could manage the 10-hex range to anything on the south side and middle of the target hill. There are enough German halftracks to make half of the force panzer grenadiers, the other half have to walk, so I gave the HMGs to the walkers and moved them from behind the central hill onto that hill on 78, hoping to draw some fire while the panzer grenadiers quickly moved around the western side of that hill, the German armor heading around the east side and aiming for the southeastern tip of the target hill, and the German 20mm AA and 75mm IG were towed by trucks (the 3rd truck was with the 88) and moved slowly onto the hill hoping to get a few shots in before dusk made them move forward. The US were set up so the 2 HMGs were on the eastern and western corners of the 20m level hill, each with an infantry platoon, all dug in, while the rest of the infantry were spread out in two more stacks along the south side of the hill so that every other hex was occupied, and the M-6 tank destroyer was set up between the eastern corner and the next infantry stack. Mortars and 37mm AT guns were dug in on the 40m hilltop and the 37mmAA gun was dug in on the southwestern-most 40m hilltop. US OBA disrupted parts of the German assault, but the first casualty was the M-6, taken out at range by the 88 before it could damage any of the Panzers. The Panzers made a successful end run around the hill and supported the first German infantry assault on the eastern hill hex, while additional stacks of Germans made contact with US troops all along the south side of the hill. Casualties were traded back and forth pretty evenly, but the Germans got the upper hand in all but one assault, where the US mortars just managed to hang on. While the darkness took hold (rolled random night visibility of 2), and assaults bogged down, the other Germans were making their way around the flanks and taking hill hexes, but there was still several contested hills in assault at the end. Both sides were tied at 10 casualty points each, hill control was 14 for the US and 10 for the Germans, and with a great chance for recovering troops of both sides stepping back in to hold an unoccupied hill hex at the last moment, I gave the game a draw as I ended it at the end of turn 10. Great little scenario. |
||||||||||||
| 0 Comments |
| Push the Americans off Djebel Ksiara | ||||||||||||||
|---|---|---|---|---|---|---|---|---|---|---|---|---|---|---|
This was another, extended 4-session play-through with the hard-fighting and conscientious, bugmaster, as the defending American Commander of most of Combat Command A of the US 1st Armored Division. Wisely, my opponent set up around on the highest (40-meter) crests of the Djebel Ksiara hill mass on Map 77. I played the Commander of Battle Group Schutte of the famed 21st Panzer Division, charged with taking this lonely hill. We played without the FOW, but with the smoke/illum, consolidation, and excess initiative optional rules. The initial session (game turns 1-4) featured a three-column German movement to contact. The left hook was made up of halftracks, a pair of HMG platoons and 2 infantry units; the center column marched up the wadi in the center of Map 78 with the bulk of the infantry; and the far right combined-arms column was spearheaded by a company of tanks & APCs followed by mortar units and the field artillery contingent. In action, the left flank feint did their job as decoys & skirmishers and mostly diverted opportunity fire, bombardments and AT fire from the other two columns. As the session ended, the only step losses was an overeager SPW 251 platoon that got too close the two American AT gun positions on the djebel’s twin summits. The right flank approach of the German armor began to enter the eastern margin of the large wadi on Map 77, where they intended to establish base of fire positions for the eventual close assault on the djebel. Two weeks later, we resumed the game, and the second session (game turns 5-7) included a continuation of the three-column German movement to contact. In the gathering dusk, the small left prong of the 3 German columns closed in on the exposed 81mm mortar platoons atop the western prominence of Djebel Ksiara. Which they then close assaulted and cleared at the cost of a section of infantry and a SPW 231 platoon be the end of game turn 7. The central column slowly made its way north out of the wadi and began closing on the opposite edge of the djebel in the face of increasingly accurate American direct and OBA fire. The right flank column was led by the German armor that went wide and began encircling the US defensive positions to the north of the j-shaped djebel. The US M6 was eliminated by long-range AT fire under illumination. The balance of the right flank column began deploying supporting artillery and APCs in the bi-level wadi on Map 77 for the coming attack on the eastern margins of the objective djebel. At the end of the session, step losses were: 3 for the Americans, and 2 (both SPW 251 halftracks) for the German side. The victory points totaled: 13 for the US and 11 for the Afrika Korps. The 3rd session (game turns 8-10) included a series of fiercely contested German close assaults on both 20-meter contour edges of the American positions on Djebel Ksiara. These resulted in increased casualties for both sides as the Afrika Korps’ vise began tightening in the nighttime gloom. German armor captured a pair of US truck platoons on their way up the western portion of the djebel where they reinforced the remaining infantry formations on that flank. Initiative levels fell for both sides in the bitter fighting on the hilltop. By the end of the session, step losses were: 9 for the Americans, and 6 for the German side. The victory points totals were: 16 for the US and 24 for the Afrika Korps. A month later, we resumed the fourth session (game turns 11-14 ) of this historically-accurate, but critically unbalanced scenario. A series of nighttime German close assaults on both flanks of the remaining US-held hilltop positions on Djebel Ksiara continued. These attacks were stubbornly contested and were very costly for both sides. In time, the German combined arms left flank attack slowly gained ground and reduced the Allied footprint on the djebel. The last of the American AT guns were eliminated by OBA and close range direct fire on turns 12 and 14, but not before another Axis SPW platoon was hit and eliminated. The right flank German column managed to hold on to the end of the game in the face on a considerable amount of accurate US direct, OBA and opportunity fire. At the end of this final session, step losses were: 18 for the Americans, and 12 for the German side. The victory points totals were: 21 for the US and 37 for the Afrika Korps, resulting in a German Major Victory. I am not sure that it would be possible for the US force to win this historically accurate scenario as written, but it was fun to play with a dynamic opponent, and hence, rates a 4, IMHO. |
||||||||||||||
| 0 Comments |
| German Armor | ||||||||||||||
|---|---|---|---|---|---|---|---|---|---|---|---|---|---|---|
Played with Matt in two hours. Matt's Americans set up in the victory hexes, all dug in. I did not inspect any hexes until I had troops next to it (even if I had LoS) so I went for a flexible German setup. I set up the guns and the mortars so they had LoS to a portion of the hills but none had any effect on the game except a few as casualty points. I set up four INF units and two leaders on foot on my left flank and the remaining mobile force on or near the road. I kept the SPW's as a reserve to enter action when the the AT assets are identified or eliminated. I moved up for three or four turns and accurate American fire caused four or five steps lost. Precise OBA on an anchor hex (it helps when all morale check rolls were 10 or higher) allowed the German to climb the hill at low risk and be in a position to assault a weak hex. The American responded with opportunity fire from other hexes (with some success) but this allowed my left flank to move adjacent to them. The Germans won the initiative next turn and launched a few assaults, which went in their favor. Another turn or two and with the AT assets identified, the SPW moved up and combined with armor, they moved adjacent to dug in infantry. Repeated fire attempts eventually took their tolls on the Americans and they started to flee away from the hills. The Americans had one last big success (a "3" result on the Direct Fire table) but not enough to change the outcome because they had no answer to the German armored assets. We gave up with a few turns remaining with the Germans already leading by 7 VP's and sure to increase their lead. German major victory. Rating: 3 I believe this one is hard on the Americans if the Germans are patient and careful with their armor. |
||||||||||||||
| 0 Comments |