
|
A Stronger Effort An Army at Dawn #20 |
||
|---|---|---|
| (Defender) Germany | vs | United States (Attacker) |
| Formations Involved | ||
|---|---|---|
| Germany |  |
5th Light Panzer Division |
| United States |  |
1st "Old Ironsides" Armored Division |

| Total | |
|---|---|
| Side 1 | 0 |
| Draw | 2 |
| Side 2 | 3 |


| Overall Rating, 6 votes |
|---|
|
4
|
| Scenario Rank: 112 of 913 |
| Parent Game | An Army at Dawn |
|---|---|
| Historicity | Historical |
| Date | 1943-02-01 |
| Start Time | 12:00 |
| Turn Count | 25 |
| Visibility | Day & Night |
| Counters | 129 |
| Net Morale | 1 |
| Net Initiative | 1 |
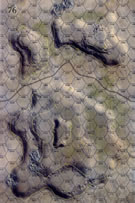
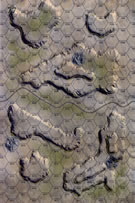
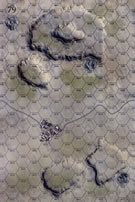
| Maps | 3: 76, 77, 79 |
| Layout Dimensions | 84 x 43 cm 33 x 17 in |
| Play Bounty | 166 |
| AAR Bounty | 165 |
| Total Plays | 5 |
| Total AARs | 2 |
| Battle Types |
|---|
| Exit the Battle Area |
| Hill Control |
| Inflict Enemy Casualties |
| Urban Assault |
| Conditions |
|---|
| Off-board Artillery |
| Smoke |
| Terrain Mods |
| Illumination |
| Scenario Requirements & Playability | |
|---|---|
| An Army at Dawn | Base Game |
| Introduction |
|---|
|
The previous day did not go well for the Americans. Well into night, commanders tried to come up with an acceptable plan but with Maj. Gen. Fredendall of II Corps fixated on Maknassy their task proved exceedingly difficult. Finally Task Force Stark rumbled southward to reinforce the attack there. |
| Conclusion |
|---|
|
The Americans demonstrated some understanding of the subtleties of war. Instead of attacking with the rising sun in their eyes, as on the previous day, they waited until noon. Recognizing that armor was for all practical purposes restricted to the pass floor, another battalion of infantry joined the attack instead. The men maneuvered into the hills where needed without losing as much combat capability. This was all basic stuff but the inexperienced American officers needed to learn it - often the hard way. Still rank amateurs compared to the Germans, the Americans were already ascending the learning curve. |

|
|
|---|
| AFV Rules Pertaining to this Scenario's Order of Battle |
|---|
|
| Heer |
|---|
|


| Army |
|---|
|


| 4 Errata Items | |
|---|---|

|
The reduced direct fire value of the Heer HMG became 5-5 starting with Fall of France. (plloyd1010
on 2015 Jul 31)
|

|
All SS PzIVH tanks should have a movement of 8. (Shad
on 2010 Dec 15)
|

|
The morale and combat modifiers of German Sergeant #1614 should be "0", not "8". (Shad
on 2010 Dec 15)
|

|
All SPW 251s have an armor value of 0. (Shad
on 2010 Dec 15)
|
| Liberate Rebaou and Push West, Colonel! | ||||||||||||||
|---|---|---|---|---|---|---|---|---|---|---|---|---|---|---|
This was a 6-session play-through with the determined & resolute, bugmaster, leading elements of the well-dug-in, German 21st Panzer Division in the wilds of Northern Tunisia. I led the green but brave attacking Combat Command A of the US 1st Armored Division. We used FOW, smoke/illum, extended assault, excess initiative, consolidation, strategic movement optional rules. We also experimentally used the following three house rules: 1) Road Movement for Mechanized & Foot Units All FOOT & MECHANIZED units may move on roads at the rate of 1/2 a Movement Point (MP) per road hex, just like MOTORIZED units, 2) Standardized Movement for Mechanized Units All mechanized units may move through clear hexes at a movement cost of only 1 movement point (MP) per hex, instead of 1 1/2. Add one to this cost if moving up or down slopes hexes, and 3) Dug In Units in Hill Slopes are Automatically in Limiting Terrain in Desert Games Unless prohibited by special scenario rules, ALL units that are dug-in on slope hexes are considered to be in limiting terrain and are spotted if enemy units approach to within 3 hexes, or 4 hexes for reconnaissance units – – unless they are marked with a spotted marker, see 8.22. The initial session (game turns 1-3) featured the beginning of a very lengthy 2-pronged American movement-to-contact from the northeast & southeast margins of Map 79. The Afrika Korps drew first blood when both American M-6 AT portees units were hit by accurate German long-range fire, however, the 3-hex town of Rebaou was liberated by the Americans during the 2nd turn. The left flank US column managed to establish themselves on the east margins and summit of the southernmost 40-meter hill mass on Map 79. The American northern (right flank) column ensconced themselves in the northeast wadi on the same map board. The Germans lost no steps, while the Americans lost 2 in this session. The victory point count was 61 for the Germans and 9 for the advancing Americans. The second session (game turns 4-5) saw the closing of the American advance in the north (right flank) with the German forward positions, in spite of growing casualties and some remarkable ineffective AT fire that included 5 platoons of US tanks firing at a single target in a crossfire situation without achieving a single hit! German reserves began migrating north in response to the US armored spearhead, and the accompanying infantry advance on this end of the battle. In the south (left flank), the Americans consolidated on the 40-meter hill mass and continued accurate mortar fire on the few visible German mortar positions, resulting in the destruction of a pair of 81mm mortar units. In all, the Germans lost 3 steps, while the Americans lost 6 more in this session. By the end, the victory point count was 58 for the Germans and a measly 15 for the advancing Americans. The third session (game turn 6) was a rather grim one for both sides with the bulk of the fierce fighting in the north where significant AFV losses for the Americans occurred. Continuing German resistance on the north & eastern margins of the 60-meter hill slowed the American attack. Highlights included multiple AT fire successes against American M-3/75 SPAT units and 2 additional halftrack platoons for the Germans in the north, but at a cost of two platoons of panzers. An American extended assault was successfully stymied by the Germans, slowing the US armored spearhead. In the south, the US side continued its slow approach and finished securing the southernmost hill mass on Map 79. Step losses for both sides accumulated quickly during this game turn, and the new totals were: 17 for the Americans and 12 for the German side. The revised victory point tally was 67 for the Germans and 30 for the advancing Americans. The much-delayed, fourth session (first part of game turn 7) we lost the VASSAL server during the 3rd US activation) featured an AT gun fight in the north (right flank) American advance. A platoon of German Marder III SPAT guns were eliminated as well as a step of Pz-IIIn tanks. The Yanks began surrounding the understrength German infantry on the 40-meter, rocky ground position, and were able to pass armored units through 4 more hexes on that contour line to the west. When we lost contact, the step loss totals were: 18 for the Afrika Korps, and still 17 for the US side. The revised victory point tally was: 63 for the German defenders, and 36 for the advancing Americans. The fifth session (second half of game turn 7 and turns 8-9) featured a great deal of costly fighting on the northern hill mass on Map 76 as the advancing Americans drew into closer range. Steps lost increased to 22 for the US side, and 30 for the defending Germans. A number of those lost were key elements of the 21st Panzer’s defensive network including yet another platoon of Pz-IIIj and two more units of AT guns. During turn 9, multiple, combined arms close assaults began in several areas of the northern and eastern portions of the hill mass. American long range AT shots began to tell against Axis transport elements and the first US unit exited the west edge of the battle map. By the end, the victory point tally was a near-draw with: 58 for the Americans, and 56 for the Tyskers (the Germans, in Danish). Remarkably, only two combat 7-die rolls were thrown this session, but a combined EIGHT, snake-eye dies were thrown. The sixth, and final, session (game turn 10-12 ) was a very exciting and action-packed session that ended rather suddenly with the Germans (Tysker) side graciously conceding a major US victory at the start of the 12th game turn, with a final score of: 40 for the Germans and 84 for the US side. However, this was a very hard fought scenario! For example, one close assault on the northern hill mass was not finally resolved in favor of the Americans for a full 9 game turns! Highlights from this session includes very high casualty rates from close assaults, deadly artillery strikes and multiple, adjacent-hex fire fights. Final step loses were 40 for the defending Germans, and 28 for the victorious Americans. Of these, 10 were lost by the 21st Panzer, and 6 by the surging Americans in this session. Happily, there were only 5 FOW-shortened turns in our playthrough. I give this fun-to-play scenario an enthusiastic rating of: 5. IMHO, it is suitable & recommended for both SOLO and SHARED play. |
||||||||||||||
| 0 Comments |
| American turnaround at Rebaou | ||||||||||||
|---|---|---|---|---|---|---|---|---|---|---|---|---|
Battle Report: At noon on February 1st, 1943, units from the American CCA, 1st Armored Division moved west toward the town of Rebaou where they clashed with elements of the German 21st Panzer Division. The US troops approached the town from the northeast in force with a small scouting group about two miles to the south. The Germans had their armor well concealed behind hills on the south side of the pass, while three platoons in Hanomags were lying in wait on the north side. Mortar and anti-tank groups were on hills along both sides of the pass, and the town was fortified along with an MG42 emplacement in the wadi north of town. By 1230, American units had taken casualties while engaged on three fronts: town, wadi MG42 group, and the 75 mm AT platoon on the hill south of town. Both the north and south sides of the road in the Rebaou town region were secured by 1400, and the town was in American hands by 1445. At that point, the Germans still had the hills surrounding the pass well covered, while the Americans took time to regroup from the initial attacks. A PzIVh platoon that had been protecting the entry to the pass was finally removed by Sherman crossfire, and thirty minutes later US units were assaulting both the north and east ridges of the highest hill north of the pass. As dusk began, the last remaining protection from the American armored forces, a Marder III platoon, was eliminated and the Americans stormed the north summit. Major Apfelbaum and his few remaining charges retreated from the hill under fire as night fell. The Americans had succeeded in securing the pass with units controlling both the north and south hills,and troops moving west along the road.Analysis: This 25-turn scenario has multiple opportunities for obtaining VP’s from hill & town control, step loss, and American unit exit. The Germans start the match in a good defensive position with 65 VP’s in hand for the hill and town hexes, while the US has a numerical superiority in unit count, albeit with lower morale. The strategy used in this playthrough was to secure the eastern sector including the town before heading west to the pass, but this proved to be time-consuming due to German resistance and seven FOW rolls on the first 10 turns. By the time the town was secured, the Americans had lost 36 steps to the German’s 32 while only accruing 13 additional points for terrain.Since the Germans must set up first, another option would be to hit one of their flanks with a heavy force and pass by the 9 VP’s for the town. Things were going fairly well for the Germans, who had initiative on 12 of the first 16 turns and wreaked havoc on the American armor and mobile AT units. However, the worm turned, and the US had initiative on eight of the last nine turns. The FOW rolls also decreased with only seven more on the last 15 turns, so the US got to get more units moving west to engage the enemy. This resurgence allowed for a major American victory; steps lost were fairly close with the US losing 54 to 57 for the Germans. However, the US had exited seven units and controlled 36 of the 40m hills and all of the 60m ones, while the Germans only had eight of the 40m hills. In addition, the Americans controlled the three town hexes, so the final VP count was a lopsided 119-62 VP victory for the Americans. The only discrepancy that appeared in this scenario was the rules and terrain chart information that allowed mechanized vehicles to ascend the slopes. The battle conclusion section of the monograph notes that “armor was for all practical purposes restricted to the pass floor”, a finding consistent with what I have read about the djebel topography. So, there probably should be a special rule limiting armor to the valley floor. Had this stipulation been in place, the Americans would have had much tougher going due to the morale disparity. The game ended with many of their ground troops unable to press forward due to disruption or demoralization that took many turns to recover, but armor support on the hills certainly helped those units that could get to the front to gain precious ground. |
||||||||||||
| 0 Comments |