
|
Task Force Kern An Army at Dawn #18 |
||
|---|---|---|
| (Defender) Germany | vs | United States (Attacker) |
| Formations Involved | ||
|---|---|---|
| Germany |  |
5th Light Panzer Division |
| United States |  |
1st "Old Ironsides" Armored Division |

| Total | |
|---|---|
| Side 1 | 3 |
| Draw | 0 |
| Side 2 | 4 |


| Overall Rating, 8 votes |
|---|
|
3.5
|
| Scenario Rank: 419 of 913 |
| Parent Game | An Army at Dawn |
|---|---|
| Historicity | Historical |
| Date | 1943-01-31 |
| Start Time | 07:00 |
| Turn Count | 24 |
| Visibility | Day & Night |
| Counters | 80 |
| Net Morale | 1 |
| Net Initiative | 1 |
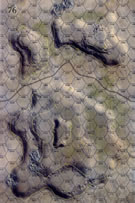
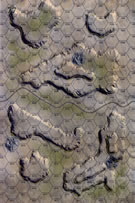
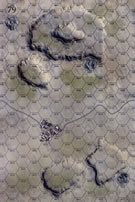
| Maps | 3: 76, 77, 79 |
| Layout Dimensions | 84 x 43 cm 33 x 17 in |
| Play Bounty | 151 |
| AAR Bounty | 159 |
| Total Plays | 7 |
| Total AARs | 3 |
| Battle Types |
|---|
| Exit the Battle Area |
| Hill Control |
| Inflict Enemy Casualties |
| Road Control |
| Urban Assault |
| Conditions |
|---|
| Off-board Artillery |
| Smoke |
| Terrain Mods |
| Illumination |
| Scenario Requirements & Playability | |
|---|---|
| An Army at Dawn | Base Game |
| Introduction |
|---|
|
The German occupation of the passes through the Eastern Dorsals in the south on the previous day completely reversed the strategic situation there. They would require few troops to guard the passes, allowing their spearhead elements to turn their attention elsewhere. The Allies decided to move quickly to counter their effort, and ordered Task Force Kern to clear the Ain Rebaou Pass while Task Force Stark cleared the Faid Pass about five miles to the north. |
| Conclusion |
|---|
|
II Corps routinely ignored the commander of 1st Armored Division, Orlando Ward, and issued orders directly to his combat commands, so he and General Lucian K. Truscott (Eisenhower’s official observer) climbed Djebel Lessouda to watch the action (both this and the following scenario were visible from this vantage point). The attacking force looked puny in the vast panorama before them. The force proved insufficient to the task, and soon Ward returned to his headquarters to try and reorganize for a stronger effort for tomorrow. |

|
|
|---|
| AFV Rules Pertaining to this Scenario's Order of Battle |
|---|
|
| Heer |
|---|
|


| Army |
|---|
|


| 3 Errata Items | |
|---|---|

|
The reduced direct fire value of the Heer HMG became 5-5 starting with Fall of France. (plloyd1010
on 2015 Jul 31)
|

|
The morale and combat modifiers of German Sergeant #1614 should be "0", not "8". (Shad
on 2010 Dec 15)
|

|
All SPW 251s have an armor value of 0. (Shad
on 2010 Dec 15)
|
| Concentration of Force Proves Critical | ||||||||||||||
|---|---|---|---|---|---|---|---|---|---|---|---|---|---|---|
This was a 4-session play-through with the resourceful and wily, Matt Brown, as the US Commander. We used the optional smoke, consolidation, excess initiative, extended assault rules, and thankfully dispensed with the defense-biased, Fog of War rule. I played the Germans defending the Ain Rebaou Pass area with the grizzled remnant elements of the Afrika Korps’ 21st Panzer Division. Before beginning this play-through, the German Commander shifted from a relatively brittle, forward defense array to a more appropriate defense-in-depth setup that emphasized initial armored movement to secure as many 40 and 60-meter contour hexes as possible – along with the 3-hex town of Rebaou – in the first 3 game turns. The initial US movement-to-contact in the northeast corner of the map was executed nearly flawlessly, with the bulk of a Sherman tank battalion (6 platoons) leading the way. Wisely, the US Commander kept a large portion of his total force off the east edge of the map, thereby pinning the vast bulk of the German forward-deployed troops in-place on Map 79. Amazingly accurate German OBA, slowed the advance of the American infantry formations that accompanied the armored spearhead. Surprisingly this artillery support, eliminated the senior American leader at the end of the first game turn. The methodical, US probe-in-force drove due west, straight down the north edge of the map, making effective concealment use of the convenient wadi and low hill terrain. Slow-driving German armor and a handful of infantry units moved north and east onto higher ground to parry this combined arms thrust. By the end of game turn 3, the US had lost a mere 3 steps. During our second session, American losses in this right flank attack began to mount in turns 4-5 as the forces drew closer together and German mobile counter attacks and AT fire intensified. Casualties among the M-3 halftrack contingent in this columns were particularly heavy, and a German probe began moving directly behind the bulk of the American task force on this edge of the map. Starting on game turn 5, the balance of the American task force began moving-rapidly-to-contact in the southeastern corner of the map. This strong combined-arms attack began almost immediately after the German Commander had prematurely moved one of his AT gun platoons from the southern map margin on the large hill in the southeast portion of the map in an effort to bolster their hard-pressed AT defenses on the north east map edge. At this juncture, all US forces were deployed on the map in two widely-separated and mutually-unsupported, left and right flank pincer attacks. Ferocious fighting and multiple close assaults ensued on either edge of the map as Task Force Kern sought to push the German lines back to the west. By the mid-point of game turn 6, step loses for the US was 16 and for the Germans side was 3, this in spite of well-directed American OBA fire and clever deployment of smoke in support of the northern pincers armor-heavy attack. Our 3rd session (game turns 7-8) were the crucial, make-or-break period in this play-through for the enveloping US attack. As it turned out the Germans resolutely repulsed both pincers and continued their deadly close assaults in the north. Two additional steps of German tanks were eliminated by intense, short-range Sherman tank, but this prong was rapidly running out of momentum as US tank and halftrack losses continued to mount. In the south, fierce hill top fighting slowed the bulk of the US attack to a crawl. By the end of turn 7, step losses stood at: 31 for the US, and 7 for the Afrika Korps. The hard-fighting, US Commander conceded at the end of the 8th game turn when it became apparent that there were insufficient remaining American units and leaders to gain enough victory points to win the game. Then final step losses were: 8 for the German side and 41 for the Americans. An exciting and fun-filled scenario. I give this one a 4. |
||||||||||||||
| 1 Comment |
| Is it "Always divide your force?" or "Never divide your force?" oh... Just remembered... | ||||||||||||||
|---|---|---|---|---|---|---|---|---|---|---|---|---|---|---|
This one, the wheels (or treads) fell off the bus. Playing against a skilled and well armed opponent, the Americans, with a highly mobile, combined arms force had to control the town, hills and highway across three boards. The German player set up in the town and on hills very well sited with overlapping fields of fire and use his tanks to actively mark all the victory objectives while moving to positions on the front line. I did not want to attack the town in the center of the entry board so I divided my force into an armor heavy component attacking north of the town, and an infantry heavy component held off board to attack south of the town where there was a fire dead zone in front of the German occupied hills where they could sprint and wait for the right moment to crest the hill and hit the German Right. On my right, the armor heavy column advanced to contact well and bypassed the wadi north of the town and headed to the first set of hills moving along the north edge of the map. At first the advance went well and I was able to get the Shermans into action and was able to take out the German Marder which had a central position in his line. That success aside, I hit a stone wall. The German armor arrived on the next hill and even with smoke I was unable to get any farther. However, this had forced the German commander to start moving some forces from the south to cover the possible break through from the north. At that point I brought the infantry heavy force on my left and got them into the cover of the hill that was the first objective. My opponent at this time had deployed his tanks to the north to hold his left position so this was as good a time as any to hit the infantry positions to the south of the town. Well it didn't work out that well. I botched the initial contact and the German inflicted serious morale losses on me and the infantry was not able to break into or through the German positions. The careful placement of leaders helped my opponent capitalize on every activaction and get in solid first strikes. After about an hour of trying to get forward and concentrate forces on the left and about two hours after initiating my armor strike on the right, the Americans had become combat ineffective and incapable of achieving their objectives so were forced to concede the battle and the battleground to the well dug in and well led Afrika Korps. |
||||||||||||||
| 3 Comments |
A succinct and well-written summary of a major action-packed shoot 'em up in the hills of Tunisia.
Thank you sir! I felt like the lessons learned were about concentration of forces. I could have still split up, but not into two equal prongs, neither of which were enough to do the job. This one would be worth playing again sometime.
Happy to switch sides for a rematch -- if they ever let us count repeat plays as the opposite side!
| Lockdown at Ain Rebaou Pass | ||||||||||||
|---|---|---|---|---|---|---|---|---|---|---|---|---|
Early on January 31, 1943, units from the US task force headed by Lt. Col. William B. Kern attempted to clear Ain Rebaou Pass of German units. The pass was defended by the 21st Panzer Division, which had units dug in on both sides of the pass, on the hill south across the road from the city and freestanding units in the wadi northwest of Rebaou. By 0715, US units had secured the town and were moving southeast. At 0745, two Panzer platoons had their nose bloodied in an armor battle west of the southeast hill. All other German units that presented a threat to American armor were cleared by 0900, as the 28mm and 75mm gun emplacements surrounding the pass and two remaining Panzer platoons were dispatched by Allied armor and precision OBA. All remaining German units were cleared from the south side of the pass by 0930, and remaining German units were off the hill on the north side of the pass by 1030 hours. The last German infantry unit, which had held out after taking the southeast hill at 1000 hours, was finally dispatched at 1245 hours along with the German Major. The US achieved a major victory. This is an interesting scenario with multiple objectives including step elimination, town control, hill control, road control and American unit exit. In this playthrough, the large numbers of US units made it difficult for the German force to defend, and they were ultimately overwhelmed, a situation that mirrors the actual history of the African campaign, albeit a month or so earlier than expected. The scenario offers a number of different tactical options that give it excellent replay value. While a spread approach was used for the German forces here, an alternate approach would be to staunchly defend the large north central 40- and 60-meter hills and try to prevent American exit, but there may not be enough German firepower to make that work either. This playthrough ended up in a lopsided victory for the Americans. Despite losing two Sherman platoons and having three more reduced, the US had 107 VP’s to 22 for the Germans, an 85 point differential and a major American victory. |
||||||||||||
| 0 Comments |
I have to hand it to Treadasaurusrex. You are a fine opponent and hard to bear, but there are many more scanarios so beware.
The handling of the armor on your left was superb. I needed to get farther faster and I could not.