
|
Ousseltia Valley An Army at Dawn #13 |
||
|---|---|---|
| (Defender) Germany | vs | United States (Attacker) |
| Formations Involved | ||
|---|---|---|
| Germany |  |
10th Panzer Division |
| United States |  |
1st "Old Ironsides" Armored Division |

| Total | |
|---|---|
| Side 1 | 3 |
| Draw | 2 |
| Side 2 | 4 |


| Overall Rating, 10 votes |
|---|
|
3.6
|
| Scenario Rank: 343 of 913 |
| Parent Game | An Army at Dawn |
|---|---|
| Historicity | Historical |
| Date | 1943-01-21 |
| Start Time | 15:00 |
| Turn Count | 18 |
| Visibility | Day & Night |
| Counters | 112 |
| Net Morale | 1 |
| Net Initiative | 0 |
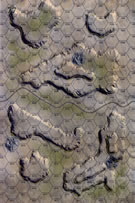
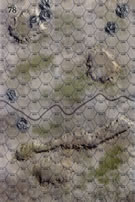
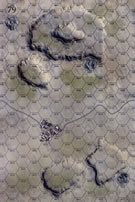
| Maps | 3: 77, 78, 79 |
| Layout Dimensions | 84 x 43 cm 33 x 17 in |
| Play Bounty | 156 |
| AAR Bounty | 153 |
| Total Plays | 9 |
| Total AARs | 4 |
| Battle Types |
|---|
| Hill Control |
| Inflict Enemy Casualties |
| Road Control |
| Urban Assault |
| Conditions |
|---|
| Off-board Artillery |
| Randomly-drawn Aircraft |
| Smoke |
| Terrain Mods |
| Illumination |
| Scenario Requirements & Playability | |
|---|---|
| An Army at Dawn | Base Game |
| Introduction |
|---|
|
To improve their defensive positions the Germans launched a major operation late on January 18th aimed at controlling the four main gaps through the Eastern Dorsals, which conveniently controlled the Tunis water supply. After faking an attack against the British they wheeled on the ill-equipped French and broke into the Ousseltia Valley. At 1715 on the 19th General Paul Robinett received orders to lead Combat Command B into the valley to rectify the situation. The Germans controlled the valley by the time Robinett arrived at Maktar on the 20th. He lined up his artillery support, then conducted a treacherous road march, delaying his attack until the afternoon of the following day. |
| Conclusion |
|---|
|
Robinett’s attack showed that Combat Command B was learning from its previous mistakes. Instead of racing willy-nilly down the road into the fire of waiting enemy anti-tank guns, the tankers waited until the supporting artillery began softening up the enemy with their fire missions and air support roared inbound. Then they advanced under control and remained organized when engaged by a platoon of Tiger tanks. While they didn’t achieve all their objectives they pushed Kampfgruppe Lueder back far enough to open up an escape route for the French fighting to the north. This new discipline led to the 501st Heavy Panzer Detachment mistaking them for British. The day did not bring laurels for CCB but they did their job well enough, and remained combat ready for the next day. |

|
|
|---|
| AFV Rules Pertaining to this Scenario's Order of Battle |
|---|
|
| Heer |
|---|
|


| Army |
|---|
|


| 4 Errata Items | |
|---|---|

|
The reduced direct fire value of the Heer HMG became 5-5 starting with Fall of France. (plloyd1010
on 2015 Jul 31)
|

|
The morale and combat modifiers of German Sergeant #1614 should be "0", not "8". (Shad
on 2010 Dec 15)
|

|
All SPW 251s have an armor value of 0. (Shad
on 2010 Dec 15)
|

|
Liberation 1944's Tiger movement and armor ratings are backwards. They should be Armor 7 and Movement 5. (petermc
on 2014 Feb 14)
|
| Seize as much High Ground as you can, Boys! | ||||||||||||||
|---|---|---|---|---|---|---|---|---|---|---|---|---|---|---|
This was a 9-session play-through with the methodical and daring, Daedalus, as the defending German Commander of Battle Group Lueder who was initially set up in 3 major positions in the hills surrounding the main east-west road on maps 77-78 & 79. I played the attacking American Commander of Combat Command B, 1st Infantry Armored Division. We used the optional smoke/illum, excess initiative, consolidation, strategic movement and extended assault optional rules. Happily, we dispensed with the fog of war optional rule in what turned out to be a very entertaining, but costly play-through. In the first session (game turns 1-2) included a pair of deliberate American movements-to-contact aimed at the hilly portions both north and south on Map 78. The heavier northern (left flank) attack led off, and was gradually followed by what turned into an extended 16-turn, back-and forth fire fight in the southern ridges (right flank). By the end of turn 2, the Americans in the northern attack had swept the bulk of the German defenders out of their forward positions on the north and western margins on the north hill mass. A number of green US units in both attacks were repeatedly disrupted and demoralized, in spite of the large amount of US direct and indirect firepower used in support of the advance. At the end of this session, step losses were 0 for the Americans, and 6 for the German side. The 2nd session (game turns 3-4) was a very grim ordeal for the American side that featured the loss of 14 steps and very cold dice. My opponent’s accurate long-range AT fire eliminated 2 and a half platoons of M-3 Lee tanks accounting for 10 of the 14 steps lost. German defensive positions on the northwest hill on Map 78 were finally overwhelmed at a heavy cost, however the developing counter attack was aborted in favor of the beginning of an extended Teutonic migration south, in order to shore up the threatened right flank on the long ridges. Two more US air strikes were called, but only one found a target, thus ending the limited American air support for this scenario. There were a total of three badly-timed combat 7-die rolls for the American side. None for Battle Group Lueder. At the end of this session, step losses were 14 for the Americans, and 10 for the German side resulting in reduced initiative levels for both sides. Oddly, the victory points at the end of turn 4, were: 34 for the Germans, and 69 for the Yanks, thanks to the occupation of the town and a large number of hill hexes. The third session (game turns 5-6) again found the Germans blessed by the PG fates with mostly hot dice. The American offensive in the south began to get a bit of traction, but at a considerable cost. A sliver of a foothold was established on the southernmost hill on Map 78 after a considerable amount of suppressing fire from American M-3/75 SPA units, HMGs, tanks and mortars. Accurate long-range AT and OBA fire from Battle Group Lueder also took a toll in the north with the elimination of the deadly American T-28 SPAA platoon. The slow & methodical combined arms Teutonic migration south to shore up the menaced German left flank on the long east-west ridge on Map 78 continued. By the end of this session, step losses were 19 for the Americans, and 12 for the German side resulting in reduced initiative levels for both sides. Unexpectedly, there were a combined total of only three combat 7-die rolls for both sides during these 2 turns. The 4th session (game turn 7) was focused on the shift in the action to the southern margins of the battle map with intense US bombardment and close-range suppressive fire washing over the German positions on the west edge of the long ridge and the southernmost 20-meter hill on Map 78. Another section of American Lee tanks was eliminated by accurate AT fire from the long ridge as the expanding US attack began to take shape. Battle Group Lueder’s armored assets continued to migrate south during this 1-turn session. At session’s end, mounting casualties resulted in step losses totals of 21 for the Americans, and 18 for the German side. The fifth session (game turns 8-9) consisted of substantial bitter fighting in the southern portion of the battlefield as the Americans slowly occupied the southernmost hill on Map 78, and finally established a very tenuous foothold on the adjacent east-west ridge. A mounted movement of the remaining company of uncommitted German mechanized infantry moved south around the ridge, and joined a company of Pz-IIINs. The Americans managed to throw FIVE combat 7-die rolls in this costly session. Again, there were none thrown by Battle Group Lueder. At the end of turn 9, step loss totals were tied at: of 23 for the Americans, and 23 for the German side. The 6th session (game turns 10-11) continued the fighting in the south with the semi-firm establishment of an American foothold on the western portion of the long ridge at the cost of a sacrificial APC platoon. The right flank (northern) American column cleared off the remaining German units on the northeastern hill on Map 78, and finally eliminated the last of the Axis mortars. Armored units supporting this drive moved onto the northernmost hill mass on Map 77. A responding German probe moved onto the eastern margins of the same hill mass. As night fell, the anticipated German combined arms counter attack on the American-held, southernmost hill began and was bitterly contested as this column moved into close assault position. By the end of turn 11, step loss totals were: 24 for the Americans, and 26 for the German side. The cumulative victory point totals were: 48 for the Germans and 107 for the US side. After a two week hiatus, the 7th session (game turns 12-13 ) was focused on a series of costly, nighttime close assaults in the hilly southern portion of Map 78, as well as desultory fighting in the hills of the western portion of Map 77. Illumination flares allowed a number of AT shots that resulted in the destruction of 3 steps of US Sherman tanks and the German’s STG-III assault gun unit. The same fitful illuminations allowed for some deadly close range artillery concentrations, and lethal direct fires accounting for 6 additional US steps and 12 more for the German side. An intrepid American infantry company close-assaulted the single Tiger I platoon, causing a demoralization and pinning this unit in-place – creating the possibility of its eventual destruction. A long distance US probe managed to capture a string of German trucks on the east-west rode segment in Map 77. By session’s end, step losses amounted to 38 for the 10th Panzer and 30 for the slowly advancing Americans. The cumulative victory point totals were now: 39 for the Germans and 148 for the US side. The long-delayed 8th session (game turn 14) was a primarily an infantry slug-fest in the darkness, punctuated by repeated leader capture attempts by multiple American tank units. In terms of the latter case; 3 German officers were captured after long sprints, and in the former case; close assaults in 3 different hexes yielded mixed results with only a single American success in clearing hex 78-0614. By session’s end, step losses amounted to 40 for the 10th Panzer and 31 for the US side. Updated victory point totals were now: 40 for the Germans, and 155 for the Americans After another unavoidable hiatus in play the final session (game turn 15-16) featured a costly and hard fought finish with multiple pinned units in fiercely contested close assaults on, and around the southernmost 20-meter hill on Map 78. The US side was able to eliminate that last of the Landsers by close assault during turn 15, leaving only the last 3 tanks platoons without infantry support. Ultimately, the last German unit to be eliminated was the troublesome & lethal Tiger I platoon at the end of turn 16. Step loses in this play-through totaled, 54 for the Battle Group Lueder and 33 for the US Combat Command B. The final victory point totals in what surprisingly turned out to be an American major victory was: 42 for the Germans, and 182 for the Americans. I give this well-designed scenario a rating of 4. My suggestions for a more balanced scenario include: 1) revising the victory conditions since an active, highly-mobile American offensive will almost guarantee a victory by occupying the bulk of the hill, road and hill hexes, and: 2) strengthen the German OBA by adding at least one more 16-strength increment, or another onboard 81mm mortar platoon. |
||||||||||||||
| 0 Comments |
| Wild and Wooly |
|---|
|
The victory conditions in this scenario make for very "lose" play. The main way to score is by occupying hill hexes. Combine this with the fact that a good portion of the scenario is played at night, and you have a very interesting scramble. I added a house rule to make night movement unpredictable: on a 1-2 a unit cannot move, on a 3-4 it can move half its allowance, and on a 5-6 it can move full. This rule had units scattered. I also deemed that all hill hexes on maps 77 and 78 start German controlled, while those on map 79 start US controlled. This balances the numerical and quality advantage of the US. I also ruled that a unit can only take one hex per turn to slow things down a bit. The Germans had their Tiger and some infantry chase after the hex grabbing Yanks. With the movement restrictions and variable visibility, the Tiger would swat an occasional US vehicle, slow as it is. During the day turns, the game played more conventional, with the US concentrating against a German line on the long ridge in the south of Map 78. The result in the end was very close, with the Germans sneaking through and grabbing some hexes on map 79. I called it a draw. |
| 0 Comments |
| Wild and Wooly Shoot Out in the Desert | ||||||||||||||
|---|---|---|---|---|---|---|---|---|---|---|---|---|---|---|
This was a big maneuver, fun scenario that was great practice for me as the American player. My relentless, but helpful opponent, Treadasaurus, was surprisingly attacking from the very beginning, instead of defending his ridges and hills like I expected. I hate Tiger I heavy tanks! The only good thing about them, is that they are darn slow. The combo of that miserable Tiger platoon and fast moving German infantry was just too much for my relatively green, US defenders. When night time came, I was not expecting illumination, and did not move my AFVs properly for safer and better defensive positions. The German side came on with great gusto and forced my hand over and over, especially on my right (southern) flank. We played with the awful FOW rule (after turn 6), which helped the supposedly-defendinmg Germans, and also used the smoke/illum, tank riders, consolidation, excess initiative, strategic movement and extended assault rules. We both drew decent sets of leaders. Thing is, I lost way more of mine in combat and by enemy capture, or desertion! Other writers have described the action in their AARs, so i will skip the grisly details. I lost US units like they were on sale after Christmas! Very bloody game play, with my side losing more than twice as many steps as the Germans. The result in the end was sorta close, with the Third Reich boys holding just enough turf on the scenario map to win it all. I give this pretty fun to play battle a 4, but I think that I mostly was dogged by bad luck against a stronger, more opportunistic opponent with a better game plan. I lost the momentum early and the initive belonged to the Germans for darn near the entire scenario. Seems like most people who play this one win as the American side. Sometimes it just doesn't go your way and the other side gets the majority of the breaks and way fewer combat 7-die rolls when they count! |
||||||||||||||
| 0 Comments |
| Taming the Tiger | ||||||||||||
|---|---|---|---|---|---|---|---|---|---|---|---|---|
Late in the afternoon of January 21, 1943, units from USA Combat Command B, 1st Armored Division engaged the Battle Group Lueder, 10th Panzer Division in the Ousseltia Valley. As the Americans approached Ousseltia, they found the Germans dug in both north and south of the main road with pickets in the western rocky ground. The US units dug in and then advanced slowly with both artillery and close air support. The support proved ineffective as the German armor decimated an M3/75 and two Lee platoons. By 1430 hours, the Americans had taken control of the western tip of the south ridge and the west center portion of the road. A German combined thrust on the north flank was stalled by three Sherman platoons moving out of the northwest wadi. As dusk fell, two Lee platoons penetrated past the Tiger platoon that was patrolling the south ridge. The Americans continued to secure hills behind the front line on the south ridge while isolating the Germans into a broad pocket. At 1830, the US assaulted the Tiger platoon, disabling the units at a price to the US troops involved. A StuG IIIG group moved west on the main road toward Ousseltia, destroying two US tank destroyers along the way. However, after it entered the town, two Sherman platoons made short work of it, and the battle ended in a major American victory. This objectives for this skirmish include town, hill and road control in addition to step loss VP’s. The scenario began with the Germans looking strong, as the US Warhawk patrols and OBA did no damage for the first hour, coupled with fog-of-war ending the first six turns early. However, once the US units got into play, the Germans began to lose ground and take losses. While the Tiger unit is formidable, the multiple American armor units allow the flexibility to get past it, and it is not able to catch up and do any real damage. Although the Germans had an edge in the number of officers that are needed for night movement, they simply didn’t have enough units to cover the ground that the Americans could. With over 200 hill hexes in play at one VP each, this gave the Americans a strong edge after nightfall. The Americans ended up with full control of the town, control of the roads on Map 79, 166 hill points to the Germans 35, and step losses of 47 US to 37 German. The total VP count was 223 US to 82 German for a major US victory. |
||||||||||||
| 0 Comments |