
|
Hanging Tough An Army at Dawn #10 |
||
|---|---|---|
| (Attacker) Germany | vs | United States (Defender) |
| Formations Involved | ||
|---|---|---|
| Germany |  |
10th Panzer Division |
| United States |  |
1st "Old Ironsides" Armored Division |

| Total | |
|---|---|
| Side 1 | 6 |
| Draw | 1 |
| Side 2 | 1 |


| Overall Rating, 9 votes |
|---|
|
4
|
| Scenario Rank: 109 of 913 |
| Parent Game | An Army at Dawn |
|---|---|
| Historicity | Historical |
| Date | 1942-12-10 |
| Start Time | 07:00 |
| Turn Count | 18 |
| Visibility | Day |
| Counters | 73 |
| Net Morale | 1 |
| Net Initiative | 1 |
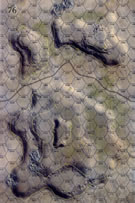
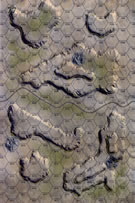
| Maps | 2: 76, 77 |
| Layout Dimensions | 86 x 28 cm 34 x 11 in |
| Play Bounty | 141 |
| AAR Bounty | 153 |
| Total Plays | 8 |
| Total AARs | 4 |
| Battle Types |
|---|
| Hill Control |
| Inflict Enemy Casualties |
| Conditions |
|---|
| Off-board Artillery |
| Severe Weather |
| Smoke |
| Terrain Mods |
| Scenario Requirements & Playability | |
|---|---|
| An Army at Dawn | Base Game |
| Introduction |
|---|
|
As part of a concentrated effort to take Medjez el Bab on 10 December the 10th Panzer Division attacked with strong forces on both sides of the Medierda River. Along the southern bank the Germans sought to drive the Americans from Djebel Bou Aoukaz as their first objective. As the Americans’ closest help sat over eight miles away, it looked easy on paper. |
| Conclusion |
|---|
|
The Americans took the best the Germans could throw at them and retained the hill. They were learning a few lessons, but not enough of them yet. That night the Americans began to pull back from the Djebel Bou Aoukaz, and left behind dozens of guns, tanks and vehicles stuck in the mud thanks to poor maintenance and a complete lack of heavy tractors to pull mired vehicles free despite repeated requests for them. |

|
|
|---|
| AFV Rules Pertaining to this Scenario's Order of Battle |
|---|
|
| Heer |
|---|
|


| Army |
|---|
|


| 3 Errata Items | |
|---|---|
| Scen 10 |
The Victory Conditions for the German side include a numerical typo under their first objective. It should read as follows: 1. No American unit occupies a hill hex on Board 78 (not 76 as published) at the end of play. (treadasaurusrex
on 2022 Feb 25)
|

|
The reduced direct fire value of the Heer HMG became 5-5 starting with Fall of France. (plloyd1010
on 2015 Jul 31)
|

|
The morale and combat modifiers of German Sergeant #1614 should be "0", not "8". (Shad
on 2010 Dec 15)
|
| German Last Roll Grabs Victoryfrom the Jaws of Defeat! | ||||||||||||
|---|---|---|---|---|---|---|---|---|---|---|---|---|
The German 10th Panzer Division drove forward at daybreak on December 10, 1942 to drive the US forces out of Djebel Bou Aoukaz. The US placed infantry and HMG units on the ridge west of the east trail (WERT) with M3’s positioned west of it. Mortar, AT, & M6 platoons were situated behind the hills to the west of WERT to cover the central and flank corridors. The Germans advanced west with tanks and ground units on both flanks. Other ground units and the 50mm artillery were placed on the ridge east of the trail, with a battery of mortar and 25-pounder units behind the ridge. Early in the battle, a Pz.IIIJ platoon moved too far ahead of the infantry units and was eliminated by the 105mm group on the north flank, a mistake would not be made by the other tank commanders. Panzer and ground units moved on the south end of the WERT, while the others on the north flank waited for infantry or OBA to take out the now-spotted American 105 unit. American M3’s on the WERT quickly discovered the danger from 50mm and panzer fire and took shelter behind the hills after two platoons had been destroyed. By 0815, the 105mm group had been eliminated by German infantry, and the M6 was destroyed by a Pz.IIIH unit. German units had engaged the Americans on both the north and south ends of the WERT, with the Americans holding fast until 0900 hours. At that point, both sides were attempting to rally many of their units and reconstitute positions, and scattered US units still held part of the ridge. Over the course of the next hour, rallying of disrupted and demoralized units continued on both sides while the US fought a guerilla-style battle to keep units on the hills in Sector 77. A mortar and two US M3 units were lost, as the M3’s tried unsuccessfully to stay out of the line of panzer fire. A concealed 37AT unit scored a hit on a reconnoitering Pz.II platoon on the south flank, but the 37AT and two more M3 units were eliminated by German infantry and panzer fire. By 1015, an American HMG unit had reoccupied the WERT behind the German front line, and the few remaining American units were breaking through the center to aid that unit. At 1030, the stalwart US 37AT platoon on the north flank finally fell to a German combined assault after holding out for over half an hour and slowing the German response to the breakthrough. By 1100, the American units on the WERT were surrounded by Germans, and the last US infantry unit with its two officers fell at 1115 hours, giving the Germans a minor victory. The scenario is played on a long map (34”) and the Germans need to achieve two objectives related to clearing all hills on the eastern map and the 60-meter ones on the western map (only 5 centrally located hexes) without losing 10 steps, tanks counting double. The biggest challenges for the American player are to slow the German advance and eliminate 10 steps, and for the German player are to clear the eastern hills and make a run at taking the far-flung 60-meter hill hexes. A strategy of positioning the Americans with strength on the eastern map was used in this scenario in an attempt to slow the German advance to the west and attempt to both claim 10 steps and hold at least one hill hex on Map #77 while doing so. The strategy fell short by a single German step, which was quite possible to achieve, and by the loss of the last American unit holding a hill hex on the last German chance to take out the unit. So, a potential American major victory became a minor German one with the last 2-3 rolls of the game going perfectly for the Axis. German victory would be much easier if it weren’t for the “mud rules”, which significantly impede armor and truck movement for the Germans. The US started with all units on the eastern map, and strategically withdrew two infantry & two M3 units to the 60-meter hills; in retrospect, if one of those infantry had been left further east, the outcome might have been different. The final count of steps lost was: American, 25; German, 9. |
||||||||||||
| 0 Comments |
| Too Tough a Nut to Crack | ||||||||||||
|---|---|---|---|---|---|---|---|---|---|---|---|---|
The Germans have a really tough set of objectives in this one: Kick all the US units off of the 3 hills on board 76 and be in sole possession of the 60m hilltop there. The US has to kill 10 steps of Germans to force the Germans to have to do both objectives to get a draw. I set up the US forces in outposts starting west of the north-south trail on board 77 so that three outposts of infantry and HMGs covered the front with some ability to hit just about anything that came forward, with the M6 and a towed 37 dug in behind that front and another backup force of US infantry on the 40m hilltop on the western half of board 77, and placed the US 105s, and the other 37mm AT gun with the US LTC on the 60m hilltop on board 76 with outposts on the eastern edges of that large hill with the US 81mm mortars on the northeastern hex and more infantry in the southeastern hex. All US troops were dug in. Germans started out on the ridge to the east of the trail with infantry and HMGs on the north and south ends of their line and tanks in the middle, hoping to strike and overwhelm the US outposts and let the tanks drive up and engage the US as early as possible to take the large hill on board 76. The plan started to fail quickly as US arty started damaging German infantry stacks, and German artillery failed to do any damage before German elements of 2 or 3 stacks of infantry/HMG groups assaulted the US outposts. Those US troops took a toll of the Germans in the moments that they had to stop adjacent before ascending the slopes and assaulting. German losses surpassed the 10 steps by the end of turn 3, with the loss of 3 of the 4 German LTs and surviving steps demoralized and falling back. The German armor found itself in the middle of the AT fire from the M6, the two 37mm guns and the 105, which while not killing them, kept them from being more aggressive. The chance for the US infantry still on the large hill to assault the tanks also made them keep a distance where their direct fire values failed to hurt the defenders. As the tanks advanced on the two US outposts on that large hill, the outposts simply fell back to reinforce the guns on the hilltop. With no leaders within spotting distance, the German arty was of no help there. The German infantry had fallen back with what leaders they still had to the starting line, with German arty throwing their shells to no effect. At the end of 6 turns, with little the Germans could do to take that hilltop and from there the other hill hexes on board 77, I called it a game. US victory. |
||||||||||||
| 0 Comments |
| If a Stuart is the Ford Pinto of North Africa, the 37mm ATG is the Ford Pinto on cinder blocks by the shed... | ||||||||||||||
|---|---|---|---|---|---|---|---|---|---|---|---|---|---|---|
Looking at the column coming from the east, the Americans didn't have that much they could do. Fair OBA, a single 105mm and three 81mm mortars. A couple 37mms one on a portee. Then a fair set of infantry and lots of M3s for fire support. Given that the Germans coming down the road and to the sides had more or less impenetrable Panzers and a raft of well let infantry, the Americans chose to set up on the high hills in the middle with the 81mms and 50 Cal HMGs with good spotting leaders, the 37mms and the rest of the defense attempted to dig in on the reverse slopes of the forward hills, only becoming visible to the Germans at the last moment. With the high ground advantage, the US OBA and 81mm spotters had access to almost the whole space across which, the Germans had to advance. Starting with a few good OBA rolls the German forces started to attrit as they advanced. The HMGs and the mortars on the heights also started to extract losses from the Germans in the first hour of the advance. In the center, the Germans were able to work around the 37mm ATG and destroy it and to then attack the gun on the American left flank. With no more anti tank weapons in place to stop them, the German commander worked to methodically assault on their right flank. The Americans were able to put up strong resistance with outlying positions and with the troops on the heights. All this took a toll on both sides. At first the German losses were higher, then as the panzers and supporting infantry cleared the heights, the toll moved predominately to the Americans and stayed that way. As the American troops were driven off the heights, they tried some local counter attacks with the M3s and Infantry platoons on both flanks, but they paid the price and ultimately had to withdraw or surrender. The result was a minor German victory due to the early losses, but ultimately that was not enough to save the Americans. Lessons. Reverse slope defenses are hard to realize in practice. Concentrating your artillery to allow combined fire is superior in practice than disbursing it along the line. Dug in 50 cals can hold up an advance longer than you expect. Booby trap your 37mm guns early and then try to get the enemy to capture them. More are going to retire from stubbed toes and smashed fingers capturing them than will die from being shot at by them. |
||||||||||||||
| 1 Comment |
| A Fine Tough Fight in the Hills | ||||||||||||||
|---|---|---|---|---|---|---|---|---|---|---|---|---|---|---|
This was a 5-session, online play-through with a resolute, challenging and resourceful opponent playing the American side. This scenario is played on a long and narrow map that constricted movement for both sides. We played without the dreaded FOW rule, but with the Consolidation, Extended Assault and Smoke optional rules. I played the remnants of the once-proud PanzerArmee in Tunisia. In this scenario, the 10th Panzer Division's objective was to push the advanced American elements out of Djebel Bou Aoukaz and surrounding rough terrain. My opponent's setup was well-thought-out, and in-depth. The German combined arms force inexorably advanced west on both flanks, while the captured 25-pounder, the OBA, and 2 platoons of 81mm mortars suppressed the most forward American elements. Adroit fire and maneuver and accurate supporting artillery resulted in the elimination of 2 of the US AT guns in the first 3 turns, thereby ending the possibility of AT crossfires in the bare hills and valleys of Map 77. The American side was able to inflict heavy casualties on the slowly advancing Germans infantry while grudgingly giving ground in the center of Map 76. However, once the panzers arrived on the main hill mass, they were able to destroy all 9 of the waiting American M-3 halftrack on both flanks with well-aimed AT shots. Typical of the luck of the German Commander, the US 105mm howitzer platoon lasted through the entire game, in spite of repeated counter battery fire. In addition, a single American .50 cal HMG platoon managed to inflict 4 step losses on attacking German infantry before the American player conceded the minor victory on Game Turn 13. The victory conditions required that the Germans achieve two major objectives: 1) clear all hills on the western Map 76, and 2) control all five of the 60-meter hilltop hexes, also on Map 76 -- without losing 10 steps. In our play-through, the Germans were only able to achieve a minor victory by holding the 5 hexes of 60-meter hilltop, since they lost more than 10 steps. The final count of steps lost was: 25 for the US and 12 for the German side. Axis victory conditions would have been easier to accomplish if it weren’t for the “mud rule,” which significantly reduced German armor and truck mobility. The scenario favors the German side and played out much like the real effort did. This was a fun-filled, historically-accurate (hence slightly unbalanced) scenario. I give it a rating of 4. |
||||||||||||||
| 0 Comments |