
|
Tigers in Tunisia An Army at Dawn #6 |
||
|---|---|---|
| (Attacker) Germany | vs |
Britain
(Defender)
United States (Defender) |
| Formations Involved | ||
|---|---|---|
| Britain |  |
2nd Royal Hampshire |
| Britain |  |
Blade Force |
| Germany |  |
10th Panzer Division |
| Germany |  |
Hermann Göring Panzer Division |
| United States |  |
1st "Old Ironsides" Armored Division |

| Total | |
|---|---|
| Side 1 | 11 |
| Draw | 0 |
| Side 2 | 5 |


| Overall Rating, 17 votes |
|---|
|
4.24
|
| Scenario Rank: 31 of 913 |
| Parent Game | An Army at Dawn |
|---|---|
| Historicity | Historical |
| Date | 1942-12-01 |
| Start Time | 12:00 |
| Turn Count | 20 |
| Visibility | Day |
| Counters | 70 |
| Net Morale | 0 |
| Net Initiative | 1 |
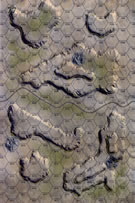
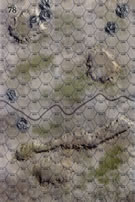
| Maps | 2: 77, 78 |
| Layout Dimensions | 56 x 43 cm 22 x 17 in |
| Play Bounty | 135 |
| AAR Bounty | 135 |
| Total Plays | 16 |
| Total AARs | 7 |
| Battle Types |
|---|
| Exit the Battle Area |
| Hill Control |
| Inflict Enemy Casualties |
| Conditions |
|---|
| Off-board Artillery |
| Randomly-drawn Aircraft |
| Reinforcements |
| Smoke |
| Terrain Mods |
| Scenario Requirements & Playability | |
|---|---|
| An Army at Dawn | Base Game |
| Introduction |
|---|
|
General Wolfgang Fischer, commander of the 10th Panzer Division, planned for the two German kampfgruppen in the north to take Tebourba after securing Chouigui and preventing Allied reinforcements from that direction. When those forces became bogged down the General became impatient and ordered his exploitation force into action as well. |
| Conclusion |
|---|
|
In confused fighting the Royal Hampshires withstood the best the Wehrmacht could throw at them, including the vaunted Tiger tanks debuting for the first time in Africa. The Tigers should have made the difference but seem to have contented themselves with tormenting the displaced Stuarts. Whether losing their commander to a sniper early in the fighting caused them to lose focus is unknown, but General Fischer raged to his superiors about the low quality of the Wehrmacht infantry late into the night. |

|
|
|---|
| AFV Rules Pertaining to this Scenario's Order of Battle |
|---|
|
| Army |
|---|
|


| Heer |
|---|
|


| Luftwaffe |
|---|
|


| Army |
|---|
|


| 6 Errata Items | |
|---|---|

|
All Bren carriers should have a movement value of 7. (Shad
on 2010 Dec 15)
|

|
Two British infantry have their full strengths printed on the back. They should both be "2-3" when reduced. (Shad
on 2010 Dec 15)
|

|
The reduced direct fire value of the Heer HMG became 5-5 starting with Fall of France. (plloyd1010
on 2015 Jul 31)
|

|
The morale and combat modifiers of German Sergeant #1614 should be "0", not "8". (Shad
on 2010 Dec 15)
|

|
Liberation 1944's Tiger movement and armor ratings are backwards. They should be Armor 7 and Movement 5. (petermc
on 2014 Feb 14)
|

|
Reduce strength direct fire value be came 5-5 in Army at Dawn. (plloyd1010
on 2015 Jul 31)
|
| Burning Stuarts | ||||||||||||
|---|---|---|---|---|---|---|---|---|---|---|---|---|
There is something about trying to take on Tigers with Lees and Stuarts. The Allies have a lot of territory to cover in this one, with few units to do it with. I set up the 3 Lees forward on board 77 to try to trade shots and slow down the German advance. The British troops were deployed on hills on board 78, with the 6pdr and an infantry dug in on the edge of the wadi to try to get a shot at anything moving down the road. With the amount of turns, there was little need for the Germans to stay on the road, even the trucks could manage the slower off-road rate and the infantry ended in a position to exit within 2 turns had they been needed to achieve he 10-point exit target. I brought the Germans on, infantry in line, on the north half, Fallschirmjaegers on the south side, trucks towing guns along with the FJs with the plan of moving the 88 and 20mm guns up to a good hill spot in the rocky saddle of the southwest hill mass while the rest of the trucks and towed guns kept on heading west as part of the exit element. The 88 and 20mm guns got into position on turn 2 but couldnt get unloaded before the US got a shot off at them from one of the Lees. Bang, 2 dead trucks, with 88s and 20mm guns right along with them. Next, another forward Lee got a shot at the Pz III, reducing it but failing to disrupt or demoralize the surviving tanks. That was the last of the fun for the Lees, as the Tigers got into position and destroyed 2 steps of Lee with one shot and a single step of one just a bit further away with a second. The Mk III finished off the second Lee unit. German infantry on both flanks moved forward unopposed while the 3rd Lee tried to get into position to shoot up other trucks, but only managed to demoralize one before getting a step loss to the 75mm AT gun and then being finished off in assault bo the Fallschirmjaegers. Massed German infantry were storming the first hill on board 78 when the reinforcements arrived. The Tiger, having been targetted for assault by British troops from both the hill and from the wadi, and having shown them the error of their decision (being demoralized by adjacent hex 88mm fire), it turned and started killing Stuarts at a range of 7 hexes, easily killing outright every other shot and reducing the ones in between. Surviving Stuarts along with the British Crusader ran to assault German infantry to prevent the Tiger from killing more, but the Tiger just shifted fire and killed one of the M-3 units and killed a step of another, leaving only the M-3/81 to offer fire support, and then only for a turn before it also was destroyed along with the other M-3 step. Stuarts and the Crusader traded step losses, but the German infantry came out on top when the last Stuarts were left burning on the hill. By now, the German trucks and towed guns were exiting the board, the German SK 10/4 and the Mk III were assaulting the single British unit on the southeast hill and winning, and German air and OBA were taking a toll on the British troops holding the northeast hill. The FJs lost all their leaders attempting to assault the British AT gun, bren carrier and 2 steps of surviving British infantry that had fled back to cover after the Tigers quit shooting at them, but survived sitting in the adjacent hex exchanging fire, turn after turn, killing off all but the bren carrier and the 2 British leaders there, until more German infantry came south from the first hill. In 2 turns, the last British in the wadi and in the northwest hill had been eliminated, that happening on turn 19. The Tiger, not seeing more armor targets and getting board, headed off the board to fill out the last 3 points needed for exit conditions. Germans managed to pull off 2 of the 3 conditions, having lost 12 steps, but having destroyed or driven off all but 2 British leaders. German marginal win. Honestly, at the halfway point, it wasnt looking like they would make it. I nearly stopped at the end of turn 10 because the assaults in the center seemed to have bogged down and the Germans didn't look like they could get 2 of 3 conditions, or even one at the moment, but playing on proved they could do it. British infantry, even single steps, lasted a long time, and a single step unit in the northwest hill rolled an 11 and a 2, delaying two stacks that were headed towards assaulting it. Real nail biter, with no real effect from allied airpower but several moments when the German airpower did major damage, and both sides called in danger close fire missions and lucked out on friendly fire every time. Great game. |
||||||||||||
| 0 Comments |
| Combined Arms attack vs. a desperate defense |
|---|
|
Great Scenario. The Germans have only two main tanks, one Tiger and one IIIN, while the Allies have Lees and a ton of Stuarts as reinforcements. The Germans need to use caution and keep the tanks and infantry working together, or the attack will stall. The allies should probably use the limiting terrain of the Wadis to launch surprise tank moves, and the infantry should block the road and/or occupy the rocky ground on the victory hills. In my game I played with FOW which had a huge impact on the outcome. The Tiger advanced over a ridge and immediately rolled a 16. Germans moved first the next turn and with two dice rolls the Tiger killed two Lee units outright. Without FOW, the Lee units could have retired to hexes out of LOS or out of spotting range. From there the Germans marched on pretty methodically, a minor victory was never in doubt, but they got the major win by clearing the hills on the last activation of the last turn. The "roll a 5-6" every turn reinforement mechanism makes this a tough one to balance but I think its pretty fairly even...the Germans have to keep combined arms in mind and move methodically, while the Allies have to understand terrain and think of aggressive ambushes. Unique, interesting, challening, fun to play either side, a ranked it a full on, enthusiastic 5. |
| 0 Comments |
| Feeding the Tiger | ||||||||||||
|---|---|---|---|---|---|---|---|---|---|---|---|---|
The recently landed 10th Panzer Division had been split into four strike groups by its commander, General Wolfgang Fischer. One group had successfully taken Chouigui (AAaD Scenario # 5), while another moved east from Djédeïda toward Tébourba, which was currently held by an Anglo-American force from the 2nd Royal Hampshire Battalion and Combat Command B of the US 1st Armored Division. Elements of the 10th Panzer Division and the Panzer Division Herman Göring encountered the Allies at noon on December 1. The Allied forces were dug in on hills both north and south of the primary east/west road on Map #77. German infantry and armor units moved west on both hills, while artillery platoons were held in reserve until the hills could be cleared. An SK.10/4 platoon that was supporting paratrooper units on the NE hill was destroyed by a remarkably accurate shot from a British 6-pounder on west end of the SE hill. The British foot units on the north hill retreated west, but those on the south hill doggedly held on, slowing the German advance. At 1245, elements from the Blade Force began arriving from the north and moved to cut off the German artillery convoy that had just emerged from the east. A Tiger platoon moved back from the south hill to protect the convoy, while the artillery platoons quickly unlimbered their guns. By 1315, 3 Stuart platoons had been eliminated and the remainder of the Blade Force reinforcements fell back to cover on the north side of the NE hill. Then German mortars took out the 6-pounder platoon, and a Pz.IIIN platoon that had survived multiple volleys from a dug-in M3 Lee destroyed another Stuart unit. While the German Tiger and Pz.IIIN platoons continued to decimate Stuart and Lee platoons on the north side of the road, a convoy of German artillery moved forward to command the NE hill. An 88 on the SE hill destroyed a Crusader platoon that was providing support to the British infantry and weapon units there, but they still held fast on the hill until they were called back toward the SW hills at 1545 to help stem the German tide moving westward along the road. Stuart and Lee platoons attempted to catch the Tiger in a crossfire, but they were destroyed by a combination of fire from the German anti-tank guns and the Tiger before any significant damage occurred. At 1615, German units broke through to the west and the battle was lost, with the Germans achieving a minor victory. The objectives of this scenario are three fold: no Allied units on the hills of Board # 78, 10 German steps exited west, and not to lose more than 10 German steps. The Germans need to reach two of the three objectives for a minor victory, and all three for a major victory. The game was extremely close to a major German victory, but the British units that held out for so long on the southeast hill were able to drop back, protected by a ridge and hold a hill hex in the extreme SW corner. Otherwise, the Germans controlled the board. The survival of the Bren was key for the British maneuverability, as it could quickly move a leader and infantry platoon out of range of the German firepower. Since the Tiger unit is pretty impregnable in this scenario, the best thing to do is stay out of the way, although one could gamble with a swarm assault if sufficient forces could be mobilized and could get close enough without serious casualties to do so. A platoon or two of fallschirmjager makes the latter a very questionable strategy, and one not tried in this case. The scenario was tenser than one might expect, as the Germans exited the last 5 points needed on Turn 20, and ended up with nine steps lost (compared to the 51 steps lost by the Allies), so the minor victory was hard fought. |
||||||||||||
| 0 Comments |
| An Army At Dawn, scenario #6: Tigers in Tunisia | ||||||||||||
|---|---|---|---|---|---|---|---|---|---|---|---|---|
An Army At Dawn, scenario #6: Tigers in Tunisia Back to the Desert! This was a fun scenario to play but I’ll make this a short AAR. The Germans have three victory conditions with different levels of victory. In short the British/Americans reinforcements didn’t come on the map until turn 6 which is not soon enough and the German Tiger unit is unstoppable for the British and American armor on this scenario. The Germans are able to achieve two out of three victory conditions for a minor victory and they could not take control of all the hill hexes, just too spread-out. If you like blowing up: Lee, Stuart, Crusader III tanks and a variety of halftracks this is a fun scenario. This game has a ton of interesting scenarios to play but I think at this point in the war, the Italians have been in the theater longer than the Germans and their tanks shouldn’t need leaders and should be armor efficient what such obsolete armor that they had and did well in surviving with. Read the book Iron Hulls, Iron Hearts, and I think you will agree. |
||||||||||||
| 0 Comments |
| Stuarts to the Slaughter | ||||||||||||
|---|---|---|---|---|---|---|---|---|---|---|---|---|
Mike Perryman asked me to play an Army at Dawn scenario with Tigers a mob of Stuarts and use Extended Assault to see If the Stuarts can swarm and overcome the Tiger with an assault. The Allied forces set up with the infantry on Board 77 on the high ground near the center to block the rad. The plan was to delay the German advance as long as possible then fall back to Board 78 and deny the hill victory condition. The allied tank force would come and wait for an opportunity to pounce on the German tanks and defeat them in close assault, the only way they would have effect on the Tiger platoon. The Germans sent the Fallschirmjaeger company to attack the northern-most UK infantry to fix them while the main force came up from the southeast to assault the UH force on the middle dorsal. The Tiger, and later the 88mm gun moved to the 40-meter level to overwatch and death quickly with two Lee platoons. The Germans methodically cleared the southern UK position, but the Luftwaffe guys had trouble with the northern, succumbing to enemy indirect fire. One the Tiger and the support PzIIN moved forward the Stuarts, hiding behind the large northern hill mass, pounced. Although they killed a step of PzIIINs, the Tiger simply dispatched all the Stuarts with its overwhelming gun. The northern UK infantry did pull back and accomplish the mission of holding onto Board 78 hills. The Germans then moved he Tiger, Pz IIINs and, infantry and some guns off the west edge to secure that VC and managed to suffer only five step losses for the minor victory. Although the allied force took a pounding and losing all its AFVs except for the indirect fire one, they did have a chance to deny a second VC but could cause enough casualties. |
||||||||||||
| 1 Comment |
Hmm, almost the same results when goosebrown and I played this scenario. The Germans won that one too, but a couple of M3 Stuart platoons survived the ordeal. Stuarts are fast, but contrary to what Jackie Fisher once said about his beloved WWI battlecruisers: speed certainly does NOT equal armor.
| Tiger Terror | ||||||||||||
|---|---|---|---|---|---|---|---|---|---|---|---|---|
In this battle, a British infantry company, supported by an American Grant company, must hold off about a battalion of mixed German infantry and paratroopers. The Germans also have some AT gun support and a platoon each of PzIII and Tigers. The Germans must capture all the hills on their half of the two-board layout, and exit 10 steps off the far edge. The Allies must stop them, and will have a full Stuart battalion with support arrive as reinforcements, to help them do it. With the arrival of Allied reinforcements weighing heavily on the Germans mind, they aggressively attacked the two hills being held by dug in Allied troops. It did not go well. Limited Allied airpower did a banner job of hindering and killing the German infantry, along with some truly devastating opp fire. Over the course of three hours, the paratrooper company at one hill and the infantry battalion(-) at the other completely wore themselves out trying to defeat the dug in Allies. The Allied Grants took a beating from the Tiger, as did a company of Stuarts when the gamely tried to set up a Tiger crossfire, but that is about all the Allies lost. The Germans would have probably done better with a more deliberate preparation before the assault (my most common tactical error) but they were very exposed and I'm leery of taking a pounding without being able to reply. Major Allied victory. |
||||||||||||
| 0 Comments |
| Ponderous Tigers and Fast Stuarts | ||||||||||||||
|---|---|---|---|---|---|---|---|---|---|---|---|---|---|---|
This was a 6-session play-through with the resourceful and wily, goosebrown, as the Allied Commander holding a pass and several adjacent hills. We used the optional smoke, consolidation, excess initiative, extended assault, as well as the dreaded Fog of War rules. The Blade Force was setup in mutually supporting blocking positions on the two central 20-meter hills, just west of the main pass, with a company of supporting armor nearby. I played the role of German General Fischer of the newly-arrived, 10th Panzer Division. The initial German movement-to-contact from the east was on a broad front with three prongs: Luftwaffe paratroopers in the north, a mobile combined arms group in the center, and a scouting/observation group in the south. The latter established a fine overwatch position for their Forward Observer (FO) on the southeastern 40-meter hilltop. The Germans were supported by OBA and occasional air attacks that grew in intensity as the game progressed. During our 3rd session (game turns 5-7), the Germans began inflicting serious losses on the Allied armor as 2 platoons of Lee tanks that were caught in the open were quickly eliminated by the 88 AT gun platoon and the slow-moving Tiger I unit. Allied reinforcement did not show up on time, but the first two American air attacks provided suppression of the 88 emplacement. Luftwaffe stukas were successful in eliminating the British 6-pounder AT gun platoon and also in suppressing the major portion of Blade Force on the hilltop just southwest of the main pass. While the German ground attack on the northernmost of the two hill in the pass came on supported by heavy machine gun covering fire. During our 4th session (game turns 7-11), the Germans continued inflicting grievous losses on Allied infantry formations in close assaults, to artillery, and to air strikes by Stukas. Allied reinforcements continued to lag, but two more American air attacks again provided suppression of the 88 emplacement. Blade Force leadership suffered a decapitation when the only Captain was captured as he fled from an assault. As play wore on, the German ground attack slowly gained ground and drove the remains of Blade Force off the more northern of the two hills, while the sole remaining British mortar platoon continued to miraculously hold out against repeated close assaults. The sole remaining American Lee tank platoon scored a long-range success and eliminated a section of the Pz-III platoon in an assault hex, but did so at a cost of half-of its strength lost in air and artillery strikes. The fifth session (game turns 11-15) was characterized by the destruction of the heroic remains of the Blade Force after multiple turns of air strikes, OBA concentrations and fierce close assaults. The widely scattered German force then began slowly concentrating on the three hill masses in the northwest corner of Map 77, and resolving a large number of morale recoveries. With the battlefield quieter due to the elimination of all British artillery observation and the end of the 4 turns of American air support, the Germans were able to re-organize for the eventual entrance of the Allied reinforcements on the north margin of Map 77. This movement-to-contact commenced at the beginning of game turn 13 at the north juncture of maps 77 and 78 with the charge of a battalion of Stuart light tanks quickly moving west along the north margin of Map 78, and the unsupported armored close assault on the dug-in 28mm AT gun, and paratrooper HMG platoon in Hex 77-0201. The latter quickly resulted in the destruction of 3 steps of Allied tanks and reinforcement by other paratroopers. Elements of the 10th Panzer redeploying to the west onto Map 78. With the direction of the Allied tactical movement becoming clear. This Allied movement proved decisive, in the end, as the it took the German side far too long to decisively engage the fast-moving US armor. At the end of turn 15, the total of steps lost was: 27 for the Allies, and 5 for the German side. The 6th session (game turns 16-20) featured the continued German movement to the west culminating in 12 steps exiting the map on the final game turn. However, the cunning Allied Commander was able to save the bulk of the remaining US Armor by scuttling to the far northwest of Map 78 behind the hill. At game end, there was still one Stuart Tank Platoon occupying a hex on the actual hill, resulting in a German minor victory. Final step losses were: 7 for the Germans, and 39 for the Allies. I give this scenario a 3, since it has gamey victory conditions making it virtually impossible for the Allied player to do more than huddle in safe hexes and stymie the Germans on the last 2 game turns by denying them at least one of their 3 victory conditions. Suggestions for Victory Condition revision: 1) require that the Germans exit at least 1 leader with their 10 steps of combat units off the west edge of the map, and 2) avoid the gamey, "cower-in-the-corner-behind-the-hill tactic" by requiring the Allied player to ALSO exit at least 8 steps of combat units off the west edge of the map. |
||||||||||||||
| 1 Comment |
Very accurate. I felt sort of bad using the gamey hide in the corner behind the hill tactic, but it is a game so...
Very fine game with Treadasaurusrex again. A resourceful, careful and talented opponent.
I have to say though that so far, the 88s and Tigers, while awe inspiring became interesting obstacles to work around and for the most part, due to speed, they were reasonable obstacles to work around.
I will also add, that Stuarts, the worst tank since the FT17 is really zippy and that HMG is pretty useful. It is more of a Bren Carrier though than a tank.