
|
Tank Infestation An Army at Dawn #4 |
||
|---|---|---|
| (Attacker) Germany | vs | United States (Defender) |
| Formations Involved | ||
|---|---|---|
| Germany |  |
190th Panzer Battalion |
| United States |  |
1st "Old Ironsides" Armored Division |

| Total | |
|---|---|
| Side 1 | 22 |
| Draw | 0 |
| Side 2 | 1 |


| Overall Rating, 26 votes |
|---|
|
3.12
|
| Scenario Rank: 676 of 913 |
| Parent Game | An Army at Dawn |
|---|---|
| Historicity | Historical |
| Date | 1942-11-26 |
| Start Time | 12:00 |
| Turn Count | 16 |
| Visibility | Day |
| Counters | 32 |
| Net Morale | 1 |
| Net Initiative | 1 |
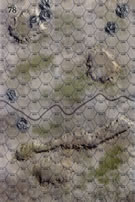
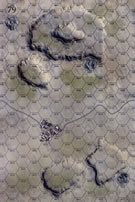
| Maps | 2: 78, 79 |
| Layout Dimensions | 56 x 43 cm 22 x 17 in |
| Play Bounty | 116 |
| AAR Bounty | 117 |
| Total Plays | 23 |
| Total AARs | 10 |
| Battle Types |
|---|
| Exit the Battle Area |
| Inflict Enemy Casualties |
| Conditions |
|---|
| Smoke |
| Scenario Requirements & Playability | |
|---|---|
| An Army at Dawn | Base Game |
| Introduction |
|---|
|
Allied command created a tank-heavy regimental group known as Blade Force to move into the Tine Valley and generate a “tank infested area”. Nobody knew what that meant, but it sounded good. In response to an American raid on a nearby Luftwaffe airfield the Germans send in their own tanks to infest the valley. |
| Conclusion |
|---|
|
Despite the well-documented use of long-barreled Panzer IV's against the British since May, word apparently did not trickle down to American tank battalion commanders. The Stuarts posed a poor matchup as Company A lost half of their twelve tanks in the first ten minutes. However, their sacrifice allowed Company B to take the panzers in the rear and eliminate seven of the troublesome intruders. The German commander, surprised and unsure of the presence of more enemies, retired with the Americans in hot pursuit. |

|
|
|---|
| AFV Rules Pertaining to this Scenario's Order of Battle |
|---|
|
| Heer |
|---|
|


| Luftwaffe |
|---|
|


| Army |
|---|
|


| 2 Errata Items | |
|---|---|

|
All SS PzIVH tanks should have a movement of 8. (Shad
on 2010 Dec 15)
|

|
Reduce strength direct fire value be came 5-5 in Army at Dawn. (plloyd1010
on 2015 Jul 31)
|
| Gen Stuart Would be Embarrased Today | ||||||||||||
|---|---|---|---|---|---|---|---|---|---|---|---|---|
This scenario has 11 platoons of Stuarts, dug in on 2 boards, with 2 halftrack units, one an 81mm mortar and the other the T30. This defending against a company of Fallschirmjaegers supported by 2 Mk IIIH, 1 Mk IIIJ and a Mk IVH. Germans need to move across the board from north to south and exit as much as possible off the board, the US has to destroy as much of them as possible. The Stuarts show their lack of AT value quite well here. The Germans entered the trucks loaded with troops towards the western side of the board, about 6 hexes from the west edge, as German recon had shown the US to have set up more of the defensive force around the town in the east, with scattered pockets of tanks all along the line. The initial outpost of Stuarts got a shot at the leading stack of trucks and loaded troops but missed, and the accompanying Panzers made mincemeat out of the 2 Stuarts stacked on the side of the hill there. Another pair of Stuarts raced up but came under fire from the other 2 Panzers and were themselves eliminated without causing any damage. The German paras figured out pretty quickly that the best way to face tanks was to dismount and work in towards assaults among the rough ground along the west side of the board, and another stack of 2 Stuarts left the long ridge near the south end to try to get some direct fire against the German infantry. The infantry and armor must have practiced this sort of thing often, because the Panzers destroyed one of the 2 Stuarts and left the other with a step loss but good morale, and then the Fallschirmjaegers hit and finished off the Stuarts in assault to no loss. After the loss of more tanks, the M3/81 got a hit on the stack of Fallshirmjaegers, now a stack of 3 units, giving the mortars another column shift and rolling a disruption, but ever time a US unit fired, it was fired back at by 4 panzer platoons. Both halftrack platoons lay in heaps of scrap metal, and finally down to a single demoralized Stuart platoon fleeing to the southeast, the Germans found themselves with time to regroup, reload and exit the south of the board, and having suffered no actual losses. In the last turn of my game, turn 11, the Stuart had regrouped from demoralized to disrupted, and this made the Mk IIIJs decide to place some well-aimed AP shot, eliminating that last step. Turn 12 saw the tanks and the last trucks full of paras move off the map. Solid major German victory, and an embarrassing moment for the ghost of the man whose name the US tanks bore. This scenario needs a US player willing to sacrifice some armor while more gets into position to take out the German infantry, preferably as early as possible. Get that mortar and T30 out there to engage those trucks and kill infantry targets. The only real chance the Stuarts have against even the MkIIIs is cross-fire at adjacent hex, not something I was able to achieve, especially as every time I had a carefully positioned shot lined up, the Germans won the initiative on the next turn and got the first shot, and at +3 or higher, they killed whole platoons with a single shot several times. I ended up sacrificing too many too early and allowed the German infantry to close to assault range while the Panzers had pretty much free reign of the area. |
||||||||||||
| 0 Comments |
| Stuarts burn like a bonfire regardless of who's driving | ||||||||||||
|---|---|---|---|---|---|---|---|---|---|---|---|---|
Seriously, these Stuarts were the Ford Pintos of the Second World War. The Germans moved straight down the middle, the Panzer IIIj and IVh in the lead of the column of motorized paratroopers. Their idea was to move fast and exit the south board with the strongest units to bash their way through since American armor had proven to be notional at best. They put a platoon of IIs and IIIhs on each flank to hold off any Americans that got fancy notions to try and turn a flank. The Americans knew that they only really had a chance if they could block the infantry from exiting the southern edge, but not even really that. It was grim. The Americans put the "tank destroyer" and all but two of the Stuart platoons on their left and went hell for leather to try and turn the German flank. The other two platoons of Stuarts and the morter trak headed into town to hold there in the protected position. On the left, the good news is that by the second turn 4 platoons of Stuarts had successfully turned the German right, and were set up for enfilade on the panzers there to cover the flank. On the left, the BAD news is that by the second turn 4 platoons of Stuarts had successfully turned the German right, and were set up for enfilade on the panzers there to cover the flank.... And burned like bonfire before the big game as the IVh and IIIj savaged them, taking three three steps of the Stuarts about 4 seconds after they achieved their enfilade position. The rest, demoralized struggled with moral for the remaining turns of the game. VERY occasionally getting of an enfilade shot while the Stuarts in FRONT of the German right, were served a portion of the same stew as the flankers. Over four turns the American left disintegrated and burned. However they did keep the Germans occupied and cost the Reich at least RM75 worth of ammunition... They collapsed by turn 9, the final two steps routing off the battlefield. In the center the Falschrimjagers advanced dismounted from their trucks till the morter track got a lucky shot and killed the Capitan and forced a moral check which the FJs failed putting their easy advance to a stop. On the American right, the Stuarts in the town were somewhat more resilient than the lot on the left. The German flanking platoons there were not able to really get at the tanks, but were able to get into a solid back and forth which delayed the German dash to the southern board edge. As the American Left crumbled like they would in the 1972 general elections, burying their cause into a pyre of misplaced optimism and fantasies, the Falschrimjagers pivoted to their left and attacked the Stuarts in the town where the left flank had them pinned. Through a daring and costly assault against the unsupported American armor, they were able to bring more units into the fray, and in bitter street fighting they were able to push the Stuarts out until one platoon broke for the rear, the second and last platoon following them minutes later. The Germans were left in complete control of the board at the cost of half a platoon of IIIhs and half a platoon of Falschrimjagers. Although it lured me in with the promise of an armor romp, I should have known Stuarts were just a fancy dressed decoy to get me to cry as the panzers crushed me... Maybe I should have stayed in bed and watched Lost In Space... sigh. Enjoyed the scenario very much and it play so dang fast. Recommended, |
||||||||||||
| 1 Comment |
| Armored carnage | ||||||||||||
|---|---|---|---|---|---|---|---|---|---|---|---|---|
I've always been ambivalent about pure tank battle scenarios in PG. I don't think they're particularly enjoyable because they lack many of the features of infantry combat that PG excels at. Tank battles are short, sharp and bloody most of the time, which isn't the kind of battle I want to play. Nevertheless, this isn't a bad scenario. Its an interesting puzzle for both sides. The Germans have a decisive superiority in armor quality, but they have to escort extremely vulnerable motorized infantry off the map. The Americans have a swarm of weak Stuarts and essentially nothing else. In my play, I spread the Stuarts out all over the board, dug in with plenty of crossfire opportunities. The Germans entered with just their tanks on turn 1, choosing to hold their infantry back until the American tanks were dealt with. In just a few turns, the Americans had lost 60% of their tanks, but so had the Germans. The Americans still maintained a second line of defense, and the Germans temporarily fell back to regroup. With only 5 turns remaining, the Germans needed to enter their trucks and move them quickly across the board. The problem was that they didn't have enough tanks to guarantee their safety, as the loss of two trucks to long range 37mm fire proved. The Germans chose to retreat. I was sure the Americans were toast, and they got badly burned, but there is very little chance I think for trucks to safely traverse this battlefield. I might consider dismounting the infantry and letting them fight their way across the board in company of the tanks from turn 1. Major American victory. |
||||||||||||
| 0 Comments |
| Panzer Push | ||||||||||||
|---|---|---|---|---|---|---|---|---|---|---|---|---|
At 1200 hours on November 26, 1942, units from the 190th Panzer Battalion attempted to break through the Allied lines in the Tine Valley that were being manned by Combat Command B of the 1st Armored Division, part of a group designated as “Blade Force” by Lt. Gen. Kenneth A.N. Anderson. The Panzer III & IV units moved south on both flanks, spotting M3 Stuart light tanks and exchanging fire. While the Stuarts attempted to catch the Panzers in a crossfire situation, it became clear that the Panzers simply had too much firepower and the Stuarts too little armor. Within the first 90 minutes of the battle, four Stuart platoons had been decimated with two platoons falling to a lone PzIVH platoon. The Americans had a bright spot when a Stuart platoon managed to blow up a truck carrying the German Cpt. von Rhein and the accompanying HMG platoon; however, Lt. Scheinhorst assumed command without a hitch. Stuart platoons continued to be brewed up with seven lost by 1400 hours, along with a T30 platoon falling to the PzIVH unit. A German convoy started to move south with coverage from the Panzers, and it moved down the valley unharmed until exiting at 1530 hours. The battle concluded at 1545 hours with ten Stuart platoons having been lost, while only two Panzer III platoons suffered reduction in force. This was a major victory for the Germans. This scenario seems a very difficult one for the Americans to win, which mirrors the actual dilemma faced by the light tanks of the US in Operation Torch. The Stuarts only fire with “2” AT fire, and thus need a roll of “12” to score hits on the Panzers, while the Panzer IV, with an AT power of “6” only needs to roll a 5 or better to score a hit on the Stuarts with their “1” armor factor. Both crossfire and assault approaches were attempted to compromise the Panzers, but with very limited success as the Stuarts can be disrupted or destroyed by opp fire as they move toward the Panzers. They also do not have the range of the Panzers, so the latter can sit back and fire with impunity on the Stuarts. Ten of the 11 Stuart platoons ended up destroyed, and the remaining unit, which was the only unit on the board after all the German units had exited, was demoralized. The US also only managed to get the initiative on 3 of the 16 turns, with the Germans having multiple action segments on some turns. This was a major German victory, with the Germans scoring 46 VP’s to the Americans 6, and only 4 steps lost to the Americans 24 steps lost. |
||||||||||||
| 0 Comments |
| An Army At Dawn: scenario #4: Tank Infestation | ||||||||||||
|---|---|---|---|---|---|---|---|---|---|---|---|---|
An Army At Dawn: scenario #4: Tank Infestation I setup my American forces across the map from east to west as I didn’t know where the German would enter the map and I didn’t want them to slip of the map for easy victory points. The German saw where they wanted to attack and entered the map with just their armor, blasting a serious hole in the American lines. The American shifted their remaining armor to try and plug this hole. The Germans won the initiative dice roll the first five turns destroying most of the American armor. By turn 6 or 7 the German Infantry rolled on the map, loaded on trucks and simple drove off the southern edge of the map. What was left off the American armor was eliminated by the end of the game. The Americans without infantry didn’t have must of a chance of stopping the Germans with light tanks against the German’s medium tanks. The victory was a total German victory scoring all the points and only losing 1.5 steps of armor to the Americans. |
||||||||||||
| 0 Comments |
| Hold Until Relieved! | ||||||||||||||
|---|---|---|---|---|---|---|---|---|---|---|---|---|---|---|
This was a fun-filled, 3-session play-through, with me playing the doomed elements of Combat Command B of the green & untested US 1st Armored Division. The indefatigable and daring, Sagunto led a mixed-branch German battle group with both paratroopers and mobile elements of the 190th Panzer Battalion. The Jerries’ mission was to inflict casualties and exit the battle map. Both sides drew decent leaders. We played with the FOW, consolidation, smoke/illum, extended assault, tank riders and excess initiative optional rules. In addition, we experimentally used the following 4 house rules: 1) Road Movement for Mechanized & Foot Units All FOOT & MECHANIZED units may move on roads at the rate of 1/2 a Movement Point (MP) per road hex, just like MOTORIZED units, 2) Standardized Movement for Mechanized Units All mechanized units may move through clear hexes at a movement cost of only 1 movement point (MP) per hex, instead of 1 1/2. Add one to this cost if moving up or down slopes hexes, 3) Dug In Units in Hill slopes are Automatically in Limiting Terrain in Desert Games Unless prohibited by special scenario rules, ALL units that are dug-in on slope hexes are considered to be in limiting terrain and are spotted if enemy units approach to within 3 hexes, or 4 hexes for reconnaissance units – – unless they are marked with a spotted marker, see 8.22, and 4) Tank Leader Forward Observation Efficient tank leaders (full strength only) may spot for ALL artillery & air strikes in accordance with the normal spotting rules (8.0, page 19). Just as in the case of leader units spotting, this action does not require an activation. Nonefficient tank leaders may also attempt to spot for ON BOARD ARTILLERY ONLY by throwing a single die per attempt to spot a target. This action does require an activation. They spot the intended target on a die roll of 4-6. The initial session (game turn 1) featured surprisingly accurate (lucky) long-range America AT fire on Map 79 that eliminated a paratroop HMG platoon in their motor transport, along with the lone Luftwaffe leader. In a subsequent German activation, the same thing happened on the north margin of Map 78, when another paratrooper platoon in trucks was hit with long-range AT fire, although no leader was lost in this incident. The Germans remorselessly continued moving south and onto the large 40-meter hill mass north of Chouigui. US tanks scuttled to more sheltered positions in the margins of the large hill mass. The second session (game turns 2-3) consisted a continued German movement-to-contact and the exchange of multiple long-range AT fire attempts. The Germans drew first blood in this session by the elimination a step of US SPAT guns and 2 more of M-3 Stuart tanks. One of the latter was destroyed in a close assault on the large hill mass north of Chouigui. The updated victory point tally was now nearly tied at: 5 for the advancing Germans and 6. for the slowly withdrawing American force. The very costly final session (game turns 4-14) featured a great deal of mostly ineffective long-range AT fire as the Germans relentlessly pushed south and the Americans gave ground, while seeking to setup crossfire shots in hopes of slowing the wave of approaching panzers. The Axis side chose to continue a strong left flank attack, coupled with a weaker right flank approach. US casualties mounted rapidly after game turn 8, when the Germans closed to decisive engagement range. The first Axis units exited the south edge of the battle map during turn 10. In the end, only 3 steps of Germans tanks were lost, thanks primarily to adroit maneuvering by my quick-thinking opponent. There were burning Stuart light thanks throughout the map, as the last Jerry units exited on game turn 14. The final victory point tally was: 42 for the victorious Germans and 26 for the hapless US side. There is little chance for the Americans to prevail in this scenario, so I recommend it for SOLO play only, and give it a generous rating of 3. It did feature a good deal of tactical maneuver and many decision points for both players. |
||||||||||||||
| 0 Comments |
| Too Much for the Swarm of Stuarts | ||||||||||||||
|---|---|---|---|---|---|---|---|---|---|---|---|---|---|---|
This scenario was played online in 2 sessions with a first-time shared player, but long-time & experienced solo PG player as my able opponent. I led the German side and was surprised when the American side conceded after only 7 turns, not halfway through this scenario. Unfortunately, we played using the awful FOW rule which hurt the Germans far more than the US side. On a brighter note, we also used the extended assault, strategic movement and consolidation rules. As others have done as is clear from the AAR on file, the US deployed 11 platoons of M-3 Stuarts, dug in on both maps. This light tank battalion was accompanied by 2 M-3 halftrack platoons with a single 81mm mortar and a T30 unit. The Axis assault force was company of German Paratroopers supported by a tank company consisting of a pair of Pz-IIIH, 1 Pz-Mk IIIJ, and a single, long-barreled Pz-Mk IVH. The Germans had to move directly across the map from northwest to south and exit as many units as possible off the south edge while my opponent's objective was to eliminate as much of my force as he could. Action began in the NW corner of the map with the destruction of the first 2 platoons of Stuarts on a local hill to clear the way for my truck-borne paratroopers, heading south along the western map edge. A turn or two later, an armored counterattack by a company of additional Stuarts was engaged and quickly eliminated by German armor. Dismounted Fallschirmjaegers proceeded to make a series of close assaults in the relatively rough terrain along that same western edge of the battlefield. Bad FOW die rolls delayed, confused and disrupted a number of these assaults, helping burn up turns. However, combined arms assaults paid off for the Germans and 2 more US light tank platoons and their mortar unit were eliminated. For the balance of this play-through only a single German para unit was reduced to half strength for a 1 step loss. My opponent chose to concede before the entire US force was eliminated or routed. This produced a clear victory for the Axis side, even though the their troops had not yet exited the southern edge of the battle area, the there were still 5 steps of Stuarts remaining. This scenario seems to be historically accurate, but it is a tall order for the Americans to prevail with only a swarm of light tanks to defend a lot of ground against superior armor. With lucky shooting and maneuver, the US force may be able to engage those German trucks full of paratroopers. As others have mentioned, the only decent chance the Stuarts have against even the Pz-III units is to try and arrange a series of close-range, cross-fire shots from adjacent hexes. Sadly for their crews, the battalion of Stuarts demonstrated both their lack of AT strength and weak armor protection. |
||||||||||||||
| 0 Comments |
| Try to Hold Until Relieved! | ||||||||||||||
|---|---|---|---|---|---|---|---|---|---|---|---|---|---|---|
This was a fun-filled, 3-session play-through, with me playing the doomed elements of Combat Command B of the green & untested US 1st Armored Division. The indefatigable, yet careful, Capt. Chaos led a mixed-branch German battle group with both paratroopers and mobile elements of the 190th Panzer Battalion. The Jerries’ mission was to inflict casualties and exit the battle map. Both sides drew decent leaders. We played with the FOW, consolidation, smoke/illum, extended assault, tank riders and excess initiative optional rules. In addition, we experimentally used the following 4 house rules: 1) Road Movement for Mechanized & Foot Units All FOOT & MECHANIZED units may move on roads at the rate of 1/2 a Movement Point (MP) per road hex, just like MOTORIZED units, 2) Standardized Movement for Mechanized Units All mechanized units may move through clear hexes at a movement cost of only 1 movement point (MP) per hex, instead of 1 1/2. Add one to this cost if moving up or down slopes hexes, 3) Dug In Units are Automatically in Limiting Terrain in Desert Games Unless prohibited by special scenario rules, ALL units that are dug-in on slope hexes are considered to be in limiting terrain and are spotted if enemy units approach to within 3 hexes, or 4 hexes for reconnaissance units – – unless they are marked with a spotted marker, see 8.22, and 4) Tank Leader Forward Observation Efficient tank leaders (full strength only) may spot for ALL artillery & air strikes in accordance with the normal spotting rules (8.0, page 19). Just as in the case of leader units spotting, this action does not require an activation. Nonefficient tank leaders may also attempt to spot for ON BOARD ARTILLERY ONLY by throwing a single die per attempt to spot a target. This action does require an activation. They spot the intended target on a die roll of 4-6. The initial session (game turn 1) featured surprisingly accurate (lucky) long-range America AT fire on Map 79 that eliminated a paratroop HMG platoon in their motor transport, along with the lone Luftwaffe leader. In a subsequent German activation, the same thing happened on the north margin of Map 78, when another paratrooper platoon in trucks was hit with long-range AT fire, although no leader was lost in this incident. The Germans remorselessly continued moving south and onto the large 40-meter hill mass north of Chouigui. US tanks scuttled to more sheltered positions in the margins of the large hill mass. The second session (game turns 2-3) consisted a continued German movement-to-contact and the exchange of multiple long-range AT fire attempts. The Germans drew first blood in this session by the elimination a step of US SPAT guns and 2 more of M-3 Stuart tanks. One of the latter was destroyed in a close assault on the large hill mass north of Chouigui. The updated victory point tally was now nearly tied at: 5 for the advancing Germans and 6. for the slowly withdrawing American force. The very costly final session (game turns 4-14) featured a great deal of mostly ineffective long-range AT fire as the Germans relentlessly pushed south and the Americans grudgingly gave ground, while seeking to setup crossfire shots in hopes of slowing the wave of superior panzers. The Axis side chose to continue a strong left flank attack, coupled with a weaker right flank approach. US casualties mounted rapidly after game turn 8, when the Germans closed to decisive engagement range. The first Axis units exited the south edge of the battle map during turn 10. In the end, only 3 steps of Germans tanks were lost, thanks primarily to adroit & courageous maneuvering by my quick-thinking opponent. There were burning Stuart light thanks throughout the map, as the last Jerry units exited on game turn 14. The final victory point tally was: 42 for the victorious Germans and 26 for the hapless US side. There is little chance for the Americans to prevail in this scenario, so I recommend it for SOLO play only, and give it a generous rating of 3. As an instructional scenario, it did feature a good deal of maneuver, no OBA, and many decision points for both players. |
||||||||||||||
| 0 Comments |
| Around the flank! | ||||||||||||
|---|---|---|---|---|---|---|---|---|---|---|---|---|
The Germans decided to take the East flank in an effort to swing around the town on their way South. Since the U.S. was forced to defend the entire area, it took a couple of moves to bring the units on the West side to bear on the East flank. The Stuarts were shot to pieces by the heavier German tanks and then it was a quick run to the South. Note: A tank with heavier armor AND longer range has little to fear from a lesser armored vehicle. |
||||||||||||
| 0 Comments |
| Board edge boogie | ||||||||||||
|---|---|---|---|---|---|---|---|---|---|---|---|---|
I set the Americans up in a line six hexes from the north edge with the intent to swing to the area where the Germans attempt to penetrate. The Germans attacked along the east edge of the map with the Pz IVs out front supported by a Pz IIIs and the other Pz IIIs protecting the flank and the trucks. the Stuarts reacted and tried to swarm the German tanks to get the +2 modifier which is what they need to kill. But even when doing so it was hard to get a kill. The German infantry even got into the act and assault some Stuart platoons. After about two hours, it was apparent the Americans were going to be defeated in detail so the Americans conceded. This scenario needed a special rule to allow for some sort of surprise effect on the Germans. In the real action, the one US tank company swarmed the flank of the Germans and this surprised them. The German commander pulled back as a result thinking he was outnumbered. In the game, the US have to surround the panzers and then roll well to get kills. I had many such shots but didn't get the rolls. |
||||||||||||
| 2 Comments |
The thing is even if you surround the Germans, you can't really kill them without some really good luck with the dice before the Germans can kill you first. Hard scenario for the Americans
The thing is even if you surround the Germans, you can't really kill them without some really good luck with the dice before the Germans can kill you first. Hard scenario for the Americans