
|
Fire Support An Army at Dawn #3 |
||
|---|---|---|
|
(Defender)
Germany
(Defender) Italy |
vs |
Britain
(Attacker)
United States (Attacker) |
| Formations Involved | ||
|---|---|---|
| Britain |  |
1st East Surrey |
| Germany |  |
Hermann Göring Panzer Division |
| United States |  |
701st Tank Destroyer Battalion |

| Total | |
|---|---|
| Side 1 | 3 |
| Draw | 14 |
| Side 2 | 8 |


| Overall Rating, 24 votes |
|---|
|
3.71
|
| Scenario Rank: 255 of 913 |
| Parent Game | An Army at Dawn |
|---|---|
| Historicity | Historical |
| Date | 1942-11-23 |
| Start Time | 13:00 |
| Turn Count | 12 |
| Visibility | Day |
| Counters | 29 |
| Net Morale | 0 |
| Net Initiative | 1 |
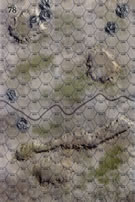
| Maps | 1: 78 |
| Layout Dimensions | 43 x 28 cm 17 x 11 in |
| Play Bounty | 109 |
| AAR Bounty | 117 |
| Total Plays | 25 |
| Total AARs | 10 |
| Battle Types |
|---|
| Hill Control |
| Inflict Enemy Casualties |
| Conditions |
|---|
| Off-board Artillery |
| Randomly-drawn Aircraft |
| Smoke |
| Terrain Mods |
| Scenario Requirements & Playability | |
|---|---|
| An Army at Dawn | Base Game |
| Introduction |
|---|
|
The United States Army offered a pathetic response to the known and growing might of the German panzer arm. Despite manufacturing the 6-pounder for the British (who'd been fighting the panzers in France and North Africa for two years) the Americans armed themselves with the 37mm gun, already proven inadequate. They created a separate tank destroyer command that fought building the useful M10 because they wanted a totally new vehicle. This meant that the troops landing in North Africa possessed a flock of M3 halftracks mounting a low-velocity 75mm cannon and four wheel drive Dodge 3/4 ton trucks armed with the near-useless 37mm bolted to its deck. Doctrine called for these two lightly-armored vehicles to be held back until enemy armor appeared, when they were expected to “aggressively” attack the panzers. Nevertheless, these stalwarts led the advance off the beaches in Operation Torch. Upon arrival in Tunisia they found themselves providing fire support for the British attempting to evict some fallschirmjägers from the high ground west of Medjez el Bab. Once they accomplished that task they planned to take the town. |
| Conclusion |
|---|
|
The combined-arms team seized the high ground west of town with surprising ease because the defenders held their fire until the British crested the last hill before Medjez el Bab. Their fire forced the infantry to ground while the tank destroyers spent more time dodging enemy fire than shooting back. When a flanking move by the tank destroyers failed, the commanders decided to wait until supporting artillery could be brought up. By that time night had fallen and the infantry went in alone, earning a bloody repulse for their effort. |

|
|
|---|
| AFV Rules Pertaining to this Scenario's Order of Battle |
|---|
|
| Army |
|---|
|


| Luftwaffe |
|---|
|


| Regio Esercito |
|---|
|

| Army |
|---|
|


| 3 Errata Items | |
|---|---|

|
All Bren carriers should have a movement value of 7. (Shad
on 2010 Dec 15)
|

|
Two British infantry have their full strengths printed on the back. They should both be "2-3" when reduced. (Shad
on 2010 Dec 15)
|

|
Reduce strength direct fire value be came 5-5 in Army at Dawn. (plloyd1010
on 2015 Jul 31)
|
| Contested! | ||||||||||||
|---|---|---|---|---|---|---|---|---|---|---|---|---|
This small fight has a reinforced Fallschrimjaeger company with a Semovente for armor support holding 2 hills against a similar sized British force with 2 bren carriers for transport and fire support in 2 M3/75s and an M6 tank destroyer. Allies start in a wadi just west of the north-south trail, Germans dug in on both hills. The Germans get random air support, which didnt get much play this game. British jumped right off with the initial initiative, with 2 Infantry and an LT heading accross the short stretch between the southeastern-most Wadi hex hoping to get into assault before losing their strength, while in the north, the 2 Bren carriers moved out smartly with 2 infantry and an LT heading for the smaller northeastern hill. Germans damanged the southern attack quickly with 2 step losses, disrupting the LT and one step and demoralizing the other. The attack in the north managed better, dismounting north of the hill and moving to assault the German Major with 1 Infantry. The Semovente had been dug in on the north side of the southern hill watching for an opportunity to damage some of the light allied armor but moved out to support the Germans in the north, not getting there in time to stop the loss of the infantry and Major but getting there in time to destroy on step of British infantry, disrupting one platoon and demoralizing the step remaining, and placing the british in a bad position just 3 hexes from the dug-in German mortars. The Semovente then turned his attention on the M6 that had moved forward hoping to engage, but losing a step and then retreating back to the cover of the wadi. The British OBA, the fire of the M3/75s and brave attack by the British commander with the HMG and Eng units finally caught up the Germans on the southern hill in assault, but once the British troops were in the hex, all supporting fire had to stop and the Fallschirmjaegers and British troops fought to a standstill, both sides taking morale losses and regrouping but neither getting the upper hand, while the M3/75s moved to try taking out the Italian armor. The M6 finally got up the nerve to leave the wadi, and the combined AT fire took out one step of the Semovente, but the Italian held the hill, forcing the remaining british infantry to assault it, and again, even with the low odds for the Italian, fighting crawled to a standstill. Time moved on and both sides traded morale and regrouping but neiter was able to kick the enemy off of either hill. The British lost 7 steps, as did the Germans, but neither could claim sole ownership of either hill at the end of 12 turns. A 5 for a game that kept the fighting going right to the bitter end. |
||||||||||||
| 0 Comments |
| Saving Lt. LeBlanc | ||||||||||||||
|---|---|---|---|---|---|---|---|---|---|---|---|---|---|---|
This short, but intense face-to-face play through took 2 sessions of battle over the fate of the town of Medjez-el-Bab. It was staged just after the Vichy French came over the the Allied side. The French garrison determined to resist after a German ultimatum was delivered. A combined Allied force defended the town that included British Paras and armor, American artillery and the original combined arms French contingent. Elements of the German 5th Fallschirmjäger Regiment assaulted the town from the south through the woods. Fierce fighting ensued south of the town in the woods/orchards and around the small hill held by a French company under Lt. LeBlanc. His force retreated slowly and the fighting shifted to the south bridge and grew in intensity as the Luftwaffe joined the fight. The combined German force had overwhelming firepower thanks to the 88mm AT gun and they did hold the bridge for some time, though the plucky French LT survived the onslaught and then led a successful, but costly, close assault counterattack, greatly aided by some lucky combat and OBA die rolls. If this scenario had gone longer than 12 turns, it is likely that my opponent's high morale German troops would have prevailed, as there were significantly more demoralized, half-strength and dispersed Allied units than among the German force. As it was, I foolishly risked, and lost the Allied recon vehicles almost immediately, but ultimately was able to hold Medjez-el-Bab and both bridges, mostly thanks to effective opportunity fire. We played without the miserable FOW rule, but used the smoke, extended assault, tank rider, excess initiative and consolidation rules. |
||||||||||||||
| 0 Comments |
| Stop the Allied Invaders in Their Tracks! | ||||||||||||||
|---|---|---|---|---|---|---|---|---|---|---|---|---|---|---|
This was a 3-session play-through with the indomitable & rapidly learning, Capt. Chaos, leading a mixed force of attacking British & American troops. I led a scratch force of dug-in, German Paratroopers in a pair of defensive positions in hilly Northern Tunisia, just west of Medjez el Bab. We played with the FOW, consolidation and excess initiative optional rules. In addition, we experimentally used the following three house rules: 1) Road Movement for Mechanized & Foot Units All FOOT & MECHANIZED units may move on roads at the rate of 1/2 a Movement Point (MP) per road hex, just like MOTORIZED units, and 2) Standardized Movement for Mechanized Units All mechanized units may move through clear hexes at a movement cost of only 1 movement point (MP) per hex, instead of 1 1/2. Add one to this cost if moving up or down slopes hexes, 3) Dug In Units on Hill Slopes are Automatically in Limiting Terrain in Desert Games Unless prohibited by special scenario rules, ALL units that are dug-in on slope hexes are considered to be in limiting terrain and are spotted if enemy units approach to within 3 hexes, or 4 hexes for reconnaissance units – unless they are marked with a spotted marker, see 8.22. The initial session (game turns 1-2) featured the beginning of a deliberate, left flank & central movement to contact to the east for the Allies. This advance was coupled with pinning direct & bombardment fire in the south. Also in the south, the Germans launched a single paratrooper platoon on a probe across the trail and into the long-north-south wadi. Italian long-range AT fire eliminated a platoon of Bern Carriers in the open after they had disgorged their infantry & leader northwest of the northern Axis-held hill. Laszlo, the German paratrooper’s pet snail, escorted their Major on the south hill and helped rally a disrupted mortar outfit in the same hex. The second session (game turns 3-6) featured a good bit of maneuver action across the central basin and many decision points for both sides. His usual good luck with die rolling deserted the Allied commander in this play-through. Multiple morale recovery attempts failed, and a substantial number of hits by Axis AT and close-range direct fire found their marks. By the end of the session the step loss count stood and 0 for the defending Germans, and 8 for the advancing Allies. This resulted in the loss of initiative by the Allies during game turn 5. There were a combined SEVEN combat 7-die rolls in this 4-game turn session. Laszlo, the German mascot, was so excited during this session that he extended his eye stalks to their fullest extent while helping direct the bombardment fire of the mortar platoon. The third session (game turns 7-12 ) featured a seesaw struggle with some excellent Allied die rolling, and 5 turns with no Luftwaffe air support for the hapless Axis side. The one air strike that did get through was only able to disrupt the British mortar platoon. The final result was a bloody draw, as neither side was able to achieve their victory conditions. Corporal Laszlo was very disappointed at his paras for not being able to hold every hex on the two hills east of the trail. He extended one eye stalk in happiness that only a single German step was lost in combat, as compared with 9 steps lost by the Allied side. There were FIVE combat 7-die rolls in this frustrating session.. There were been 5 FOW-shortened game turns of 12 played. We agreed that this scenario is appropriate for both SOLO and SHARED play. This fun-filled play-through one merits an enthusiastic rating of: 5! |
||||||||||||||
| 0 Comments |
| An Army at Dawn, scenario: #3, Fire Support | ||||||||||||
|---|---|---|---|---|---|---|---|---|---|---|---|---|
An Army at Dawn, scenario: #3, Fire Support A small 12 turn scenario, perfect for my limited time today. It had a little of everything for a small scenario, German, Italian, American and British counters. The Axis defend too hill sections east of the many trail and the Allies try and take them without losing five or more steps. The little bugger of an Italian Sem. 47/32 took out a loaded British Bren with Infantry and Leader as they left the Wadi hex, so not a good way to start. As the Allies bunched up against the first hill east of the trail, they assaulted dug-in German paratroopers as the odd assortment of American tank destroyers blasted the Italian Sem. 47mm apart but the assault failed terribly as the German rolled high knocking out two steps of British Infantry in Fire-first action for dug-in Axis units. The whole attack on the first east hill failed in fact but the Allies regrouped to go at the furthest eastern hill where there was less enemy forces, trying to dislodge them but were only able to put one American M3/75mm halftrack there as Axis airpower struck and time ran out. I would call it a clear Axis victory but the Victory condition on this one threw me off a bit. I mean The British in no way controlled all the hill hexes east of the trail buy only west of it. The Germans eliminated over five steps of Allied units and controlled all of the east hill hexes but the one with an American halftrack on it, so I guess that one hex results in a draw, even though that option is not available. By the looks of things, I would call it a clear Axis victory however. A fun play! |
||||||||||||
| 0 Comments |
| Bloody fight for one hill. | ||||||||||||
|---|---|---|---|---|---|---|---|---|---|---|---|---|
This is a nice quick to play scenario. The Germans setup with a strong position on the forward-most hill objective. but a good defense plus the mortars on the rear hill objective. The Semoventes were place on the forward hill. The Brits set up for a direct assault at the forward hill. The game began with smoke being fired to mask the Brit infantry move. The Semoventes took out a platoon of M3/75s TDs. But by the next turn the Semoventes were destroyed. The Brit infantry suffered getting to the hill and by mid game was assaulting it. But the Germans held on throughout. The battle on the hill was back and forth but pretty much a stalemate. The game ended in a draw. |
||||||||||||
| 0 Comments |
| Not. Enough. Fallschirmjägers. | ||||||||||||
|---|---|---|---|---|---|---|---|---|---|---|---|---|
The Fallschirmjägers set up on the two small hills they needed to control for on the eastern half or the board the victory conditions not knowing which one the allies were going to come for first. The front most hill seemed like the first priority for the Allies and the Semovente deployed to the rear there in hopes of ambushing the American supporting Tank Destroyers. The British deployed in a battalion line out of range of the Fallschirmjägers intermixed with the tank destroyers of the 701st TD Battalion. The combat started with the British mortars and the light OBA trying to soften up the Fallschirmjäger on the hill. Once it became clear that the Surreys were going to attempt to overrun the hill in short order, the Semovente moved up the hill to support them. The next turn was more or less a disaster for the Hermann Göring kampfgruppe as the American tank destroyers both malfunctioned and were became useful knocking out the Semovente to the astonished cheering of the Surreys who were moving to assault the Fallschirmjäger in their foxholes. After a fusilade the Surreys charged the Fallschirmjäger and took them under close combat. Over the next half-hour the Germans lost more and more moral throws and were forced to retreat in disorder, in most cases not recovering before exiting the board. As the first hill cleared, the same technique was applied to the second hill where the Germans put up a good struggle, but one by one, their units broke and the hill was left in the good hands of the Surreys who lost two steps and a bevy of Bren carriers. Got to use an Me210for the first time as support. Snore. Very light scenario with the Germans being just a little under strength to make it balanced. |
||||||||||||
| 0 Comments |
| Is that a tank?... Wait... No... Check that. It sort of LOOKS like a tank... | ||||||||||||||
|---|---|---|---|---|---|---|---|---|---|---|---|---|---|---|
Finally something a 37mm AA gun can destroy! An Italian tank! Too bad it was stuck in the middle of a bunch of Falschrimjägers that. Refused. To. Die. This is the epitome of way too few forces to cover the objectives but my intrepid opponent did just that. The objectives were to take control of both hills on the east half of the board. One hill close to a wadi where the Allies would start and a larger one farther back behind an open plain with little cover. Allied player needed to take both hills. The German commander wisely realized with one company of troops and one platoon of Italian "tanks" that there was not a real way to hold both hills so he put a token force of a platoon dug in on the closer hill and spread out the rest of the company along the edge of the larger hill. The tank deployed in the plains between the two hills to savage any force coming close enough in the spirit of the Black Knight! NONE SHALL PASS! As the allied commander I deployed the Company from the East Surrey regiment on my left in the wadi and the notional tank destroyers on the right to work against the notional tank. When the whistle blew, the Surreys left the wadi straight for the hill on the German right where the bulk of the defenders were dug in. This was not going to be a pretty fight, but there was just not the firepower I needed to crack the nut with preparitory fire. It was going to be the bayonet or nothing for them. On the right the 761st TD batallion split and ran the two M3/75 companies up the left side of the smaller hill which was held by the Germans and the AA element, an M6, charged along the far right flank to get to a position where it could get a crossfire with the slightly slower M3/75s. The Falschirmjägers held their fire as the Surreys came on across a 600 yard front centered on the left most positions on the ridge in front of them. Desultory mortar fire dropped among them as succeedingly more useless barrages of 25 pounder shells stretched overhead. On the Allied right after the italian tank started to place rounds down range, the M3s found a stopping place about 1000 yards downrange and started to return the Italian fire. At the same time the M6 rounded the hill and rocky outcroppings to the south and pulled into a position where their 37mm could start to threaten the M13 in its dug in position. The Surreys continued the advance starting to take moral losses that forced a platoon to seek cover and which took several of another platoon. On the right a gun duel progressed from the M6 and the M3s. Shortly after the M6 dealt a maximum range shot which put a few holes in the tank causing a step loss. As the Surries pushed their way up the hill, the Lufwaffe began its work on the exposed tank destroyers as the tank fired on them from its prepared position. On the hill the fighting began in earnest as a platoon of Infantry and an Engineer took step losses, but they did not abandon the assault. Over the next 45 minutes the battles in on the hill continued and expanded to cover the entire German force. Over and over, the Surreys wer bested, but they tenaciously held on and rallying units came to join them. As the combat became a hairball on the ridge, I endeavored to drop mortars and 25 pounders on the hinge in the German line but actually managed to hit my own troops more often than I did the Germans. There will be a report no doubt. About this point the Italian tank exploded from a solid hit from an M3/75 and the TDs on the right started to concentrate their fire on the Germans on the ridge. Just at this point, the Luftwaffe showed up in strength and dealt constantly to the TDs for the rest of the game, but were only able to inflict a step loss on one unit, the M6, now close enough to lend support, firing away at the Me109 and subsequent JU-88 that came in for support. With time in play almost up and no hills occupied. The allied commander extended his resignation and ended the game. A draw, but a fine fight. |
||||||||||||||
| 0 Comments |
| Shoestring Assault | ||||||||||||
|---|---|---|---|---|---|---|---|---|---|---|---|---|
A small fast battle, with only about a reinforced company for the British with American self-propelled guns in support versus a company of German paratroopers with an Italian tank platoon. The Germans have to defend a pair of hills on the east half of the board, the Allies need to take them. The Allies set up in a wadi that just about crosses the board from North to South near the middle. The Germans have most of their forces on the hill closest to the Allies, the Italians in reserve behind the hill, with the remainder of the Germans on the second hill. The Allied attack kicks off with two British platoons in Bren carriers driving forward to fire on the dug in Germans, with desultory OBA, mortar fire and the American half-track assault guns joining in. After about an hour of ineffective attacks, the German para mg on the flank is disrupted, so the Brens drive up and dismount their charges. While the initial assault almost falters, the dismounted infantry still in the wadi surge forward along with the American guns, so a point blank general melee ensues. At this point, with the Allies fully committed, the Italians drive out their tanks, but they are taken out before getting a chance to fire in anger by the Americans. Fighting on the first hill reaches a crescendo, the last of the British infantry advances to keep the Germans on the second hill from intervening on the first hill. In the closing half hour of battle, the Allied force races toward the remains of the German force clustered in front of the second hill. More assaults take place and time runs out just minutes from the Allies possibly securing the second hill. A minor Allied victory, almost a major. A fun little scenario, I initially had no hope that the Allies would succeed in clearing the first hill at all, but steady attacks and steady nerves allowed them to lever a nearly equal force out of the dug in hilltop position. Quite a feat actually, and a nice exercise in economy of force. Another factor was the German air power, which should have provided an attack on about half of the turns, rarely appeared and failed to influence the outcome at all. |
||||||||||||
| 0 Comments |
| Para-dice and an Italian Sure Shot | ||||||||||||
|---|---|---|---|---|---|---|---|---|---|---|---|---|
On November 23, 1952, a joint British/American force consisting of units from the 1st East Surrey and B Co. and the US 701st Tank Destroyer Battalion attempted to clear some fallschirmjägers of Kampfgruppe Witzig from the area west of Medjez el Bab in central Tunisia. The engagement began with sighting of the Germans at 1300 hours along a trail west of the town. The German forces were defending two hills just east of the trail with mortar placement on the northernmost hill and a Semovente 47/32 out of sight east of it. The Allied forces aligned along a wadi and on hilltops west of the trail with a primary assault directed at the south hill. Two Brens waited with their infantry platoons aboard to make the move eastward. As they moved forward, the Semovente shifted to the German left to protect the south hill. An M6 and M3/75 were moved forward to cover the Brens, but the M6 was stalled by mortar fire; the crew of the M3/75 were not well trained in targeting, and the Semovente destroyed both Brens by 1345. Fortunately, their infantry platoons and officers had unloaded first under cover of a smoke barrage. The Semovente was then finally destroyed by the M3/75, but the British assault on the south was a see-saw affair throughout the afternoon. The British finally had the Germans on the ropes by 1445, but could never completely clear the hill of German units, which were later reinforced by an infantry platoon that had been held in reserve on the north hill. At 1530, the rejuvenated M6 took high ground on the north hill, which also remained contested at the end of the scenario. This is a short scenario with a small number of units. The objectives involve hill control and USA step elimination. While the USA had lost the requisite 5 steps for German victory, both hills east of the road were contested, resulting in a draw. Because of the limited number of both units and turns, good die roils seemed to play a bigger part than strategy and tactics. The Germans also have the chance to put aircraft into play, which happened on five of the twelve turns, but the aircraft did not cause any step losses through their strafing. This is a good introductory scenario for sharing the game as it can be played quickly, and gives a solid luck factor that results in opportunity for success with either side. |
||||||||||||
| 0 Comments |
| Run on the hill | ||||||||||||
|---|---|---|---|---|---|---|---|---|---|---|---|---|
The Brits went for the nearest hill, but the Germans had expected that. It was a pretty much even fight altogether. Game was won in the last couple of turns. Note: There is not a "3 inch" gun in my British inventory as yet |
||||||||||||
| 2 Comments |