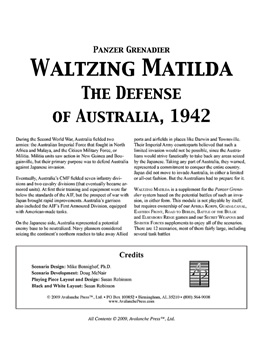
Waltzing Matilda

| AP Series | Panzer Grenadier |
|---|---|
| Designer | Bennighof |
| Game Type | Expansion |
| Format | |
| Release Date | 2009-10 |
| Availability | Out of Print |
| Scenarios | 12 |
| Counters | 330 |
| Counter Type | DIY |
| Maps | 0 |
| Overall Rating, 19 votes |
|---|
|
3.68
|
| Expansion Rank: 28 of 114 |
| Popularity: Ownership & Activity | ||||
|---|---|---|---|---|
| Status | Owned by 12% | Played by 2% | AAR'd by 3% | Medaled by 1% |
| Rank | 68th of 163 | 101st of 152 | 80th of 150 | 57th of 92 |
| Expansion Game Requirements & Playability | |
|---|---|
| 12/12 | Waltzing Matilda |
| 12/12 | Afrika Korps |
| 11/12 | Guadalcanal |
| 10/12 | Road to Berlin |
| 9/12 | Eastern Front |
| 2/12 | Elsenborn Ridge |
| 2/12 | Secret Weapons |
| 1/12 | Battle of the Bulge |
| 1/12 | Desert Rats |
| 1/12 | Sinister Forces |

| Total | |
|---|---|
| Side 1 | 8 |
| Draw | 1 |
| Side 2 | 10 |

|
During the Second World War, Australia fielded two armies: the Australian Imperial Force that fought in North Africa and Malaya, and the Citizen Military Force, or Militia. Militia units saw action in New Guinea and Bougainville, but their primary purpose was to defend Australia against Japanese invasion. Eventually, Australia's CMF fielded seven infantry divisions and two cavalry divisions (that eventually became armored units). At first their training and equipment were far below the standards of the AIF, but the prospect of war with Japan brought rapid improvements. Australia's garrison also included the AIF's First Armoured Division, equipped with American-made tanks. On the Japanese side, Australia represented a potential enemy base to be neutralized. Navy planners considered seizing the continent's northern reaches to take away Allied ports and airfields in places like Darwin and Townsville. Their Imperial Army counterparts believed that such a limited invasion would not be possible, since the Australians would strive fanatically to take back any areas seized by the Japanese. Taking any part of Australia, they warned, represented a commitment to conquer the entire country. Japan did not move to invade Australia, in either a limited or all-out fashion. But the Australians had to prepare for it. Waltzing Matilda is a supplement for the Panzer Grenadier system based on the potential battles of such an invasion, in either form. There are 12 scenarios, most of them fairly large, including several tank battles. PDF is still available via the Gold Club. |
|---|
| Scenario | Plays | AARs | Rating |
|---|---|---|---|
| 01. Darwin's Theory | 4 | 2 | 3.8 |
| 02. First Wave | 3 | 3 | 3 |
| 03. Dutch Treat | 1 | 1 | 4 |
| 04. Brisbane Line | 1 | 1 | 3 |
| 05. Sons of Lasalles | 1 | 1 | 3 |
| 06. Steel Springs | 2 | 2 | 5 |
| 07. As Fast As a Leopard | 1 | 1 | 4 |
| 08. The Lighthorsemen | 1 | 1 | 3 |
| 09. Killer Koalas | 1 | 1 | 4 |
| 10. Hurling Down the Track | 1 | 1 | 3 |
| 11. Panzern im Perth | 2 | 2 | 4.5 |
| 12. Chocos in the Sun | 1 | 1 | 3 |
| AFV Rules Pertaining to this Game's Order of Battle |
|---|
|
| 3 Errata Items | |
|---|---|
| Scen 7 |
The Note section should mention that a piece from Secret Weapons is required. (rerathbun
on 2011 Dec 26)
|

|
Counters are misprinted "CLTS." (rerathbun
on 2011 Mar 23)
|

|
Counter K has a direct fire value of 6-5 on the step-loss side. It should be 3-5. (rerathbun
on 2011 Jan 30)
|
| Nations at War - Scenario Appearance Percentages | ||
|---|---|---|
| Australia |
100%
|
Australia |
| Japan |
92%
|
Japan |
| Germany |
8%
|
Germany |
| Battle Types - Scenario Appearance Percentages | ||
|---|---|---|
| Meeting Engagement |
42%
|
Meeting Engagement |
| Inflict Enemy Casualties |
42%
|
Inflict Enemy Casualties |
| Urban Assault |
33%
|
Urban Assault |
| Exit the Battle Area |
33%
|
Exit the Battle Area |
| Hill Control |
25%
|
Hill Control |
| Road Control |
25%
|
Road Control |
| Delaying Action |
25%
|
Delaying Action |
| Rural Assault |
17%
|
Rural Assault |
| Bridge Control |
8%
|
Bridge Control |
| River Crossing |
8%
|
River Crossing |
| Conditions - Scenario Appearance Percentages | ||
|---|---|---|
| Randomly-drawn Aircraft |
75%
|
Randomly-drawn Aircraft |
| Off-board Artillery |
67%
|
Off-board Artillery |
| Terrain Mods |
25%
|
Terrain Mods |
| Entrenchments |
8%
|
Entrenchments |
| Minefields |
8%
|
Minefields |

 Variant Panthers


