|
Jiradi Pass Sword of Israel #6 |
||
|---|---|---|
| (Attacker) State of Israel | vs | Arab Republic of Egypt (Defender) |
| Formations Involved | ||
|---|---|---|
| Arab Republic of Egypt |  |
6th Infantry Brigade |
| State of Israel |  |
75th Armored Infantry Battalion |
| State of Israel |  |
77th Tank Battalion |
| State of Israel |  |
82nd Tank Battalion |
| State of Israel |  |
Armor School Battalion |

| Total | |
|---|---|
| Side 1 | 1 |
| Draw | 0 |
| Side 2 | 0 |
| Overall Rating, 1 vote |
|---|
|
4
|
| Scenario Rank: --- of 913 |
| Parent Game | Sword of Israel |
|---|---|
| Historicity | Historical |
| Date | 1967-06-06 |
| Start Time | 00:00 |
| Turn Count | 18 |
| Visibility | Night |
| Counters | 160 |
| Net Morale | 2 |
| Net Initiative | 4 |
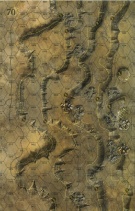
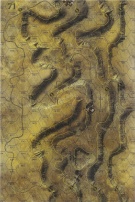
| Maps | 2: 70, 71 |
| Layout Dimensions | 56 x 43 cm 22 x 17 in |
| Play Bounty | 192 |
| AAR Bounty | 171 |
| Total Plays | 1 |
| Total AARs | 1 |
| Battle Types |
|---|
| Rural Assault |
| Conditions |
|---|
| Anti-infantry Wire |
| Anti-tank Ditches |
| Entrenchments |
| Minefields |
| Off-board Artillery |
| Randomly-drawn Aircraft |
| Smoke |
| Illumination |
| Scenario Requirements & Playability | |
|---|---|
| Sword of Israel | Base Game |
| Introduction |
|---|
|
The Jiradi Pass is a 14-kilometer-long defile leading northwest into the south side of El Arish along the coastal road. This position was strongly defended in three-deep lines by a reinforced Egyptian infantry brigade, dug in with barbed wire emplacements, minefields, and fortified pillboxes. At 1430, elements of Israeli Tank Battalion 82 rolled down the center of the defile, past unaware/unbelieving Egyptians. Only at the last minute did they open fire on the tail end of the Israeli column as it raced past, inflicting few casualties despite the overwhelming Egyptian numbers. At 1630 elements of Tank Battalion 77 rolled up and got a different sort of welcome, being driven back after two attempts. The Israelis tried twice to forge ahead through the hail of fire and failed, falling back to cover until nightfall and reinforcements arrived. At midnight they tried again. |
| Conclusion |
|---|
|
Despite the darkness, the Israeli forces charged in boldly, while IAF aircraft bombed and strafed marked targets. They met solid resistance, as for once the Egyptians did not have to contend with Israeli tactical mobility they could not hope to match. Finally outflanked, the Egyptians still would not yield until the next day when Israeli paratroopers cleard every defensive post in hand-to-hand combat. |
| AFV Rules Pertaining to this Scenario's Order of Battle |
|---|
|
| A brutal affair | ||||||||||||
|---|---|---|---|---|---|---|---|---|---|---|---|---|
In this scenario, the Israelis have 2 forces, a small one backed up by the nigh-invulnerable Centurions, and a large one mostly equipped with Pattons, with a lot of infantry mounted in M3s. The Israelis get air support for the 1st 4 turns, and have a bit of OBA, which can fire starshells, although I don't think that's their best use (see below). To win the Israelis either have to reduce the Egyptians below 8 undemoralized steps (of over 100 at start!) or eliminate all of the Egyptian Artillery and AFVs. The Egyptians are subject to the surrender rule. Meanwhile, the Egyptians have a lot of infantry, and a smattering of AFVs ranging from SU-100s to T-54s. They also have a number of 85mm AT guns and some lighter AA guns. They have to set up in 3 lines on the board. The hills above 40m are out of play, so the Israelis are racing down a ravine. I set the Egyptians with a strong line, backed by AT ditches, wires and mine facing the larger force, and wire and mine defenses facing the smaller force, with a weaker line in the middle. Note that a strict reading of the set-up rules could allow the Egyptians to concentrate everything on the hills, and I don't think that was the intent...although it would make for an interesting game. As mentioned, this one takes place at night. Early on, I had the OBA firing starshells so that the Israelis could see a lot of targets. The downside was that the targets could then often shoot back, so I soon stopped that. The Israeli tanks have searchlights, and they could light up Egyptian targets and blast them to pieces. Yes, other Egyptians could shoot back, and this was less effective against infantry, and it gave the Israelis a big advantage. SoI gives the Egyptians IR for their T-55s (none in this scenario) and "Commanders." Commanders isn't defined, so I assumed it meant leaders. However, they aren't very good with it, and it really only helps units in a hex with a leader. Anyway, the Israelis found it slow going with the smaller force. The Centurions did very well vs. the armor, however they were having trouble rooting out the infantry. And the infantry couldn't get too close in M3s, because they were very vulnerable to short range AT fire. A LOT of M3s were lost this way, several of them loaded. However, given that the Israelis had to basically eliminate everything, Israeli casualties weren't that big a deal, besides eating into the initiative bonus. One the east side, the Israelis were forced around the AT ditches into more heavily defended areas, and with less capable tanks and infantry having to walk (starshells made M3s juicy targets) it was slower going, however they broke through by mid game. I had the Egyptians all dug in behind the AT ditch, in retrospect I probably should have put some in the AT ditches, as they provide good defense, although not first fire. Once the northern section of the eastern line collapsed, the Israelis started rolling up that line and slammed into the weaker center line. The western line was still holding its own, however increasing numbers of Egyptians were surrendering and the 1st 2 lines started to disintegrate. On turn 13, the Israelis had a logistics shortage, and there were still about 30 steps of Egyptians left. By turn 16, the shortage had become critical. However, the Israelis pressed on, and despite losing 5 Patton units and 5 halftracks platoons to logistics failure, they were finally able to eliminate the last Egyptian armor and AT gun on turn 17 to claim the victory. Casualties were very high for the Israelis, with 10 tank steps, plus 2 AA Jeeps, 6 Inf platoons, 2 HMG platoons and 15 M3s being eliminated in combat while the Egyptians were essentially wiped out. A very tense scenario. The Israelis rolled very well on turn 17 for the victory, closer to average might have cost them the scenario. There's not a ton for the Egyptians to do besides decide where to shoot. They have limited mobility, so this might be better solo. However, it is definitely a challenge for both sides. |
||||||||||||
| 0 Comments |

 SwIs005


