|
Total |
| Side 1 |
0 |
| Draw |
0 |
| Side 2 |
0 |
|
Total |
| Side 1 |
0 |
| Draw |
0 |
| Side 2 |
0 |
|
Total |
| Side 1 |
0 |
| Draw |
0 |
| Side 2 |
0 |
| Overall Rating, 0 votes |
|---|
|
|
|
Scenario Rank:
of |
| Parent Game |
Black Mountain |
| Historicity |
Historical |
| Date |
1914-08-16 |
| Start Time |
00:00 |
| Turn Count |
22 |
| Visibility |
Day |
| Counters |
28 |
| Net Morale |
1 |
| Net Initiative |
2 |
| Maps |
1: 96 |
| Layout Dimensions |
43 x 28 cm
17 x 11 in |
| Play Bounty |
215 |
| AAR Bounty |
227 |
| Total Plays |
0 |
| Total AARs |
0 |
|
Introduction
|
|
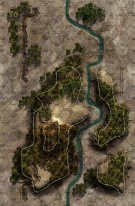
The Montenegrins put most of their effort into advance from the north-western corner of their country, along the border with Serbia, to support their Serb allies. The Austrian XVI Corps placed its own major effort here as well, to not only liberate the Monarchy’s territory but the unhinge the Serbian strategic left flank. After the Montenegrins fled from Celebic, Maj. Gen. Theodor Gabriel led a group of three mountain brigades in pursuit. On Metalka Ridge, the Montenegrins turned to fight.
|
|
Conclusion
|
|
Once again, the Austrians depended on the tactics worked out in the decades after the disastrous 1866 war with Prussia, and then discarded on most fronts in 1914 in favor of frontal assaults. The 1st Mountain Brigade fixed the Montenegrins along the ridge line, while 4th Mountain Brigade worked around their open left flank and forced their retreat with heavy casualties.
|
Austro-Hungarian Empire Order of Battle
Montenegro Order of Battle


 BkMn004


